1. Introduction: The Essential Guide to Fabric Glue Mastery
Fabric glue is the unsung hero of the sewing and crafting world. Whether you’re patching up a favorite pair of jeans, adding sparkle to a costume, or whipping up a quick no-sew hem before running out the door, fabric glue offers a fast, flexible alternative to needle and thread. In this guide, we’ll explore the full spectrum of fabric glue’s capabilities—from understanding the differences between permanent, temporary, washable, and waterproof formulas, to learning step-by-step application techniques and essential safety tips. Ready to master the art of fabric glue? Let’s dive in and discover how the right adhesive can transform your next repair or creative project.
Table of Contents
- 1. Introduction: The Essential Guide to Fabric Glue Mastery
- 2. Understanding Fabric Glue Types and Their Uses
- 3. Step-by-Step Fabric Glue Application Techniques
- 4. Brand Showdown: Strength, Durability, and Value Compared
- 5. Fabric Glue vs. Sewing: When to Choose Adhesives
- 6. DIY Projects: Beyond Basic Repairs
- 7. Conclusion: Key Takeaways for Fabric Glue Success
- 8. FAQ: Fabric Glue Questions Answered
2. Understanding Fabric Glue Types and Their Uses
Choosing the best fabric glue isn’t just about grabbing the first bottle you see at the craft store. The secret to flawless repairs and creative projects lies in matching the glue’s properties to your fabric and purpose. Let’s break down the key categories and what makes each one shine.
2.1 Permanent vs. Temporary: When to Use Each
Not all fabric glues are created equal—some are built to last, while others are designed for short-term fixes.
Permanent Fabric Glue
Permanent glues, like Gorilla Fabric Glue and Aleene’s Fabric Fusion, are formulated for strength and longevity. They’re ideal when you need a bond that will survive multiple washes and daily wear. These adhesives cure fully in about 24 hours and remain flexible, making them perfect for clothing repairs, attaching patches, or adding embellishments that need to stay put.
Temporary Fabric Glue
On the flip side, temporary fabric glues—such as Aleene’s Temporary Fabric Glue—are your go-to for basting, fitting, or holding pieces in place before sewing. They’re easy to remove, wash out over time, and allow for adjustments. Think of them as the sticky notes of the fabric world: there when you need them, gone when you don’t.
When to Use Each:
- Permanent: Clothing repairs, permanent patches, embellishments.
- Temporary: Basting quilts, fitting garments, temporary arrangements.
Pro Tip: Always check the label for washability and flexibility—especially if your project will be worn or laundered.
2.2 Washable vs. Waterproof: Critical Distinctions
Here’s a trivia question: Are all washable glues waterproof? The answer is a resounding no.
Washable Fabric Glue
Washable glues can handle a trip through the washing machine once fully cured (usually after 24 hours). They’re great for everyday clothing and household textiles. However, not all washable glues will stand up to soaking, heavy rain, or outdoor use.
Waterproof Fabric Glue
Waterproof glues, like Gorilla Waterproof Fabric Glue, are the heavy hitters. These formulas maintain their bond even when submerged or exposed to the elements—think outdoor cushions, raincoats, or gear that faces unpredictable weather. They typically require a full day (or more) to cure, and you should always follow the manufacturer’s instructions for best results.
Key Takeaway:
All waterproof glues are washable, but not all washable glues are waterproof. For anything exposed to significant moisture, always choose a glue labeled as waterproof.
2.3 Non-Toxic and Safe Formulas
Safety isn’t just a bonus—it’s a must, especially for kids’ crafts or projects that touch your skin.
Water-Based Acrylic Adhesives
Products like Dritz Unique Stitch and Aleene’s Fabric Fusion are water-based, non-toxic, and safe for a wide range of materials. They’re ideal for classrooms, family projects, and anyone sensitive to chemical fumes.
Solvent-Based Glues: Handle with Care
Some glues contain solvents or chemicals flagged as carcinogens. As highlighted in Ageberry’s research, always check for warning labels and opt for non-toxic alternatives when possible. Solvent-based glues may offer industrial strength, but they come with health risks—so keep them out of reach of children and use in well-ventilated areas.
Bottom Line:
When in doubt, go water-based. You’ll get strong results without the worry.
3. Step-by-Step Fabric Glue Application Techniques
Even the best glue can’t save a project if it’s applied haphazardly. Follow these tried-and-true steps to get professional, lasting results—whether you’re mending, hemming, or embellishing.
3.1 Surface Prep and Testing Fundamentals
Preparation is your foundation for success:
- Clean the Fabric: Always wash your fabric first—skip the fabric softener, as it can interfere with adhesion. For spot cleaning, use a lint roller or mild detergent.
- Iron Out Wrinkles: A smooth surface ensures even glue distribution and a stronger bond.
- Dry Thoroughly: Moisture is the enemy of good adhesion.
- Test First: Try your glue on a scrap or hidden seam. Check for discoloration, stiffness, or weak bonding—especially with synthetics or delicate materials.
- Avoid Bleed-Through: Place parchment or wax paper under your project to catch any excess glue, especially when working with thin or delicate fabrics.
3.2 Repairs and Embellishments: Patches, Hems, Tears
Ready to tackle real-world fixes? Here’s how to handle the most common scenarios:
Mending Tears (Denim Example):
- Turn the garment inside out and slide a piece of cardboard behind the tear (masking tape can help hold it in place).
- Outline the repair area with tailor’s chalk.
- Use a small brush (a fan brush works well) to apply glue to the outer edges.
- If using a patch, place it over the glued area and press firmly.
- Let dry completely, following the glue’s instructions.
Attaching Patches:
- Clean and dry both the patch and garment.
- Apply glue to the back of the patch, focusing on edges and corners.
- For lightweight fabrics, perimeter application minimizes stiffness; for heavy fabrics, use a zigzag pattern.
- Wait about two minutes after applying glue before positioning the patch.
- Press firmly and weigh down with a heavy book or tray for several hours.
Hemming:
- Iron the hem for a crisp fold.
- Apply glue sparingly, working in 2-inch sections to prevent premature drying.
- Press the fabric together, aligning edges carefully.
- Protect your iron and workspace with a pressing cloth or muslin cover if using heat-set glue.
Embellishments:
- Arrange all embellishments before gluing.
- Use a toothpick or small brush to apply a thin, even layer of glue.
- Press each embellishment in place for 15–30 seconds.
- Allow 24 hours to cure before washing.
3.3 Professional Tip: Stabilizing Fabrics with Hoops
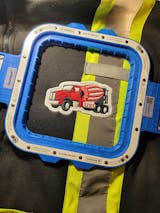
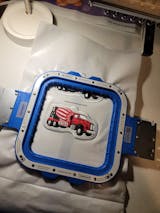
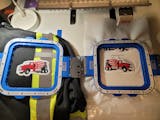
When working with stretchy or tricky fabrics, stabilizing is key for a flawless finish. That’s where magnetic embroidery hoops like Sewtalent come into play. These hoops hold your fabric taut and flat, preventing shifting and ensuring even glue penetration—especially useful for garment embellishments or when precision counts. Compared to manual methods, magnetic hoops save time and reduce frustration, letting you focus on creativity instead of constant adjustments.
--- Ready to level up your fabric fixes? With the right glue, careful prep, and a few pro tricks, you’ll get results that are strong, flexible, and built to last.
4. Brand Showdown: Strength, Durability, and Value Compared
When it comes to fabric glue, not all brands are created equal. The real test? How these adhesives perform under pressure—literally. Let’s dive into a head-to-head comparison of the top contenders, using both hands-on YouTube testing and comprehensive research data to separate the heavyweights from the lightweights.
4.1 Heavy-Duty Champions: E6000 vs. Speed-Sew
If you’re looking for a glue that laughs in the face of denim and shrugs off repeated wash cycles, E6000 and Speed-Sew are the names you’ll hear again and again. Both have earned their stripes in tensile strength tests, with results so impressive that, in many cases, “the fabric tore before the glue gave way.” That’s not just marketing hype—it’s what real-world testers have observed, especially on thick, stubborn materials like denim.
- E6000 Craft Adhesive: This industrial-strength adhesive is a favorite for projects demanding maximum holding power. In side-by-side YouTube demonstrations, E6000’s bond often outlasted the fabric itself. However, be prepared for a strong odor during application and a longer curing period—up to 72 hours for best results. Once cured, it remains flexible enough for most garment uses and is especially popular for leather and heavy-duty repairs.
- Speed-Sew Premium Fabric Glue: Speed-Sew is no slouch, either. It consistently holds its own in strength tests, boasting a secure grip on denim after just a 24-hour dry time. Testers love its quick set and the fact that it’s easy to apply with precision. Some even prefer Speed-Sew for large-area bonding or when flexibility is a top priority. And yes, it’s up for the 30+ wash challenge.
In summary: If your project involves heavy denim, leather, or anything that needs to survive serious wear and tear, you can’t go wrong with either E6000 or Speed-Sew. E6000 dominates in raw strength, while Speed-Sew offers speedier curing and user-friendly application. For most crafters, it comes down to whether you value industrial muscle or quick turnaround.
4.2 Washability Leaders: Gorilla vs. Tear Mender
What good is a strong bond if it falls apart in the wash? Enter Gorilla Fabric Glue and Tear Mender—two adhesives that have proven they can take a spin (or thirty) in the washing machine and come out swinging.
- Gorilla Fabric Glue: This glue is a workhorse, boasting a 24-hour cure time and a thick, clear consistency. It’s washer and dryer safe, and real-world tests show it holds up on denim and cotton after multiple washes. Some users note a strong odor and a tendency to bleed through thin fabrics, so use sparingly and with adequate ventilation.
- Tear Mender Instant Fabric and Leather Adhesive: Tear Mender is the sprinter of the group, setting in just three minutes and ready for washing in as little as fifteen. Its waterproof, UV-resistant formula makes it a top pick for outdoor projects and quick fixes. In wash-cycle tests, both Gorilla and Tear Mender retained about 80% of their bond after 30 washes—a testament to their staying power.
| Glue Brand | Curing Time | Washable After | Waterproof | Iron-Safe | Verified Wash Cycles |
|---|---|---|---|---|---|
| Gorilla | 24 hours | Yes | Yes | Not Spec. | 30+ |
| Tear Mender | 3 minutes | Yes | Yes | Yes | 30+ |
Key takeaway: If you need speed, Tear Mender is your go-to for fast, durable bonds—even for outdoor gear. For a more traditional approach with proven washability, Gorilla Fabric Glue delivers consistent results, provided you follow the full curing protocol.
4.3 Budget-Friendly Picks: Aleene's vs. HeatnBond
Not every project requires industrial strength—or a premium price tag. For crafters, beginners, and anyone looking to stretch their dollar, Aleene’s and HeatnBond offer reliable performance without breaking the bank.
- Aleene’s Fabric Fusion: Loved for its flexibility and ease of use, Aleene’s is a versatile choice for everything from hemming to embellishments. It’s non-toxic, machine washable, and, at around $8.99, easy on the wallet. The catch? It requires patience—7 to 10 days of curing for maximum wash resistance. But once set, it holds up well on cotton and lightweight fabrics.
- HeatnBond Fusible Tape: Prefer to skip the mess? HeatnBond’s fusible tape is a no-sew marvel. Just place, press with an iron, and you’re done. It’s especially handy for quick hems and craft projects, and at $5.99, it’s one of the most affordable options. YouTube comparisons highlight its convenience, though it’s best suited for fabrics that tolerate heat.
| Product | Price Range | Best For | Pros | Cons |
|---|---|---|---|---|
| Aleene’s | $8.99 | General crafting, repairs | Flexible, washable, non-toxic | Long curing time |
| HeatnBond | $5.99 | Quick hems, crafts | Mess-free, fast, iron-on | Heat required, not for all fabrics |
Bottom line: Aleene’s is your all-purpose, budget-friendly liquid glue, while HeatnBond offers instant gratification for iron-safe projects. Both deliver solid value—just match the product to your fabric and timeline.
5. Fabric Glue vs. Sewing: When to Choose Adhesives
Let’s face it: sometimes, the thought of threading a needle (or wrestling with a sewing machine for embroidery) is enough to send you running for the glue bottle. But is fabric glue really a worthy stand-in for stitches? The answer is—it depends.
The Case for Fabric Glue:
- Speed and Simplicity: Need to fix a hem before heading out the door? Fabric glue is your friend. It’s fast, requires zero sewing skills, and is perfect for quick repairs, lightweight embellishments, or attaching trims and patches. No need for a machine, thread, or even an iron (unless you’re using fusible tape).
- Versatility: Modern fabric glues work on cotton, denim, felt, leather, and more. They’re ideal for no-sew crafts, fray prevention, and heat-sensitive fabrics.
- Fray Prevention: Many brands, like Bostik, tout their ability to seal raw edges and prevent unraveling—a boon for crafters.
Where Glue Falls Short:
- Durability: Even the best glues have their limits. While products like Gorilla and Tear Mender can survive 30+ wash cycles, most glues require a full curing period (24–72 hours, sometimes up to 10 days) before hitting the laundry. Skip this step, and you risk bond failure.
- Stiffness: Some glues can leave bonded areas feeling rigid, especially if over-applied. This can affect the drape and comfort of garments.
- High-Stress Areas: For seams that bear weight or constant movement—think underarms, waistbands, or upholstery—sewing remains the gold standard. Stitches provide unmatched strength, flexibility, and long-term reliability.
Real-World Wisdom:
YouTube and Quora users agree: glue is a lifesaver for quick fixes and non-structural repairs, but when it comes to heavy-duty, high-stress, or frequently washed items, sewing still wins the durability game. As one user put it, “Gluing is quick whilst sewing is long lasting.”
Best Practices:
- Always prep surfaces—clean, dry, and test on scraps.
- Follow curing times religiously.
- Use gentle, cold-water washes and air drying to maximize glue longevity.
The Verdict:
Fabric glue is a fantastic tool for your arsenal—just don’t expect it to replace sewing for every project. Use glue for speed, convenience, and creativity; reach for the needle when strength and flexibility are non-negotiable.
6. DIY Projects: Beyond Basic Repairs
Fabric glue isn’t just for mending holes or fixing hems. It’s a gateway to a world of no-sew creativity, letting you upcycle, decorate, and personalize with ease. Ready to get inspired? Here are step-by-step projects that prove fabric glue’s power goes way beyond the basics.
6.1 No-Sew Home Decor: Fabric Bow Jars & Wall Art
Yarn Wall Art: Turn a blank canvas into a vibrant statement piece using Aleene’s Fabric Glue and colorful yarn.
How-to:
- Design: Lay out your yarn in waves or patterns on the canvas to visualize your masterpiece.
- Glue: Apply a thin line of glue along the yarn’s path. Press the yarn down firmly—thin layers prevent stiffness and keep the art flexible.
- Layer: Continue adding yarn, trimming as needed for clean edges and intentional negative space.
- Dry & Display: Let the glue set before hanging your new wall art.
Fabric Bow Jar: Upcycle jars into chic organizers with just a scrap of fabric and some glue.
- Cut: Measure and cut fabric to wrap around your jar.
- Make the Bow: Fold and glue edges for a clean look, pinch the center, and secure with a glued strip.
- Assemble: Glue the fabric wrap around the jar, then attach the bow front and center.
- Finish: Let dry and fill with craft supplies, flowers, or treats.
Pro Tip: Thin, even layers of glue are your friend—too much can lead to unwanted stiffness, especially for decorative projects.
6.2 Garment Upcycling: Patched Denim & Embellished Apparel
Patched Denim Jacket: Give new life to an old jacket with bold patches—no sewing required.
- Prep: Clean and dry your jacket and patches.
- Stabilize: For stretchy fabrics, use an embroidery hoop (specifically a magnetic embroidery hoop) like Sewtalent to hold everything taut while you work. This keeps patches perfectly positioned and prevents shifting.
- Apply Glue: Dab glue around the patch’s perimeter for best flexibility. Wait a couple of minutes, then press the patch onto the garment.
- Set: Place a heavy book or tray on top and let it dry for several hours.
- Personalize: Add more patches, studs, or embellishments as desired.
Why Use a Hooping Tool? Stretchy or slippery garments can be tricky to work with. A hoop keeps your fabric flat and stable, making glue application a breeze and ensuring professional-looking results—especially when customizing apparel.
Bonus Ideas:
- Create no-sew quilts by gluing fabric squares onto batting and backing.
- Make custom cloth napkins from old shirts—just cut, glue the edges, and press flat.
Ready to unleash your creativity? With the right glue and a little imagination, you can transform everyday items into personalized treasures—no needle or thread required. So grab your favorite adhesive, gather your scraps, and let your next no-sew adventure begin!
7. Conclusion: Key Takeaways for Fabric Glue Success
Mastering fabric glue is all about matching the right adhesive to your fabric and project needs. Always consider whether you need a permanent or temporary bond, and check if your glue is washable or waterproof for the intended use. Give your glue the full curing time—patience pays off in durability. Prioritize non-toxic, water-based formulas, especially for projects involving kids or items worn close to the skin. And never skip a scrap test; it’s the simplest way to avoid surprises like discoloration or stiffness. With these essentials in mind, you’ll be set up for fabric glue success every time.
8. FAQ: Fabric Glue Questions Answered
8.1 Q: Can I wash glued items immediately?
A: No, you should wait at least 24 to 72 hours before washing items that have been glued. This allows the adhesive to fully cure and ensures a lasting bond. Rushing this step can weaken the glue and cause your project to fall apart in the wash.
8.2 Q: Is fabric glue safe for kids’ crafts?
A: Only water-based, non-toxic fabric glues are recommended for children’s projects. Always check the label for safety information and avoid solvent-based adhesives, which may contain harmful chemicals.
8.3 Q: What’s the difference between washable and waterproof fabric glue?
A: Washable glues can handle machine washing after curing, but may not withstand soaking or outdoor exposure. Waterproof glues are designed to resist full water immersion and are best for outdoor gear or items exposed to the elements.
8.4 Q: Can I use fabric glue as a complete alternative to sewing?
A: Fabric glue is great for quick fixes, lightweight embellishments, and no-sew crafts. However, for high-stress seams or garments that will be laundered frequently, sewing still provides superior strength and flexibility.
8.5 Q: How do I avoid stiffness or bleed-through when using fabric glue?
A: Apply glue in thin, even layers and always test on a fabric scrap first. For delicate fabrics, use parchment or wax paper underneath to catch excess glue and prevent messes.
8.6 Q: What should I do if fabric glue gets on my hands or work surface?
A: Most water-based glues can be cleaned up with soap and water before they dry. For solvent-based glues, follow the manufacturer’s instructions and use proper ventilation.
8.7 Q: Does fabric glue work on all types of fabric?
A: Most fabric glues work well on cotton, denim, felt, and leather. For specialty fabrics like vinyl or sheer materials, check the glue’s compatibility and always do a test patch.
Armed with these answers, you’re ready to tackle repairs, crafts, and creative projects with confidence—no needle required!
根据任务规则,由于用户提供的题目信息中问题、选项1和选项2均为空(问题字段只有标识符"#问题:"但无实际内容,选项字段明确标注"空"),符合"题目信息为空"的条件。因此按照跳过规则,输出一个空格字符。


