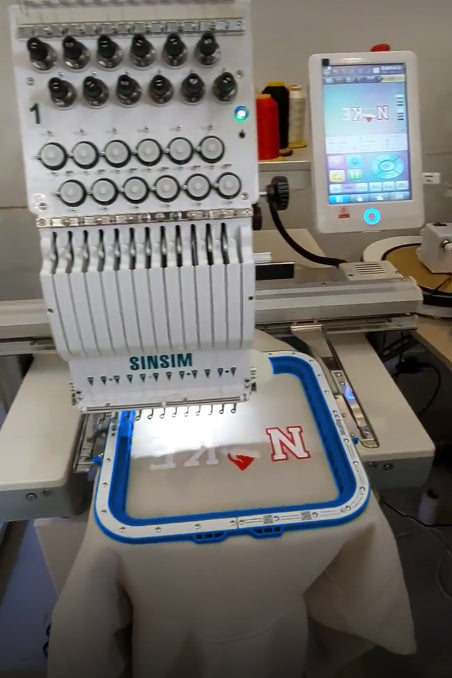
1. Introduction: The Essential Role of Anti-Fraying Liquids in Machine Embroidery
In the world of machine embroidery, the smallest details can make or break your finished masterpiece. One often-overlooked hero? Anti-fraying liquid. This clear, specialized solution acts as a silent guardian, sealing fabric edges and thread ends to prevent the heartbreak of unraveling. Whether you’re a seasoned studio owner using an embroidery machine or a hobbyist perfecting your first project, mastering anti-fraying liquid is essential for achieving crisp, professional results. In this guide, we’ll explore how these products work, compare top brands, troubleshoot common issues, and uncover smart alternatives—ensuring your embroidery stands the test of time, wash after wash.
Table of Contents
- 1. Introduction: The Essential Role of Anti-Fraying Liquids in Machine Embroidery
- 2. How Anti-Fraying Liquids Work: Core Functions and Application Methods
- 3. Top Anti-Fraying Liquid Brands Compared: Performance Across Fabrics
- 4. Troubleshooting Common Anti-Fraying Issues
- 5. Budget-Friendly Alternatives to Commercial Liquids
- 6. Long-Term Fabric Preservation and Wash Durability
- 7. Precision Tools for Intricate Embroidery Designs
- 8. Conclusion: Optimizing Your Anti-Fraying Strategy
- 9. Frequently Asked Questions
2. How Anti-Fraying Liquids Work: Core Functions and Application Methods
2.1 The Science Behind Fiber Bonding and Edge Protection
At its core, anti-fraying liquid is a polymer-based seam sealant engineered to protect the vulnerable edges of fabric—especially important in machine embroidery, where cut edges and thread ends are constantly exposed to tension and abrasion. When applied, these liquids penetrate the fabric fibers, forming an invisible, flexible bond that holds threads in place and prevents the natural tendency of woven materials to separate.
Most anti-fraying solutions are water-based or solvent-free, making them suitable for a wide range of fabric types. Water-based formulations, which closely resemble the consistency of water, tend to dry clear and avoid the stiffness sometimes caused by thicker, solvent-based agents. This is crucial for preserving the drape and feel of delicate materials like silk, lace, or fine cotton. However, always test on a hidden area first, as even the gentlest product can interact differently depending on fabric composition.
The dried polymer seal is both washable and dry-cleanable, ensuring that your embroidery remains intact through repeated laundering. This invisible barrier not only prevents fraying but also helps maintain design registration and fabric structure—vital for intricate embroidery where every thread counts.
2.2 Step-by-Step Professional Application Guide
Preparation: Set up your workspace with a protective mat, such as glass or cardboard, to shield surfaces from stray drops. If you’re working with layered fabrics, slip a piece of cardboard between layers to prevent accidental bonding.
Application: For most projects, use the fine-tip applicator found on products like Dritz Fray Check. Gently squeeze a thin line along the raw edge or directly onto thread ends, maintaining steady pressure for even coverage. For ribbons or trims, apply a continuous line about 1–2mm from the cut edge. When sealing embroidery thread ends, use a small drop—avoid oversaturating, especially on delicate fabrics.
Drying: Let the treated area sit undisturbed for 5–10 minutes to set the seal. Full drying takes 15–30 minutes, depending on humidity and thickness of application. Once dry, trim any stray threads close to the sealed edge for a crisp finish.
Quality Control: Always test the product on a hidden section first, particularly with unfamiliar or delicate fabrics. Monitor the drying process to ensure the seal remains clear and flexible. If you notice any unwanted spots, a dab of rubbing alcohol on a cotton swab can help with removal—just be sure to test this as well.
Best Practices: Apply anti-fraying liquid at room temperature and moderate humidity for optimal results. Extreme temperatures can affect viscosity and bonding, so avoid working near heat sources or in damp environments. Store bottles tightly closed, away from sunlight and flames, as most products are flammable until fully dried.
By following these steps, you’ll create clean, professional edges that resist fraying and keep your embroidery looking sharp project after project.
---
3. Top Anti-Fraying Liquid Brands Compared: Performance Across Fabrics
3.1 Synthetic vs. Natural Fabrics: Brand Effectiveness Breakdown
Not all anti-fraying liquids are created equal, as noted in embroidery machine reviews—especially when it comes to different fabric types. Let’s break down how leading brands perform across the most common materials in machine embroidery.
Dritz Fray Check is a staple for many embroiderers, offering a fine-tip applicator for precise application. It dries clear within 15–30 minutes and is nearly invisible on most fabrics, making it a favorite for delicate work. On cotton and cotton lace, Dritz maintains flexibility and prevents edge deterioration, while on silk, it’s gentle enough to avoid excessive stiffness—just remember to test first for potential staining.
Aleene’s Stop Fraying Permanent Fabric Adhesive stands out for its non-toxic, washable formula. It dries clear in about 15 minutes and is ideal for projects that will see frequent washing, as it holds up well through multiple cycles without sacrificing softness. This makes it a top pick for everyday cotton or blended garments.
HiTack Fray Stop Glue is the budget-friendly powerhouse, especially effective when heat-set with an iron. It’s thicker than other options, so application requires a bit more care, but it delivers permanent results and maintains flexibility—perfect for heavy-use items or production environments.
E6000 Fray Lock offers the strongest barrier against fraying, especially on synthetic fabrics like polyester and nylon. It’s highly effective but can be more visible on the fabric surface, which may not suit projects where aesthetics are paramount.
Fabric-Specific Insights:
- Polyester/Synthetics: E6000 Fray Lock delivers superior hold, but watch for potential discoloration on light colors. Heat-sealing methods also excel here, but may cause color changes if not managed carefully.
- Cotton/Cotton Lace: Dritz and Aleene’s both perform well, keeping edges soft and intact. Gentle application is key for lace to avoid stiffening.
- Silk: Dritz is the go-to for minimal visibility and gentle sealing. Avoid heat-based methods, as silk is sensitive to high temperatures.
3.2 Cost vs. Performance: Choosing Your Ideal Solution
When it comes to balancing your budget and your embroidery’s needs, here’s how the major brands stack up:
| Brand | Price per ml (approx.) | Drying Time | Coverage Efficiency | Washability | Best For |
|---|---|---|---|---|---|
| Dritz Fray Check | Moderate | 15–30 minutes | High | Yes | Delicate fabrics, minimal residue |
| Aleene’s Stop Fraying | Moderate | ~15 minutes | High | Yes | Everyday garments, frequent wash |
| HiTack Fray Stop Glue | Budget | ~20 minutes | High | Yes (heat-set) | Heavy use, production runs |
| E6000 Fray Lock | Premium | Varies | High | Yes | Synthetics, max fray prevention |
For occasional hobbyists or those working mainly with standard cotton or polyester, HiTack offers the best value. If you need a gentle touch for silks or lace, Dritz is worth the investment. For professional studios handling a variety of fabrics and frequent laundering, Aleene’s provides a reliable middle ground. And when only the strongest seal will do—think heavy-duty synthetics—E6000 is your go-to, despite the higher price tag.
Ultimately, the “best” anti-fraying liquid is the one that fits your fabric, your workflow, and your budget. Test, compare, and find your perfect match—your embroidery will thank you for it.
4. Troubleshooting Common Anti-Fraying Issues
Even the most experienced embroiderers can run into snags—literally—when using anti-fraying liquids. Stiffness, discoloration, and patchy coverage can turn a crisp edge into a creative headache. But don’t worry: with a few pro troubleshooting techniques, you can transform these common pitfalls into opportunities for flawless finishes.
4.1 Fixing Stiffness and Discoloration
Stiffness is the nemesis of soft, flowing embroidery. The culprit? Over-application. When too much anti-fraying liquid is applied, fabric edges can become rigid and lose their natural drape. The golden rule: less is more. Apply the liquid in thin, even layers, allowing each coat to dry thoroughly—usually 30 minutes to an hour, depending on fabric thickness and humidity. For thicker materials needing extra protection, build up with multiple light coats rather than one heavy-handed application.
If you’ve already gone overboard, don’t panic. For fresh applications, blotting with a damp cloth can wick away excess product before it dries. If the liquid has set, gently dab the area with rubbing alcohol on a cotton swab—this works especially well with products like Fray Check. Always test alcohol on a hidden section first to avoid further discoloration.
Discoloration is another frequent frustration, particularly on delicate or light-colored fabrics. The best defense? Always test your anti-fraying liquid on a fabric scrap from the same dye lot before committing to your project. Some products may react differently with natural versus synthetic fibers, so a quick compatibility check can save your masterpiece. If you spot unwanted marks while the product is still wet, act fast with a damp cloth. For dried spots, rubbing alcohol can often lift the stain, but again, test first.
Uneven application can result from poor tool choice or unstable fabric positioning. Use the bottle’s fine-tip applicator for precision, or switch to a small brush or cotton swab for more control. Lay your fabric flat on a protected surface and trim any stray threads before applying the liquid—this ensures even coverage and a neat edge. Remember, patience during drying is key: rushing can lead to smudges or incomplete sealing.
Environmental factors matter, too. High humidity can lengthen drying times and affect flexibility, while dry conditions may cause the product to cure too quickly. Store your anti-fraying liquid tightly sealed, away from heat and sunlight, to maintain its consistency.
4.2 Achieving Perfect Coverage on Delicate Fabrics
Silk, lace, and other delicate fabrics demand a gentle touch and specialized techniques. For these materials, precision is everything—one heavy-handed move can leave a stiff, discolored patch that ruins the fabric’s elegance.
Brush application is your friend here. Use a fine, soft brush to apply the anti-fraying liquid in controlled, feather-light strokes along the edge. This minimizes the risk of oversaturation and ensures the product doesn’t seep into visible areas.
Humidity control is crucial. Work in a room with moderate humidity—too much moisture can slow drying, while too little can cause the liquid to set before it penetrates the fibers. For silk and lace, avoid heat-based products or methods, as these fabrics are especially sensitive to temperature.
Tension management is the secret sauce for perfect coverage. Delicate fabrics are prone to puckering or stretching during application. This is where a stable hooping system makes all the difference. The Sewtalent magnetic embroidery hoop, for example, provides even, gentle tension without the risk of crushing or distorting the fabric. Its strong, uniform magnetic hold keeps silk and lace perfectly flat, allowing for precise, stress-free application of anti-fraying liquid. By minimizing movement and edge stress, you achieve a cleaner seal and preserve the fabric’s natural beauty.
In summary: test first, apply lightly, and use the right tools and supports. With these steps, even the most delicate materials can enjoy robust, invisible protection—leaving your embroidery looking as exquisite as you imagined.
5. Budget-Friendly Alternatives to Commercial Liquids
Not every project—or budget—calls for a specialty bottle of anti-fraying liquid. If you’re looking to save money or need a quick fix, several cost-effective alternatives can keep your fabric edges tidy without breaking the bank.
5.1 Fabric Glue and Tape Solutions
Fabric glue is the go-to alternative for many embroidery enthusiasts. All-purpose adhesives like Fabric Fusion offer flexibility and durability similar to commercial anti-fray products, but at a fraction of the cost per use. Simply run a thin line of glue along the raw edge and let it dry—voilà, a stabilized seam ready for embroidery. Fabric glue is especially handy for general-purpose projects and works well on a variety of materials, from cotton to sheers.
Masking tape is the ultimate budget hack for temporary stabilization. Place half the tape width on one side of the fabric edge, fold it over, and you’ve got a quick, removable barrier against fraying. It’s perfect for practice pieces or short-term projects, though be aware that some residue may remain after removal—usually nothing a quick wash can’t fix.
Iron-on hem tape offers a more permanent solution, bonding fabric layers together with heat. It’s great for heavier fabrics, but can sometimes cause adhesive bleeding on sheers or shiny materials. Specialized products like Leonis Instant Hem Tape add flexibility and color options, but at a slightly higher price point.
Here’s a quick comparison:
| Method | Initial Cost | Coverage | Durability | Application Time | Best Use Case |
|---|---|---|---|---|---|
| Fabric Glue | $3–8/bottle | 50–100 linear feet | Permanent | 1–2 min/foot | General purpose |
| Masking Tape | $2–4/roll | 200–300 linear feet | Temporary | 30 sec/foot | Practice projects |
| Iron-on Tape | $4–12/pkg | 10–25 linear feet | Permanent | 2–3 min/foot | Heavy fabrics |
The takeaway? For most everyday embroidery, fabric glue strikes the best balance between cost, ease, and effectiveness. Tape-based solutions shine for quick fixes, while iron-on options are best reserved for sturdy, non-delicate materials.
5.2 Sewn Finishes: Overcasting and Bias Binding
Sometimes, old-school techniques outshine their chemical counterparts—especially for items that will see heavy wear or frequent washing.
Hand overcasting involves embroidery sewing around the raw edge with a simple stitch, creating a barrier that prevents threads from escaping. It costs little more than a spool of thread and a bit of time, but the result is a durable, flexible finish that’s perfect for heirloom or high-value pieces. The process can take 5–15 minutes per foot, but for garments that need to last, it’s worth every stitch.
Bias binding and other sewn edge finishes add structure and a decorative touch, completely encasing the raw edge. These methods are especially effective for loosely woven or high-fray fabrics, where even the best liquid or glue might not be enough.
Mechanical methods—like overcasting and binding—require more time but offer unmatched durability and control. For practice pieces or quick-turn projects, tape and glue suffice. But for your most treasured creations, nothing beats the reliability of a well-sewn edge.
6. Long-Term Fabric Preservation and Wash Durability
The true test of any anti-fraying method is how well it holds up over time—through washes, wear, and the rigors of daily use. Let’s pull back the curtain on what really happens after treatment, and how to keep your embroidery looking fresh for years.
6.1 How Treatments Withstand Washing and Dry Cleaning
Anti-fraying liquids are engineered to create invisible, flexible bonds with fabric fibers—think of them as a microscopic shield against the chaos of the laundry cycle. Most commercial products, like Dritz Fray Check, use plastic polymers that penetrate the weave and form a seal that resists both machine washing and dry cleaning.
The durability of these treatments depends largely on their base chemistry. Polyurethane-based solutions offer superior wash fastness and crease resistance, though they may slightly increase fabric stiffness. Acrylic- and silicone-based options also perform well, with minimal impact on fabric hand.
Here’s a comparative snapshot:
| Treatment Type | Water Repellency | Durability | Stiffness Impact | Washing Fastness |
|---|---|---|---|---|
| Polyurethane-based | Excellent | High | Moderate | Superior |
| Acrylic-based | Good | Moderate | Minimal | Good |
| Silicone-based | Good | High | Low | Good |
| Fluorine-based | Excellent | Variable | Minimal | Excellent |
Proper application is key: apply only as much as needed, allow 15–30 minutes for drying, and always test on a scrap first. When done right, the protective effect endures through repeated washing, ironing, and even freezing-unfreezing cycles. In fact, treated fabrics often retain their edge protection until the underlying material itself wears out.
6.2 Maintaining Fabric Integrity Over Years
Long-term, anti-fraying treatments can slightly increase a fabric’s thickness and weight, but these changes are usually minor and offset by the enhanced structural integrity. The fabric’s drape and flexibility are largely preserved, especially when using water-based or silicone-based formulas.
Color retention is another strong suit: most anti-fraying liquids dry clear and resist yellowing, provided you avoid over-application and test for compatibility. The deep penetration of the treatment means that even after years of use, the edges remain protected and the design stays sharp.
For embroiderers who want to go the extra mile, combining anti-fraying liquids with reinforced stitching—like double rows or zigzag patterns—adds another layer of durability. And when it comes to maintaining the shape and minimizing distortion during embroidery, stable hooping is essential. The Sewtalent magnetic embroidery hoop, for example, keeps fabric taut and evenly tensioned throughout the process, reducing the risk of puckering and ensuring that the anti-fraying treatment does its job for the long haul.
In summary: with the right product, careful application, and supportive tools, your embroidery can survive countless washes and years of wear—remaining as vibrant and intact as the day you finished it.
7. Precision Tools for Intricate Embroidery Designs
When it comes to intricate embroidery, the difference between “good enough” and “flawless” often lies in the tools you choose for applying anti-fraying liquid. The tiniest misstep—a drop too much, a shaky hand, a poorly chosen applicator—can stiffen delicate lace or leave a visible mark on silk. Let’s dive into the world of specialized applicators and stabilization techniques that put you in control, even when working at the edge of what’s possible.
7.1 Specialized Applicators: Fine Tips and Brush Attachments
Precision is everything in embroidery, and the same goes for anti-fraying liquid application. The right tool not only prevents oversaturation but also ensures your stitches and fabric edges remain crisp and clean.
Fine-tip applicators—like those found on Dritz Fray Check—are the gold standard for targeted treatment. Their narrow nozzles let you dispense a controlled bead of liquid exactly where it’s needed: along raw edges, around tight curves, or between dense stitches. This minimizes the risk of the liquid spreading into visible areas or hardening the fabric beyond the intended zone. For more complex or layered designs, consider a sectional treatment approach: apply the liquid to one area, let it dry for 5–10 minutes, then move to the next. This method gives you time to assess coverage and prevents accidental smudging.
For products with a thicker consistency, such as HiTack Fray Stop Glue, manual application using a small, soft brush or even a cotton swab can offer better control. Brushes are especially useful for feathering the liquid onto lace or for working around raised embroidery elements. The key is to use gentle, light strokes—think of painting a watercolor edge rather than slathering on glue. Always work on a glass mat or non-porous surface to prevent the fabric from sticking during drying.
Environmental factors matter, too. Stable room temperature and moderate humidity help maintain the liquid’s viscosity, ensuring it flows smoothly and dries evenly. Store your applicators clean and capped to prevent clogging or contamination.
Here’s a quick comparison of popular products and their applicator types:
| Product | Applicator Type | Precision Level | Best Use Case |
|---|---|---|---|
| Dritz Fray Check | Fine-tip | High | Delicate edges, detailed work |
| Aleene’s Stop Fraying | Standard nozzle | Medium-High | General use, multiple applications |
| HiTack Fray Stop | Manual/brush needed | Medium | Heavier fabrics, production runs |
| Prym Fray Check | Precision applicator | High | Intricate, multi-layered designs |
The evolution of anti-fraying liquids is trending toward water-based, clear-drying formulas with ever-more refined applicators. These advances make it easier than ever to achieve professional results—no matter how complex your embroidery.
7.2 Stabilization Systems for Complex Projects
Intricate embroidery doesn’t just demand steady hands—it also requires a stable foundation. Combining anti-fraying liquids with the right stabilization systems like embroidery hoops and frames can be the secret weapon for tackling 3D effects, layered motifs, or fabrics prone to shifting.
Water-soluble stabilizers are a favorite among professionals for supporting delicate or openwork designs during both stitching and anti-fraying treatment. Place the stabilizer beneath your fabric in the hoop, complete your embroidery, and apply anti-fraying liquid to the edges while the stabilizer is still in place. This prevents the fabric from stretching or distorting as the liquid dries. Once everything is set, simply wash away the stabilizer, leaving only your protected, perfectly shaped embroidery.
For even greater accuracy, use a glass mat as your work surface. Glass provides a smooth, non-porous base that prevents the fabric from sticking and allows you to see the underside for double-checking coverage. In studio settings, hooping stations can streamline the process, keeping fabric taut and flat—especially helpful for multi-section or large-scale projects.
And don’t underestimate the value of a high-quality embroidery hoop. Magnetic hoops like those from Sewtalent (for garment embroidery) offer uniform tension without crushing the fabric, making them ideal for intricate work where every millimeter counts. By reducing movement and edge stress, they complement your anti-fraying efforts and help preserve the integrity of even the most delicate designs.
In summary: success with anti-fraying liquids on intricate embroidery is all about the synergy between precise applicators, thoughtful technique, and reliable stabilization. Master these, and you’ll be ready to tackle the most challenging designs with confidence.
8. Conclusion: Optimizing Your Anti-Fraying Strategy
Mastering anti-fraying liquids is about more than just picking a product—it’s about matching the right solution to your fabric, using precise tools, and integrating best practices into your embroidery workflow. Remember to test on scraps, apply with finesse, and choose stabilizers and hoops that support your design’s complexity. With these habits and best embroidery machines, you’ll keep your embroidery edges crisp, your fabrics supple, and your creative vision intact—project after project.
9. Frequently Asked Questions
9.1 Q: Can I use fray check on silk?
A: Yes, but always test on a scrap first. Dritz Fray Check and similar products can be used on silk, but over-application may cause stiffness or discoloration. Use a fine-tip applicator and apply sparingly for best results.
9.2 Q: How do I remove dried anti-fraying liquid?
A: For most products, gently dab the area with rubbing alcohol on a cotton swab. This works best if the liquid hasn’t fully cured. Always test on a hidden area first to avoid further damage.
9.3 Q: Are homemade solutions safe for embroidery?
A: Homemade alternatives like diluted glue or tape can work for temporary stabilization, but may not offer the same wash durability or flexibility as commercial products. Always test for compatibility with your fabric and thread.
9.4 Q: Does freezing affect anti-fraying liquid performance?
A: Most commercial anti-fraying liquids retain their protective qualities after freezing and thawing cycles, as long as they are fully dried before exposure to extreme temperatures.
9.5 Q: Why does fabric stiffness occur after treatment?
A: Stiffness usually results from over-application. Apply anti-fraying liquid in thin, even layers and allow each coat to dry before adding more. For delicate fabrics, use the lightest touch possible and consider brush application for extra control.


