1. Introduction to Fire Embroidery
Fire embroidery isn’t just a trend—it’s a blazing statement in the world of embroidery machines. Whether it’s the bold insignia on a firefighter’s jacket, the fierce flames streaking across a custom motorcycle vest, or the edgy accents lighting up fashion runways, fire motifs ignite creativity across industries. Why the fascination? Fire symbolizes passion, transformation, and power—making it a favorite for those who want their designs to stand out and spark conversation.
In this guide, we’ll journey through the essentials of fire embroidery mastery. You’ll discover where to source the best fire-themed machine embroidery designs, learn advanced techniques for bringing flames to life on fabric, and find inspiration for creative projects that turn up the heat. We’ll also tackle the technical considerations that ensure your fiery creations burn bright—never fizzle out. Ready to fuel your next project? Let’s dive in and set your embroidery world ablaze.
Table of Contents
- 1. Introduction to Fire Embroidery
- 2. Sourcing Fire-Themed Machine Embroidery Designs
- 3. Advanced Techniques for Embroidering Fire Designs
- 4. Creative Applications and Project Inspiration
- 5. Technical File Essentials
- 6. Troubleshooting Common Fire Embroidery Issues
- 7. Free and Low-Cost Fire Embroidery Resources
- 8. Conclusion
- 9. Frequently Asked Questions (FAQ)
2. Sourcing Fire-Themed Machine Embroidery Designs
2.1 Top Design Sources and Technical Specifications
When it comes to fire-themed machine embroidery, the market is ablaze with options—whether you’re after roaring flames, subtle embers, or stylized fire patterns. Leading commercial platforms like BeaglesEmbroidery and DNK Workshop offer a wide array of flame designs, each available in multiple sizes to suit everything from a small badge to a statement back piece.
For example, BeaglesEmbroidery’s flame designs come in 10 different sizes, ranging from a compact 3.0×1.8 cm (1,594 stitches) to an impressive 12.0×7.3 cm (10,778 stitches). This scalability is a game-changer: you can tailor your design to any project without sacrificing detail or quality. Stitch count scales proportionally with size, maintaining optimal density—smaller designs might feature around 675 stitches per square centimeter, while larger ones are engineered for stability at roughly 202 stitches per square centimeter.
Other noteworthy sources include DNK Workshop, which offers flame motifs in six sizes, and Stitch Wicked Shop, with collections boasting up to 14 different sizes. AnnTheGran, a popular design marketplace, features fire embroidery files like DataStitch’s “Fire” (1.7" x 0.9", 3,436 stitches, available in six sizes) and Mira Embroidery’s “Fire Safety Logo” (3.72" x 3.72", 6,497 stitches). These designs typically fit standard 4" x 4" hoops, making them accessible for most home and commercial machines.
Here’s a quick look at what you can expect:
| Design Source | Sizes Available | Stitch Count Range | Formats Supported |
|---|---|---|---|
| BeaglesEmbroidery | 10 (3–12 cm) | 1,594–10,778 | 12 formats (DST, PES, etc.) |
| DNK Workshop | 6 | Not specified | Multiple |
| Stitch Wicked Shop | 14 | Not specified | Multiple |
| AnnTheGran (DataStitch) | 6 (1.7" x 0.9" etc.) | 3,436 | ART, DST, EXP, HUS, JEF, PES, etc. |
| Mira Embroidery | 1 (3.72" x 3.72") | 6,497 | ART, CND, DST, EMB, EXP, PES, etc. |
Industry standards divide designs by stitch count:
- Small: up to 6,000 stitches
- Medium: 6,000–10,000 stitches
- Large: 10,000–15,000 stitches
What sets fire-themed designs apart is their technical complexity. Flame shapes are organic and dynamic, requiring careful digitization to balance visual impact with fabric stability. Fill stitches for backgrounds often use about 1,500 stitches per 4mm area, ensuring coverage without puckering. Customer reviews consistently praise the variety of sizes, instant digital delivery, and the professional finish of these designs.
So, whether you’re customizing a jacket, creating a patch, or branding workwear, sourcing your fire embroidery designs from reputable platforms ensures you get scalable, high-quality files ready to light up your next project.
2.2 File Format Compatibility Across Machines
One of the hottest questions in machine embroidery: “Will this design work on my machine?” The answer, thankfully, is usually yes—if you pay attention to embroidery file format.
Most fire-themed embroidery designs are distributed in a wide range of formats to ensure broad compatibility. Leading vendors like BeaglesEmbroidery support 12 different formats, including:
- DST (Tajima, widespread in industrial settings)
- PES (Brother, Baby Lock)
- JEF (Janome)
- EXP (Melco, Bernina)
- HUS (Husqvarna Viking)
- ART (Bernina)
- XXX (Singer)
- …and more (DGT, EMD, PCS, SEW, SHV, VP3, etc.)
When browsing platforms like AnnTheGran or Etsy, you’ll see format options listed clearly—just select the one that matches your machine. If you ever upgrade or switch brands, many vendors offer re-downloads in alternate formats, so your design library stays future-proof.
In summary:
- Check your machine’s supported formats before purchase
- Choose vendors offering multiple file types
- Enjoy seamless compatibility for all your fiery creations
3. Advanced Techniques for Embroidering Fire Designs
3.1 Machine Configuration and Stabilizer Strategies
Embroidering flames isn’t just about flashy thread colors—it’s about precision setup. Start by selecting the right needle: sizes 75/11 to 90/14 are recommended for flame designs, balancing fine detail with the ability to handle denser fills. Adjust your machine’s tension carefully; too tight, and you’ll risk puckering, too loose, and your flames may lose their crisp edges.
Stabilizer choice is crucial. Tear-away stabilizers, especially in 6x6 inch sheets, are favored for flame motifs. They provide the support needed for dense stitching yet remove cleanly, leaving your fire design looking sharp and professional. For lighter fabrics, opt for a medium-weight tear-away; for heavier or stretch materials, consider layering stabilizers or using a heavier grade.
A pro tip from YouTube tutorials: always secure your fabric in the embroidery hoop so it’s taut but not overstretched. This keeps your flames from warping and ensures smooth, even stitches. Regular tension checks and needle changes will help you maintain top-notch results, even on complex, high-stitch-count designs.
3.2 Specialized Stitching Methods for Realistic Flames
Want your flames to leap off the fabric? It’s all about the stitches. The Bargello technique—with its signature zigzag movement—creates dynamic, geometric flame patterns. Satin stitch layering adds depth and shine, perfect for the body of the flame. For movement and realism, vary your stitch directions: let the stitches “flow” upward and outward, mimicking the unpredictable nature of fire.
Outlining your flames with a backstitch gives definition, making the motif pop against any background. To achieve that signature fiery gradient, blend thread colors from deep red through orange to bright yellow, switching threads as you progress up the flame. This gradient blending is key to a lifelike effect.
Need a finishing touch? Try heat-sealing the thread ends (carefully!) to prevent fraying and give your work a polished, professional look. With these techniques, your fire embroidery will glow with energy and artistry.
3.3 Achieving Perfect Tension on Garments
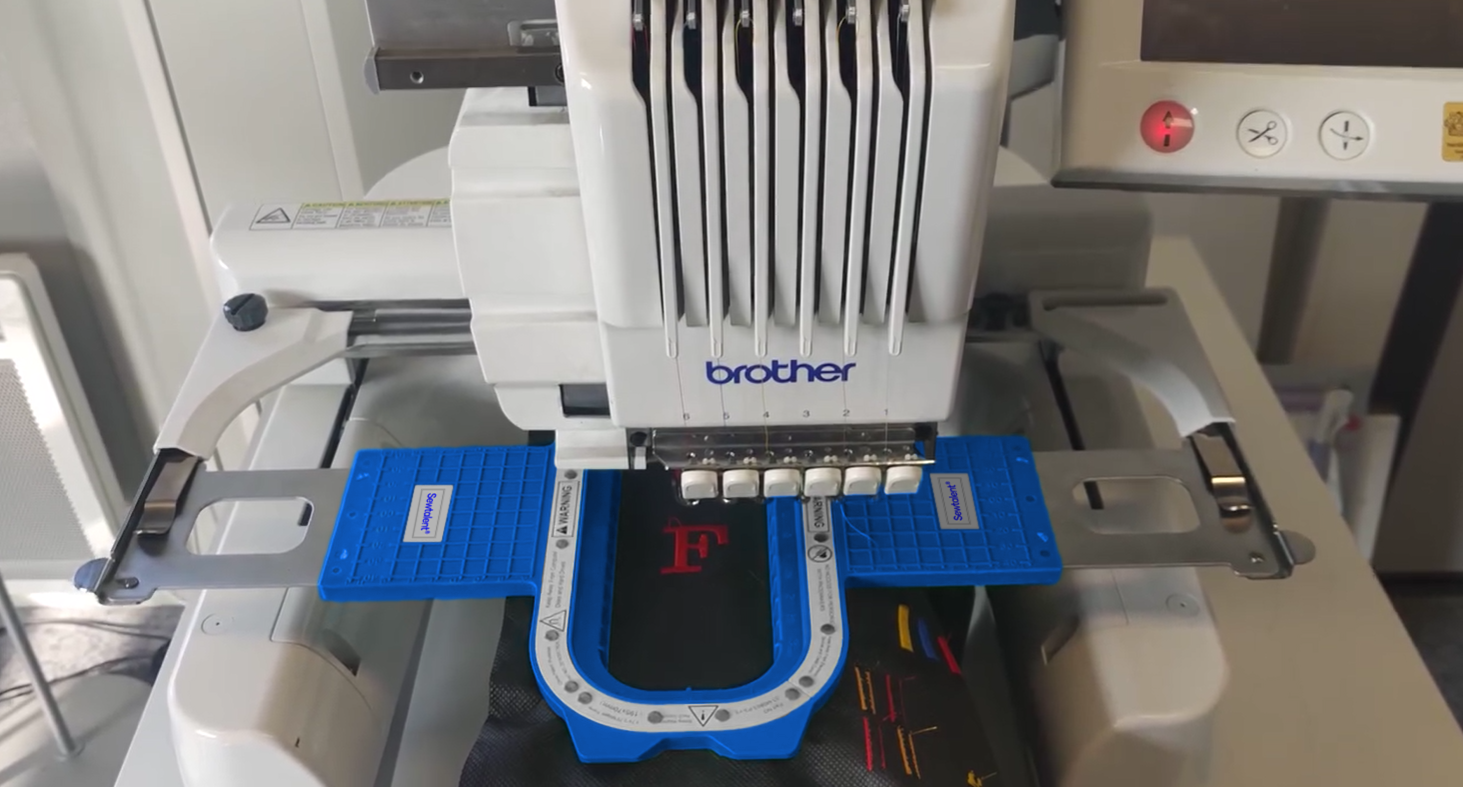
Nothing ruins a fiery design faster than puckering or distortion—especially on tricky fabrics like denim or silk. That’s where magnetic hoops like Sewtalent come to the rescue. Unlike traditional screw hoops, magnetic hoops secure the fabric evenly, preventing stretch marks (“hoop burn”) and ensuring flawless tension across every inch.
Here’s the real kicker: using magnetic hoops can cut hooping time by up to 90% compared to screw hoops. That means less fiddling, more stitching, and a smoother workflow—especially when you’re producing multiple garments or working with challenging materials. Whether you’re embroidering a single patch or an entire jacket back, magnetic hoops help maintain your design’s integrity from start to finish.
If you’re serious about fire embroidery on garments, investing in a magnetic hoop system like Sewtalent isn’t just a convenience—it’s a game-changer for quality and efficiency.
4. Creative Applications and Project Inspiration
4.1 Flame Variations: Logos, Borders, and Mixed Media
Logos and Borders:
Flame motifs are a favorite for custom logos—think fire department insignias or sports team emblems—where the symbolism of fire stands for courage and intensity. Repeating flame borders, stitched along garment edges or home textiles, create a sense of motion and drama. These borders work especially well on sleeves, hemlines, or as accents on patches created with an embroidery machine to make patches, instantly transforming the ordinary into the extraordinary.
Mixed Media Magic:
One of the most exciting trends in fire embroidery is the fusion of traditional stitching with innovative materials and techniques. Take inspiration from upcycling projects, like the YouTube "Fire Blazer Refashion," where flame shapes are cut from orange knit fabric and fused onto a yellow base using adhesive and a hot iron. Once in place, these fabric flames are outlined and textured with needle-felted wool yarn, using both single-needle and multi-needle felting tools. The result? A blazer that’s not just refashioned, but reborn—its sleeves ablaze with tactile, three-dimensional flames.
Technique Highlights:
- Satin stitch is your go-to for filling flame shapes with bold, smooth color.
- Backstitch outlines sharpen the edges, making flames pop.
- Running stitch offers a lighter, airy effect—great for layering or creating subtle flame textures.
- Directional stitching and color blending (from deep red to yellow) mimic the organic flow of fire, adding realism and depth.
Material Tips:
- For hand embroidery, DMC six-strand floss (codes 807, 976, 3821) on linen fabric creates vibrant, consistent color.
- Machine embroidery designs often specify dimensions (like 2.45" x 1.55") for easy project planning.
- Mixed media projects benefit from heat-removal marker pens for pattern placement and protective mats during felting.
Project Ideas:
- Upcycled blazers with flame borders
- Custom patches for jackets or bags
- Fire-themed logos for uniforms or team gear
- Needle-felted accents on wool coats or accessories
Let your imagination run wild—fire embroidery thrives on bold choices and creative risk-taking. Whether you’re refining a classic logo or experimenting with new textures, flames are your ticket to show-stopping results.
4.2 Jacket Customization Step-by-Step
Ready to set your jacket on fire—creatively, of course? Here’s a step-by-step guide to embroidering flame motifs on sleeves or hemlines, ensuring stability and professional polish from start to finish.
1. Design Placement:
Choose where your flames will make the biggest impact—sleeves and hemlines are prime real estate. For curved surfaces like cuffs or jacket bottoms, precise positioning is key. Use a heat-removal marker to sketch your flame outlines, ensuring symmetry and flow.
2. Hooping for Success:
For stable stitching, especially on tricky curves, magnetic hoops like Sewtalent are a game-changer. They grip the fabric evenly, preventing distortion and keeping your flame shapes crisp. Magnetic hoops are especially helpful for thicker or layered jacket fabrics, offering a secure hold without leaving hoop marks.
3. Stabilizer Selection:
Dense flame embroidery calls for the right stabilizer. For most jackets, a medium-weight tear-away stabilizer provides enough support without adding bulk. If your fabric is particularly heavy or stretchy, consider doubling up or using a heavier stabilizer for extra security.
p>4. Thread and Color Sequencing:Select threads that capture the fiery gradient—deep reds, oranges, and yellows. Plan your color changes to build the flame from base to tip, blending shades for a natural transition.
5. Stitching Techniques:
- Start with a satin stitch or layered fill for the body of the flame.
- Outline with a backstitch for definition.
- Use directional stitching to mimic the upward flicker of real fire.
6. Finishing Touches:
After stitching, carefully remove the stabilizer and press the area from the reverse side to keep the embroidery smooth. If you’ve combined embroidery with needle-felted accents, gently brush and shape the wool for added texture.
Pro Tips:
- Test your design on a fabric scrap before committing to the jacket.
- Keep extra felting needles handy—they can break during intensive work.
- Protect your work surface during felting to avoid accidental damage.
With these steps, your jacket will go from basic to blazing—a wearable work of art that turns heads and sparks conversation.
5. Technical File Essentials
5.1 Hoop Sizing and Design Scaling
Getting the technical details right is crucial for flawless fire embroidery. The relationship between design size, stitch density, and hoop compatibility can make or break your project.
Design Dimensions & Stitch Density:
Fire embroidery designs are available in a wide range of sizes, from compact (1.2" x 0.7", ~1,594 stitches) to statement-making (4.7" x 2.9", ~10,778 stitches). The stitch density varies accordingly—smaller designs may reach 531 stitches/cm² for crisp detail, while larger ones balance coverage and fabric integrity at around 381 stitches/cm². This careful scaling ensures that flames look sharp whether they’re tiny accents or bold centerpieces.
Industry Standards:
- Small Designs: Up to 6,000 stitches, perfect for patches or small logos.
- Medium Designs: 6,000–10,000 stitches, ideal for jacket sleeves or borders.
- Large Designs: 10,000–15,000 stitches, suited for back pieces or prominent motifs.
Hoop Compatibility:
Matching your design size to the correct hoop is essential. Most fire designs fit standard 4" x 4" hoops, but larger motifs may require 5" x 7" or even 8" x 12" hoops. Always check your machine’s maximum hoop size before starting—a mismatch can lead to incomplete stitching or registration errors.
Scaling Tips:
- When resizing designs, maintain the original stitch density to avoid gaps or puckering.
- Use editing software to adjust size within recommended limits, keeping the flame’s proportions intact.
Quick Reference Table:
| Design Size | Dimensions (inches) | Stitch Count | Recommended Hoop Size |
|---|---|---|---|
| Small | 1.2" x 0.7" | ~1,594 | 4" x 4" |
| Medium | 2.4" x 1.4"–3.2" x 1.9" | 3,805–5,739 | 5" x 7" |
| Large | 4.7" x 2.9" | ~10,778 | 8" x 12" |
By understanding these technical essentials, you’ll ensure every flame you stitch is as precise and vibrant as the design intended.
5.2 Color Sequencing and Flame-Resistant Threads
The magic of fire embroidery lies in its color—and the threads you choose are the fuel for that fire.
Color Sequencing:
Most fire embroidery designs use a two-color gradient, blending reds, oranges, and yellows for a lifelike flame effect. Sequencing your colors from dark to light (base to tip) creates depth and movement, while careful thread changes prevent harsh transitions.
Specialty Threads for High-Heat Applications:
If your embroidered item will face heat—like uniforms, workwear, or patches on gear—consider flame-resistant threads. Options like Kevlar® and Nomex® offer superior resistance to high temperatures, meeting stringent safety standards (ISO-6941, ISO 15025, DIN EN ISO 11612 D + E). These threads don’t just look good; they’re engineered to perform under pressure.
- Kevlar® Threads: Withstand up to 800°F, offering strength and minimal stretch.
- Nomex® Threads: Maintain integrity at elevated temperatures and are Oeko-Tex® certified for safety.
Thread Selection Tips:
- For everyday projects, high-quality polyester or rayon threads (over 400 polyester, 370 rayon shades available) deliver rich color and durability.
- For safety-critical or industrial applications, always choose certified flame-resistant threads.
Certification Matters:
Look for Oeko-Tex® certification when safety or skin sensitivity is a concern. This guarantees the thread is free from harmful substances and safe for prolonged contact.
By mastering color sequencing and selecting the right threads, you’ll create fire embroidery that’s as durable as it is dazzling—ready for anything from the runway to the rescue scene.
6. Troubleshooting Common Fire Embroidery Issues
6.1 Preventing Color Bleeding and Distortion
Vivid flames demand crisp colors and sharp lines—but fire embroidery can be tricky, with risks of color bleeding and pattern distortion. Here’s how to keep your work flawless:
Color Bleeding Solutions:
- Retayne Dye Fixative: Soak cotton fabrics in hot water (at least 140°F) with Retayne before the first wash to lock in dyes and prevent bleeding.
- Synthrapol Detergent: Use this industrial-strength detergent both before and after embroidery to keep loose dyes suspended and off your fabric.
- Shout Color Catchers: Toss a sheet in the wash to absorb stray dyes and protect your flame gradients.
Distortion Prevention:
- Adjust machine tension to match your fabric and design—too tight leads to puckering, too loose causes wavy lines.
- For organic flame shapes, test tension on a scrap before embroidering your final piece.
Proactive Tips:
- Use high-quality, colorfast threads to reduce bleeding risk.
- Always prewash and treat fabrics before embroidery, especially with bold reds and yellows.
With these strategies, your flames will stay as bright and defined as the day they were stitched.
6.2 Machine Compatibility Fixes
Fire embroidery’s intricate patterns can push your machine to its limits. When thread breaks or format errors strike, don’t panic—here’s how to get back on track:
Thread Breaks:
- Upgrade to a 90/14 needle for dense or metallic threads common in flame designs.
- Slow down your machine speed, especially around sharp flame tips or color transitions.
- Use fresh, high-quality thread—old or brittle thread is a recipe for breakage.
Format Errors:
- Double-check that your design file matches your machine’s required format (DST, PES, JEF, etc.).
- If errors persist, try re-downloading the file or converting it with embroidery software.
Stitch-by-Stitch Diagnostics:
- Advance the machine manually using the handwheel to pinpoint exactly where issues arise.
- Clean the upper thread path with a small brush or unwaxed dental floss to remove lint and debris.
Bobbin Management:
- Replace bobbins promptly and overlap 2–3 stitches when resuming to ensure seamless coverage.
By methodically troubleshooting, you’ll conquer even the most stubborn fire embroidery challenges—ensuring your flames burn bright, not out.
7. Free and Low-Cost Fire Embroidery Resources
Fire embroidery designs may seem like a niche specialty, but you don’t have to burn through your wallet to access quality files and tutorials. While premium fire motifs often command top dollar, a little resourcefulness opens up a world of budget-friendly—and even free machine embroidery designs—options for crafters at every level.
Free Resources:
Several platforms offer no-cost fire-themed designs, perfect for beginners or anyone testing out new techniques. For instance, EmbroideryDesigns.com features a free fire department badge design (2" x 2.19"), while AnnTheGran.com lists complimentary options like the fireman badge (1.93" x 1.91"). These basic motifs are sized for standard 4" x 4" hoops and are ideal for patches, uniforms, or practice runs. Expect simple, geometric flame shapes or classic badge styles—just right for skill-building and experimentation.
Low-Cost Options:
If you’re ready to level up but still want to keep costs in check, look for low-priced premium designs. Platforms such as Embroidery & Sewing offer the “Freefire” design for just $2.88, spanning multiple sizes (from 4" to 10"), and Mira Embroidery’s “Fire Safety Logo” is available for $2.00 on AnnTheGran.com. These affordable files often include enhanced layering, more intricate detail, and broad format compatibility (DST, PES, JEF, EXP, HUS, and more), ensuring they’ll work on most major embroidery machines.
Format and Compatibility:
One trade-off with free resources is limited file formats—often just DST or PES—while paid designs typically support a wider variety (sometimes 12+ formats). Always double-check compatibility with your machine before downloading.
Educational Platforms:
While fire-specific tutorials are rare, general embroidery learning hubs like NeedlenThread.com provide foundational guides on pattern transfer, thread management, and finishing techniques. These skills translate directly to fire embroidery projects, helping you get the most out of both free and paid designs.
Tips for Maximizing Resources:
- Use free basic designs to practice and refine your technique.
- Invest in low-cost files for more polished, professional results.
- Explore embroidery forums and community groups for shared patterns and project inspiration.
- Combine general embroidery tutorials with your fire-themed projects for best results.
What’s Missing?
Intermediate-level free fire embroidery designs are still hard to find, and free files may not always offer the advanced detail or size variations of their commercial counterparts. But with a hybrid approach—mixing free, low-cost, and educational resources—you can spark creativity without breaking the bank.
8. Conclusion
Mastering fire embroidery is about more than just bold designs—it’s about combining accessible resources, technical know-how, and creative courage. From sourcing scalable files and controlling tension to experimenting with gradients and textures, you now have the tools to make your flames leap off the fabric. Remember: every great project starts with a single spark of curiosity. So dive in, test new techniques, and let your imagination set your next embroidery project ablaze!
9. Frequently Asked Questions (FAQ)
9.1 Q: What is the minimum stabilizer weight recommended for dense flame embroidery?
A: For dense flame motifs, a medium-weight tear-away stabilizer is typically sufficient. If working with heavier or stretch fabrics, consider doubling up or using a heavier stabilizer for extra support.
9.2 Q: Which fabric types work best for fire embroidery designs?
A: Most fire embroidery designs stitch well on cotton, denim, canvas, and linen. For mixed media or needle-felting accents, wool fabrics are especially suitable.
9.3 Q: What digitizing software is recommended for creating custom fire embroidery designs?
A: While fire-specific digitizing tutorials are limited, general embroidery digitizing software like Hatch, Wilcom, or Brother PE-Design is widely used for creating and editing custom motifs. Look for software machine embroidery that supports layering, gradient fills, and multiple export formats to maximize compatibility with your embroidery machine.


