1. Introduction to Connecting Embroidery Machines to Computers
Embroidery has come a long way from manual stitching to a world where digital designs leap from your computer screen onto fabric with precision and flair. Connecting your embroidery machine to a computer isn’t just a technical upgrade—it’s a creative revolution. By connecting your computerized sewing and embroidery machine to your computer, you unlock a universe of design possibilities, streamline file transfers, and supercharge your workflow efficiency.
This blog will guide you through the essential methods for connecting your embroidery machine to your computer—whether by trusty USB cables, wireless SD cards, or advanced software solutions. We’ll also touch on troubleshooting common hiccups and optimizing your setup for smooth, error-free stitching. And remember: digital precision is only half the story. Stable fabric mounting—like what you achieve with magnetic hoops—ensures your digital designs translate perfectly onto fabric, reducing errors and elevating your results. Ready to transform your embroidery process? Let’s dive in.
Table of Contents
- 1. Introduction to Connecting Embroidery Machines to Computers
- 2. Physical Connection Methods: USB Cables and Drives
- 3. Wireless Connectivity Options
- 4. Software Integration for Seamless Transfers
- 5. Troubleshooting Transfer Failures
- 6. Connection Method Comparison
- 7. Multi-Machine Network Setups
- 8. Conclusion: Streamlining Your Digital Embroidery Workflow
- 9. FAQ: Embroidery Machine Connectivity
2. Physical Connection Methods: USB Cables and Drives
Physical connections remain the backbone for many embroidery setups, offering reliability and straightforward operation. Whether you’re a seasoned studio owner or just starting out, mastering USB cable and flash drive transfers is essential for seamless design movement between your computer and machine.
2.1 Step-by-Step USB Cable Connection Guide
Getting Started with USB Cable Connections
Connecting your embroidery machine directly to your computer via USB is often the fastest route for transferring designs. Here’s how to ensure a smooth connection:
1. Hardware Setup
- Use the USB cable provided with your embroidery machine.
- Power on your embroidery machine before or after connecting the cable, as required by your specific model.
2. Driver Installation
- Some machines, like Janome, need you to install a dedicated USB driver (often via an installer that may prompt Windows Security).
- Others, such as many Brother models, can auto-install drivers using Windows’ built-in driver management.
3. File Transfer Protocols
- If your machine appears as an external drive in Windows Explorer, you can copy embroidery files (like .PES, .DST, or .JEF) directly to it.
- Use embroidery software (e.g., Hatch Embroidery) to send designs directly by selecting the machine’s drive location.
4. Pre-Installation Checks
- Confirm your cable is compatible (some machines require USB-A to USB-B, others use USB-C).
- Make sure your computer recognizes the device—if not, double-check the cable connection and machine power status.
Pro Tip: Always consult your machine’s manual or manufacturer’s support resources for model-specific instructions.
2.2 USB Flash Drive Transfers
The Art of the USB Stick
For many, USB flash drives are the unsung heroes of embroidery design transfer. Here’s how to make the most of them:
- Formatting Drives:
- Format your USB stick to FAT32, as most embroidery machines require this for compatibility.
- For older machines, stick to smaller capacities (2GB or 4GB); newer machines often handle up to 8GB or more.
- Transferring Designs:
- Drag and drop your embroidery files into the USB drive’s folder.
- You can select multiple files at once (using Ctrl or Shift) or transfer entire folders, but avoid overloading the drive—machines may only read a limited number of files at a time.
- Safe Ejection:
- Always use the “Safely Remove Hardware” feature in your computer’s taskbar to avoid corrupting files.
- Machine-Side Navigation:
- Insert the USB stick into your embroidery machine’s port.
- Use the machine’s interface to browse and select the design you want to stitch.
Best Practices:
- Don’t use your USB stick as a permanent storage device—treat it as a transfer tool.
- Keep your designs organized by hoop size and file format to avoid confusion at the machine.
2.3 Troubleshooting Physical Connection Failures
Even the best-laid plans can hit a snag. Here’s how to tackle common problems:
| Issue | Solution |
|---|---|
| No driver detected | Reinstall drivers using your manufacturer’s installer (e.g., Janome’s Jsmc864Installer). |
| Machine not recognized | Ensure the USB cable is securely connected and the machine is powered on. |
| File transfer errors | Verify the USB drive is formatted correctly (FAT32) and files are in compatible formats. |
- Cable Integrity:
- Try a different USB cable if your machine isn’t recognized.
- Device Manager Diagnostics:
- On Windows, use Device Manager to check for driver conflicts or missing devices.
- Firmware Updates:
- Some connection issues are resolved by updating your machine’s firmware—check the manufacturer’s website for updates.
Alternative Methods: If direct USB or flash drive transfers aren’t working, consider wireless options or consult your machine’s manual for specialized readers or proprietary software requirements.
3. Wireless Connectivity Options
The freedom of wireless transfers is a game-changer for modern embroidery studios. No more juggling cables or USB sticks—just seamless, cable-free design movement from your computer (or even your phone) straight to your machine. Let’s explore the main wireless options available today.
3.1 WiFi SD Cards and Built-in Wireless
WiFi SD Cards: Turning Any SD Slot into a Wireless Portal
-
Toshiba FlashAir III:
- Insert the FlashAir card into a USB adapter and connect it to your computer for initial configuration.
- Use compatible software (like Embrilliance) to set up your network credentials.
- Once configured, pop the card into your embroidery machine’s SD slot and transfer designs wirelessly.
Key Points:
- Only FlashAir III or newer models are supported.
- Works with any embroidery machine that has an SD card slot.
Built-in WiFi (e.g., Brother SE700/SE2000):
- Use the machine’s setup wizard to connect to your WiFi network (usually 2.4GHz WPA2).
- Once connected, transfer designs directly from your computer or compatible mobile app.
- Machines like the Baby Lock Altair 2 offer similar built-in wireless capabilities.
Setup Steps (as shown in video guides):
- Power on your machine and access the settings screen.
- Select your WiFi network, enter your password, and confirm the connection.
- Use the provided QR code or app pairing for mobile transfers if supported.
| Method | Hardware Needed | Setup Complexity | Compatibility |
|---|---|---|---|
| FlashAir SD Card | Wireless SD card, adapter | Moderate | Any SD slot machine |
| Built-in WiFi | Native WiFi machine | Low | Model-specific |
3.2 Dedicated Wireless Adapters
EmbroideryConnect: The Plug-and-Play Wireless Bridge
Device Setup:
- Connect the EmbroideryConnect device to your computer via USB-C for initial configuration.
- Use the EmbroideryHub software to select your WiFi network, enter credentials, and assign a device name.
- Once configured, plug the device into your embroidery machine’s USB port.
LED Status Indicators:
- Solid green: Power on.
- Solid blue: Connected to WiFi and ready for transfers.
Multi-Machine Support:
- Each machine requires its own EmbroideryConnect device, but you can manage multiple devices from one computer using EmbroideryHub.
Key Features:
- Automatic design handling, including file rotation and folder customization.
- Secure, encrypted transfers for peace of mind.
Use Case: Perfect for studios with multiple embroidery machines or those seeking to eliminate cable clutter for good.
Wireless connectivity isn’t just about convenience—it’s about unlocking new levels of efficiency and creative freedom in your embroidery workflow. Whether you choose SD card solutions, built-in WiFi, or dedicated adapters, you’re stepping into a future where design transfers are as effortless as your imagination.
4. Software Integration for Seamless Transfers
In the digital embroidery world, software isn’t just a convenience—it’s the bridge between your creative vision and flawless machine execution. software embroidery machine solutions can transform complicated file transfers into a streamlined, one-click affair, while also ensuring your designs are perfectly formatted for your specific machine. Let’s dive into how leading programs like Hatch Embroidery and PE-DESIGN make seamless design transfers possible, and why mastering file formats is the key to embroidery success.
4.1 Hatch Embroidery Direct Transfer
Hatch Embroidery is renowned for its robust integration and user-friendly workflow, especially when paired with CorelDRAW for advanced vector editing. If you’re using Hatch, here’s how to make direct transfers a breeze:
Step-by-Step Workflow:
1. Connect Your Machine Attach your embroidery machine to your computer using a USB cable. Power on the machine and check if it appears as an external drive in Windows Explorer. If it does, you’re set for direct transfers.
2. Configure the Transfer Dialog In Hatch, click the “Transfer” icon. Select your machine brand and type, then choose the correct file format (e.g., .PES for Brother, .DST for Tajima). Specify the machine’s drive location as shown in Windows Explorer.
3. Send Your Design Hit “OK” and Hatch will send the design directly to your machine. These settings are saved for future transfers, making repeat projects even faster.
Troubleshooting: If your machine isn’t recognized as an external drive, double-check your drivers and cable connections. Some machines may require you to use a USB stick instead, exporting your design from Hatch and then physically transferring it.
Bonus: Hatch’s integration with CorelDRAW means you can edit vector graphics directly within the software, offering unmatched precision for your embroidery designs. This is especially powerful for users who need advanced editing tools before sending files to the machine.
4.2 PE-DESIGN and Brother Wireless Link
PE-DESIGN, a staple for Brother users, takes connectivity a step further with its Wireless Link mode. Here’s how it elevates your workflow:
Wireless Link Mode Activation:
- Enable Wireless Link on your compatible Brother machine and computer.
- Register your embroidery machine on the network via the Network Machine Settings dialog in PE-DESIGN.
- From the software, select the design and use the “Send” > “Wireless Link” option to transfer it. The machine will display status updates (Ready, Waiting, Sewing, Paused, Error) in real time.
Design Queuing & Multi-Machine Distribution:
- Queue up multiple designs in the Wireless Link dialog; PE-DESIGN will manage the order and distribute files to up to ten machines simultaneously.
- For even more advanced setups, use Embroidery Office to coordinate multi-machine distribution, ensuring each machine gets the right file at the right time.
Cloud Workflows:
- Brother’s Artspira app introduces cloud-based design management, allowing you to sync and access designs across devices. While not as feature-rich as PE-DESIGN’s networked approach, it’s a flexible solution for mobile creators.
Best Practice: Always check that your design fits within the maximum embroidery area and is saved in the correct format. PE-DESIGN will alert you to any size or compatibility issues before transfer.
4.3 File Format Conversion Essentials
One of the most common pitfalls in embroidery file transfers is format mismatch. Each machine brand has its own preferred file types—.PES for Brother, .JEF for Janome, .DST for Tajima, and so on. Here’s how to stay ahead:
Key Essentials:
- Know Your Machine’s Format: Always use your machine’s native format to avoid stitch errors or unreadable files.
- Use Software Tools: Hatch Embroidery supports over 20 formats and offers auto-digitizing tools like Bitmap to Embroidery and Vector to Embroidery, making conversion effortless.
- Auto-Digitizing: Convert images to stitch files with automatic settings for fabric type and stitch density, ensuring compatibility and quality.
- Compatibility Tables: Refer to your software’s compatibility table to confirm support for your machine’s file type.
Pro Tip: Before transferring, double-check design dimensions and hoop size compatibility. This prevents frustrating errors at the machine and ensures your project starts stitching smoothly.
5. Troubleshooting Transfer Failures
Even with the best software and hardware, transfer hiccups can crop up. From file compatibility woes to physical misalignments, let’s tackle the most common issues and how to solve them—so you can get back to stitching, not stressing.
5.1 Resolving File Compatibility Issues
File compatibility is the Achilles’ heel of digital embroidery. Here’s how to spot and fix the most common snags:
| Problem | Solution |
|---|---|
| Stitch calibration errors | Use Advanced Color Matching in your software to create accurate thread profiles. Adjust underlay and stitch compensation for your specific fabric. |
| Memory size limitations | Older machines may require smaller memory sizes (e.g., 4MB or 1.44MB). Save designs accordingly. |
| Format mismatch | Always save files in your machine’s native format. Use conversion tools in Hatch or PE-DESIGN. |
| Alignment problems | Use tools like HoopSync Pro to scan calibration patterns and auto-calculate X/Y offsets. Find professional embroidery machine repair near me through manufacturer resources |
Extra Tips:
- Ensure designs are unzipped before transfer—many machines can’t read zipped files.
- For persistent issues, check for driver conflicts in Device Manager or try transferring from a different computer.
From the Pros: Pam Hayes recommends verifying your bobbin case and thread tension if you see unexpected results in your stitch-out. And remember, a new needle can work wonders!
5.2 Optimizing Fabric Stability to Prevent Errors
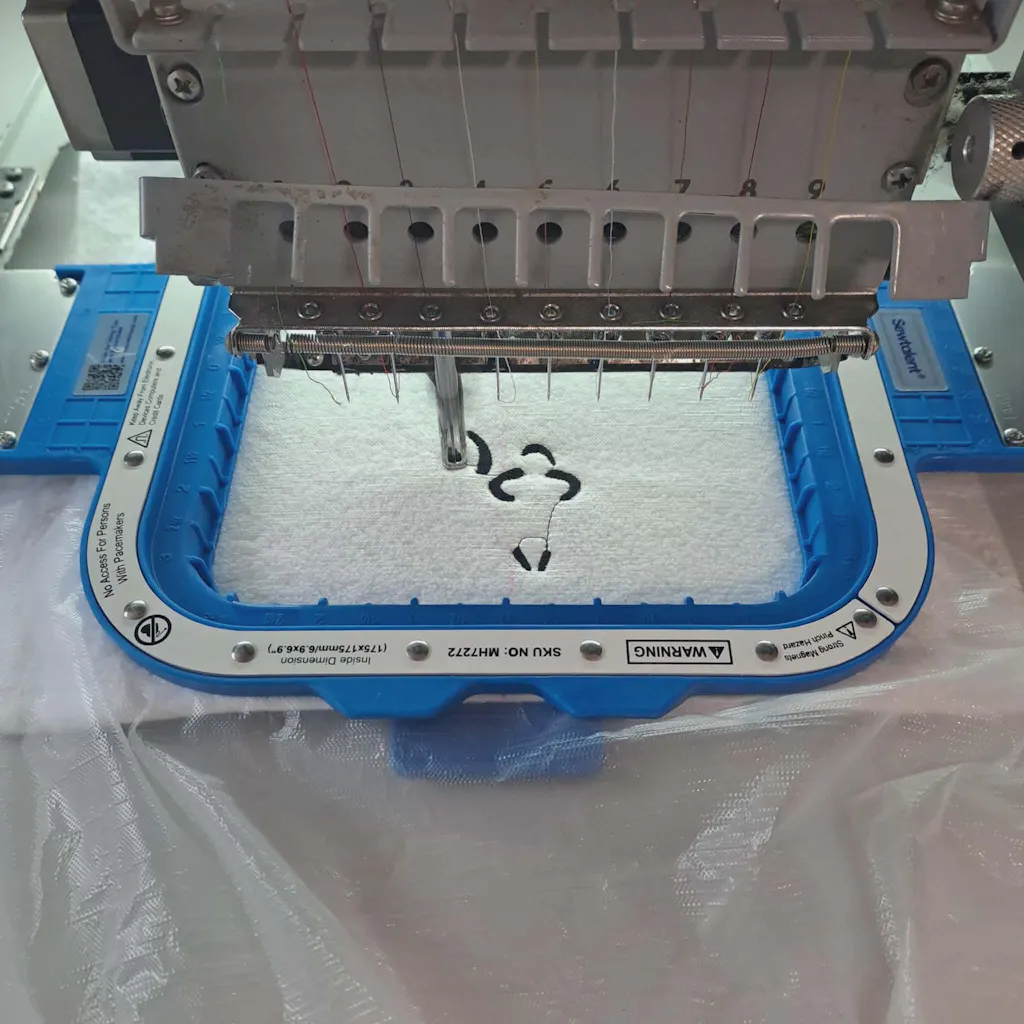
Let’s face it: even the most perfectly transferred design can go awry if your fabric shifts mid-stitch. That’s where magnetic hoops, like those from Sewtalent, become your embroidery secret weapon.
Why Magnetic Hoops Matter:
- Even Tension Distribution: Magnetic hoops apply uniform pressure across your fabric, preventing puckering and distortion.
- Reduced Hoop Burn: Unlike screw-based hoops, magnetic force is gentle yet firm, minimizing marks on finished garments.
- Compatibility with Thick Fabrics: Sewtalent hoops excel at holding everything from delicate silks to bulky towels or denim—no more slippage or misalignment.
Case Study: Studios switching to Sewtalent magnetic hoops have reported a marked reduction in embroidery defects, especially when working with challenging materials. The result? Fewer ruined pieces, less wasted time, and a lot more embroidery joy.
Pro Tip: Always ensure your stabilizer is fully within the hoop area. Pairing a robust stabilizer with a magnetic hoop like Sewtalent’s is a recipe for crisp, consistent results.
6. Connection Method Comparison
With so many ways to link your computer and embroidery machine, how do you choose? Let’s break down USB, wireless, and software-based solutions—so you can pick the best fit for your workflow, budget, and creative ambitions.
6.1 Speed and Reliability Analysis
When deadlines loom, every second counts. Here’s how the main connection methods stack up:
| Criteria | USB | Wireless | Software-Based |
|---|---|---|---|
| Speed | Fastest (direct transfer) | Moderate (network-dependent) | Variable (software/network) |
| Reliability | High (no network issues) | Moderate (Wi-Fi stability) | Moderate (software bugs possible) |
| Accessories | USB drives/cables | Wi-Fi-enabled machine, app | Software licenses, adapters |
| Best For | Legacy machines, large files | Convenience, cloud sync | Advanced editing, multi-machine |
USB: The gold standard for reliability and speed, especially for large files or mission-critical projects. No network hiccups, no app crashes—just plug and go.
Wireless: Great for convenience and app-based workflows, but speed and reliability depend on your Wi-Fi. Perfect for quick transfers and cloud-based design management.
Software-Based: Ideal for advanced users who need batch processing, multi-machine coordination, or deep customization. The trade-off? You’re at the mercy of both software stability and network conditions.
Key Trends:
- The best embroidery machine for high-volume environments often retains USB reliability.
- Wireless is gaining ground in high-end machines, thanks to seamless app integration.
- Software tools like Hatch and EmbroideryConnect bridge the gap, offering both flexibility and power.
6.2 Accessory Requirements and Costs
What do you actually need to get started? Here’s a quick breakdown:
| Method | Essential Accessories | Cost Considerations |
|---|---|---|
| USB | USB flash drive, USB cable | Low—most machines include cables |
| Wireless | Wi-Fi SD card (e.g., FlashAir), built-in Wi-Fi, or wireless adapter | Moderate—FlashAir cards and adapters are extra purchases |
| Software-Based | Specialized software (Hatch, PE-DESIGN), EmbroideryConnect device, adapters | Higher—software licenses and hardware add up |
Cost-Effective Alternatives:
- For older machines, USB drives are the most budget-friendly.
- FlashAir SD cards let you add wireless to machines with SD slots for a modest investment.
- EmbroideryConnect devices are pricier but pay off in multi-machine studios with their time-saving wireless transfers.
Bottom Line: Choose based on your current setup, volume of work, and how much you value convenience versus upfront investment.
No matter which connection method you choose, understanding the trade-offs empowers you to build a workflow that’s as creative—and efficient—as you are.
7. Multi-Machine Network Setups
As your embroidery business grows, so does the complexity of keeping multiple machines humming in harmony. Whether you’re running a boutique studio with a handful of machines or managing a bustling production floor, setting up a reliable network for multi-machine connectivity is crucial. Let’s break down the wired and wireless solutions that make large-scale digital embroidery not just possible, but powerfully efficient.
7.1 Wired Serial and Ethernet Solutions
Wired connections have long been the backbone of industrial embroidery networks, prized for their reliability and speed. But as with any classic, there are quirks and modern twists to consider.
Serial Port Solutions
To connect multiple embroidery machines—especially legacy models like Tajima—serial ports are often your starting point. Here’s what you need to know:
- Hardware Requirements: For setups with more than four machines, you’ll need PCI expansion cards or Comtrol devices to provide enough serial ports. Tajima machines require proprietary cables in specific lengths (25', 50', 75', or 100'), designed with unique pin layouts to ensure stable communication.
- Software Licensing: Wilcom software allows you to control up to four machines without extra licenses. If you’re scaling up (think 8–16 machines), be prepared to purchase additional licenses to unlock full network management.
- Setup Process: 1. Connect each machine to your central computer or hub using the appropriate serial cables. 2. Configure your embroidery software (like Wilcom) to recognize and communicate with all attached machines. 3. Use machine-specific commands (such as Tajima’s “3/4 SET”) to enable file acceptance over the serial connection.
| Component | Details |
|---|---|
| Serial Cables | Tajima-specific or standard RS232/null-modem |
| Serial Ports | PCI cards or Comtrol devices for expansion |
| Licensing | Wilcom: 4 machines free, more require licenses |
Limitations and Modern Workarounds
- RS-232 Limitations: Traditional RS-232 serial connections are limited by cable length (Tajima recommends a maximum of 50' for non-shielded cables), and each additional machine adds complexity.
- Modern Alternatives: Many studios are migrating to Ethernet-based solutions or adding network adapters to legacy machines, reducing cable clutter and boosting scalability.
Pro Tip: If you’re running a smaller shop (1–4 machines), serial setups remain cost-effective and straightforward. Multi head embroidery machine setups excel in medium-large operations, consider networked or wireless options for greater flexibility.
7.2 Scalable Wireless Systems
Ready to cut the cord? Wireless networking is rapidly becoming the go-to for embroidery businesses aiming for scalability, flexibility, and less time spent untangling cables.
EmbroideryConnect (Wilcom)
- Components:
- One EmbroideryConnect device per machine (plugs into the USB-C port).
- A dedicated PC running EmbroideryHub software acts as the network’s brain.
- Workflow:
- Push Method: Send designs directly from EmbroideryHub to any connected machine.
- Pull Method: Operators use barcode scanners to request specific designs from a queue—no more guessing which file goes where.
- Compatibility:
- Works with standard WiFi routers (ensure support for 802.11n/g protocols).
- No need for shared folders or complex file mapping.
EO Net 2 (Embroidery Office)
- Components:
- Ethernet-based Machine Terminals are installed on each embroidery machine.
- A central server PC runs Embroidery Office to coordinate transfers.
- Scalability:
- Supports up to 255 machines via standard Ethernet or WLAN networks—ideal for enterprise setups.
- Features:
- Optional wireless devices for even greater flexibility.
- Barcode readers for automated, error-free design loading.
| Solution | Max Machines | Key Features |
|---|---|---|
| EmbroideryConnect | Unlimited* | Push/pull design management, barcode integration |
| EO Net 2 | 255 | Ethernet/WLAN support, multi-brand compatibility |
*Actual capacity depends on your network infrastructure and software licensing.
Implementation Recommendations
1. Small-Scale (1–4 Machines): Stick with serial ports and standard software licensing for simplicity.
2. Medium-Scale (5–16 Machines): EmbroideryConnect with a dedicated EmbroideryHub PC and extra Wilcom licenses offers streamlined management.
3. Large-Scale (17+ Machines): EO Net 2 shines with its 255-machine capacity and robust Ethernet/WLAN support.
4. Tajima Machines: Always use proprietary cables or approved adapters to avoid frustrating connectivity issues.
Router Setup and Security
Whether you’re going wired or wireless, your router is mission control. For wireless, make sure your router supports the necessary protocols and provides a stable connection. As shown in video guides, configuring your router often involves switching to 2.4GHz, entering network credentials, and confirming connectivity—steps that, once mastered, make expanding your network a breeze.
Curiosity Gap: Ever wondered what it’s like to manage 50+ embroidery machines from a single computer, each one loading designs with a simple barcode scan? With the right network setup, that’s not just possible—it’s the new industry standard.
8. Conclusion: Streamlining Your Digital Embroidery Workflow
Connecting your embroidery machine to a computer—whether by USB, wireless, or advanced software—unlocks a world of creative and operational possibilities. The right setup depends on your studio’s size, machine models, and production needs. For maximum efficiency, pair your digital transfer solutions with stable fabric mounting, such as Sewtalent magnetic hoops. This combination minimizes errors, boosts productivity, and lets your creativity shine. Ready to optimize your workflow? Start with a connection audit and see where you can save time, reduce errors, and elevate your embroidery game.
9. FAQ: Embroidery Machine Connectivity
9.1 Q: Why is my embroidery machine not recognized by the computer after connecting via USB?
A: Check that your USB cable is securely connected, the machine is powered on, and the correct drivers are installed. If issues persist, try a different cable or port, and consult your machine’s manual for specific troubleshooting steps.
9.2 Q: What is the maximum USB flash drive size my embroidery machine can support?
A: Many older machines have a 2GB or 4GB limit for USB drives, while newer models may handle 8GB or more. Always format your drive to FAT32 for best compatibility.
9.3 Q: Is WPA3 WiFi security supported for wireless transfers?
A: Most embroidery machines and wireless adapters currently support WPA2 security. Check your machine and adapter documentation for the latest compatibility information.
9.4 Q: Can I transfer designs between different brands of embroidery machines using the same software?
A: Many embroidery software solutions support exporting to multiple file formats (.PES, .JEF, .DST, etc.). However, always confirm that your design is saved in the native format required by your specific machine to avoid compatibility issues.
9.5 Q: What should I do if my design file isn’t showing up on my machine after transfer?
A: Ensure the file is in the correct format and not zipped. Double-check that the design fits within your machine’s maximum embroidery area and that the USB drive or wireless transfer completed successfully.