1. Introduction
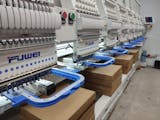
Computerized embroidery machines have sparked a revolution in textile design, seamlessly blending digital technology with the timeless art of needlework. No longer confined to the slow, painstaking rhythms of hand embroidery, today’s machines empower creators—whether hobbyists, studio owners, or commercial producers—to bring intricate patterns, logos, and custom designs to life with remarkable speed and precision.
In this guide, we’ll explore the core features that set modern embroidery machines apart, compare leading brands and models, and dive into the creative and practical possibilities these tools unlock. From understanding hoop sizes and built-in designs to evaluating connectivity, speed, and reliability, you’ll discover how technology is democratizing embroidery—making it more accessible, efficient, and inspiring than ever before. Ready to transform your creative process? Let’s unravel the threads of innovation together.
Table of Contents
- 1. Introduction
- 2. Understanding Computerized Embroidery Machine Fundamentals
- 3. Comparing Brands and Models: Making Smart Purchase Decisions
- 4. Best Machines for Specific Applications: From Hobbyists to Professionals
- 5. Mastering Operation and Maintenance Techniques
- 6. Creative Applications: Personalization and Project Ideas
- 7. Evaluating Cost-Effectiveness and Business Scaling
- 8. Conclusion
- 9. FAQs
2. Understanding Computerized Embroidery Machine Fundamentals
Computerized embroidery machines are marvels of modern engineering, designed to automate and elevate the art of embroidery through digital precision and mechanical ingenuity. But how do these machines work, and what features should you look for as you embark on your embroidery journey?
2.1 Core Architecture and Working Principles
At the heart of every computerized embroidery machine lies a sophisticated blend of mechanical and electronic systems. The architecture typically consists of three primary components: the machine system, the transmission system, and the electric control system.
- Coordinate-Based Stitching: Designs are mapped out using X and Y coordinates, allowing the machine to position the fabric with mathematical precision. The pantograph—a movable frame—glides the fabric under a stationary needle head, following the digital blueprint of your chosen pattern.
- Lock-Stitch System: The stitching mechanism relies on the classic lock-stitch, using a top thread and a bobbin thread underneath. As the needle penetrates the fabric, the bobbin thread loops with the top thread, locking each stitch securely in place and ensuring durability on both the front and back of your garment.
- Multi-Axis Movement: The magic happens through synchronized X, Y, and Z axis controls. Stepping motors—often powered by advanced servo or inverter systems—drive the pantograph’s movement, while electromagnetic brakes provide pinpoint accuracy for starts and stops. The Z-axis manages the needle’s up-and-down motion, orchestrated by a microcomputer that converts design data into real-time mechanical action.
- Transmission & Control: Top-tier machines often utilize servo electromechanical systems for smooth, adjustable speed and precision. Electromagnetic brakes ensure the pantograph stops exactly where it should, even at high speeds or during intricate designs.
- User Interface: Modern machines feature intuitive touchscreen displays, allowing users to select designs, adjust settings, and monitor progress—all with a tap or swipe. This digital command center is where creativity meets control.
In short, computerized embroidery machines operate like a symphony—each component playing its part to deliver flawless, repeatable results, whether you’re stitching a single monogram or hundreds of branded uniforms.
2.2 Essential Functionalities: Hoops, Designs, and Connectivity
What truly sets computerized embroidery machines apart are their programmable features and creative flexibility. Let’s break down the essentials:
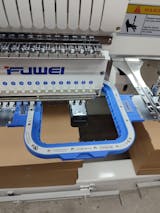
- Hoop Systems & Sizes: The hoop is more than just a fabric holder—it’s the foundation for stitch accuracy. Machines offer a variety of hoop sizes, from compact 4x4" frames for small logos to expansive 10x6.3" (and beyond) for large, detailed artwork. As highlighted in both Good Housekeeping reviews and YouTube tutorials, beginners often find themselves quickly outgrowing smaller hoops. Investing in a machine with a larger hoop size (such as 5x7" or more) opens up a world of creative possibilities and saves time by reducing the need to reposition fabric mid-project.
- Built-In Designs and Editing: Most machines come loaded with a library of built-in patterns and fonts—sometimes hundreds of them. But the real power is in customization. With onboard editing tools, you can resize, reposition, rotate, and even combine designs directly on the machine’s screen. Want to add text or personalize a gift? It’s all at your fingertips.
- Design Import & Software Compatibility: Need something truly unique? Import custom designs via USB, or, with advanced models like the Brother SE2000, upload patterns wirelessly from your computer or smartphone. Many machines support a wide range of file formats and work seamlessly with popular digitizing software (such as Embrilliance, Hatch, or Wilcom DecoStudio), letting you convert vector graphics into stunning stitch patterns.
- Automatic Features for Efficiency: Say goodbye to tedious manual tasks. Modern machines offer automatic needle threading, thread trimming, color changes, and tension adjustments. Some even feature real-time camera positioning or LED pointers for perfect design placement.
- Connectivity Options: Wireless integration is becoming the new standard. The Brother SE2000, for example, allows you to send designs directly from your device, browse thousands of built-in patterns, and even digitize SVG files for embroidery—all without ever touching a USB stick.
- Speed and Memory: With stitch speeds reaching up to 1,200 stitches per minute, these machines can tackle both quick jobs and large orders with ease. Generous onboard memory means you can store multiple projects and switch between them effortlessly.
In essence, computerized embroidery machines are not just tools—they’re creative partners, offering the precision, speed, and versatility to bring your boldest ideas to life. Whether you’re a beginner eager to personalize your first tote bag or a seasoned pro managing a bustling studio, understanding these core features will set you up for embroidery success.
3. Comparing Brands and Models: Making Smart Purchase Decisions
Choosing the right embroidery machine can feel like navigating a maze of brands, features, and price tags. But fear not—let’s break down the landscape so you can make an informed, confident decision that matches your needs and ambitions.
3.1 Home vs. Commercial Machines: Price and Performance Breakdown
The embroidery machine market is divided into three main price tiers, each catering to different users:
| Tier | Price Range | Best For | Key Features |
|---|---|---|---|
| Entry-Level | $250–$600 | Beginners, hobbyists | Basic functionality, smaller hoops (4x4"), limited built-in designs |
| Mid-Range | $600–$3,000 | Small businesses, advanced hobbyists | Larger hoops (5x7" or more), more designs, some automation, better speed |
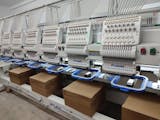
| Commercial | $3,000–$16,000+ | High-volume, professional studios | Multi-needle, high speed, advanced automation, large embroidery areas, robust build |
Popular Models by Segment:
- Brother SE600: A favorite among beginners, this single-needle machine offers a 4x4" embroidery area, 80 built-in designs, and user-friendly controls. It’s affordable and great for learning the basics, though the small hoop can quickly feel limiting for ambitious projects.
- Brother SE2000 & SE1900: Stepping up, these models feature a 5x7" embroidery field, hundreds of built-in designs, wireless connectivity (SE2000), and intuitive touchscreens. They strike a balance between price and creative flexibility—ideal for growing crafters and small businesses.
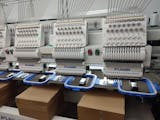
- Janome MB-7: A prosumer workhorse, the MB-7 boasts seven needles for multi-color designs, a spacious embroidery area, and independent bobbin winding. It’s built for efficiency and larger projects, making it a smart choice for Etsy sellers or boutique studios.
- Ricoma EM-1010: Designed for commercial use, this single-head, multi-needle machine offers blazing speeds (up to 1,200 stitches per minute), a 7-inch touchscreen, and robust construction. Ricoma’s lineup scales up for even higher-volume operations.
What the Pros Say: YouTube testimonials and expert reviews consistently emphasize the importance of matching your machine to your workflow. If you’re running a business, investing in a commercial-grade model pays off in speed, reliability, and support—while hobbyists may find all they need in a well-equipped mid-range machine.
3.2 Critical Selection Factors: Embroidery Area, Speed, and Reliability
When comparing machines, focus on the features that will impact your daily work and long-term satisfaction:
- Embroidery Area (Hoop Size): The size of your hoop dictates the maximum design you can create in one go. Entry-level machines typically offer 4x4" frames, while mid-range and professional models expand to 5x7", 6.7x7.9", or even 10x6.3". Larger hoops mean fewer fabric repositions and more creative freedom.
- Stitch Speed: Budget machines operate at 400–600 stitches per minute (SPM), while professional models can reach 1,000–1,500 SPM. But remember, automation features—like automatic thread trimming, needle threading, and color changes—can be just as important for efficiency as raw speed.
- Reliability & Build Quality: Commercial machines often use metal components and industrial-grade motors for continuous operation. Brands like Brother, Janome, and Ricoma have earned reputations for durability and strong support networks. Bernina’s multi-needle machines, for example, are praised for their precision and robust construction.
- Automation & Ease of Use: Look for features like automatic tension adjustment, intuitive touchscreens, and built-in tutorials. These not only speed up setup but also reduce the learning curve—especially valuable for beginners or busy studios.
- Support & Community: A great machine is only as good as the help you can get when things go wrong. Consider the availability of local dealers, online resources, and active user communities.
Pro Tip: “Get the biggest hoop you can afford”—this advice echoes across expert reviews and YouTube guides. It’s a small upgrade that unlocks a big world of creative options and saves frustration down the line.
Whether you’re just starting out or scaling up to meet commercial demand, understanding the landscape of computerized embroidery machines—and the features that matter most—will help you stitch together a smarter, more satisfying purchase. Ready to dive deeper? The next chapters will explore top picks for every user and advanced tips for getting the most from your investment.
4. Best Machines for Specific Applications: From Hobbyists to Professionals
Choosing the right embroidery machine isn’t just about specs—it’s about finding the perfect match for your creative ambitions, workspace, and business goals. Whether you’re a beginner, a home-based entrepreneur, or managing a bustling commercial studio, the market offers specialized solutions tailored to every need. Let’s break down the top recommendations, drawing on expert reviews, real-world performance, and the voices of seasoned users.
4.1 Top Picks for Home Use and Beginners
Embarking on your embroidery journey at home? The right machine can make all the difference between frustration and fun. Experts and hobbyists consistently highlight a few standout models that balance affordability, ease of use, and creative potential.
Brother SE600: If you’re just starting out or working with a tight budget, the Brother SE600 is a perennial favorite. This single-needle combo machine offers a 4"x4" embroidery area, 80 built-in designs, and an intuitive LCD screen. Beginners praise its clear instructions and drop-in bobbin system, making the learning curve feel less like a mountain and more like a gentle hill. While the 4"x4" hoop is perfect for small projects and learning the ropes, many users quickly outgrow its size—so think ahead about your future ambitions.
Brother SE1900: Ready to level up? The SE1900 is a feature-rich upgrade with a 5"x7" embroidery field, 138 built-in designs, and 11 fonts. It operates at a brisk 850 stitches per minute and adds automatic needle threading, thread trimming, and tension defaults—features that streamline your workflow and boost confidence. Good Housekeeping testers consistently recommend this model for its exceptional value and professional-level results, all at a manageable price point.
Baby Lock Altair 2: For the tech-savvy embroiderer, the Baby Lock Altair 2 is a dream machine. It boasts a massive 9.5"x14" embroidery workspace and Bluetooth integration, allowing you to wirelessly upload custom designs via the IQ Intuition Positioning App. With 534 built-in designs and four different hoops included, it’s a powerhouse for those who crave both creative freedom and digital convenience. Automatic thread cutting and tie-off features round out the package, making it as efficient as it is innovative.
Pro Tips from the Field:
- Think Big (or Bigger): Many beginners wish they’d started with a larger hoop size. A 5"x7" field opens up more design possibilities and saves you from the hassle of splitting and realigning designs.
- Prioritize Support: Choose a machine backed by strong customer service and an active user community. The learning curve is much smoother when you have help at your fingertips.
- Connectivity Counts: Wireless design upload and intuitive touchscreens are more than just bells and whistles—they make the creative process seamless and enjoyable.
Whether you’re monogramming towels or personalizing denim jackets, these machines are your ticket to a world of creative possibilities, right from your kitchen table or craft corner.
4.2 Business-Ready Solutions: Startup to Commercial Scaling
Stepping into the business side of embroidery? Efficiency, reliability, and scalability become your new best friends. Here are the machines that experts and successful entrepreneurs trust to keep production running smoothly.
Janome MB-7: Tailored for home-based businesses and boutique studios, the Janome MB-7 is a multi-needle marvel. With seven needles, you can thread multiple colors and breeze through complex, multi-color designs without constant thread changes. Its spacious embroidery area (up to 9.4"x7.9") and independent bobbin winder let you prep for the next project while the current one stitches away. Reviewers love the large LCD screen and the suite of included accessories—making it a smart investment for Etsy sellers and small-batch producers.
Meistergram Pro1508: When your business is ready for high-volume production, the Meistergram Pro1508 steps up to the plate. This commercial powerhouse features eight heads operating at 850 stitches per minute, with a generous 350mm x 450mm sewing field and 2,000,000 stitches storage capacity. Its advanced features—like a 9-inch LCD color monitor and built-in noise reduction—make it ideal for mid-level production environments. Just note: its size and complexity may be overkill for smaller setups, but for those aiming to scale, it’s a game-changer.
Business Insights from the Pros:
- Multi-Needle = Multi-Tasking: Multi-needle machines dramatically cut production time and reduce manual thread changes, letting you focus on growing your business, not babysitting your equipment.
- Support and Training Matter: Commercial machines often come with on-site training and robust tech support—critical when every minute of downtime affects your bottom line.
- Plan for Growth: Modular machines that let you add more heads or units as your business expands offer flexibility without the upfront commitment of a massive multi-head system.
From startup hustlers to seasoned production managers, these machines are engineered to keep your business humming—so you can spend less time troubleshooting and more time creating (and selling) your signature designs.
5. Mastering Operation and Maintenance Techniques
Owning a computerized embroidery machine is like having a high-performance car: exhilarating when everything runs smoothly, but requiring skill, care, and a bit of know-how to keep it at peak performance. Let’s dive into the essential techniques and troubleshooting strategies that separate embroidery rookies from seasoned pros.
5.1 Hooping Mastery: Fabrics, Stabilizers, and Magnetic Solutions
The secret to flawless embroidery? It all starts with proper hooping and stabilization. A well-hooped fabric lays the foundation for crisp, consistent stitches—while a poor setup can unravel even the most beautiful design.
Cutaway vs. Tear-Away Stabilizers:
- Cutaway Stabilizers are your go-to for stretchy fabrics like T-shirts, hoodies, and sweatshirts. They provide long-lasting support, keeping designs stable through repeated washes.
- No-Show Mesh is a lighter, more discreet version of cutaway, perfect for thin garments where you want to avoid visible stabilizer shadows.
- Tear-Away Stabilizers are best for sturdy, non-stretch fabrics—think tote bags, shoes, or denim. They offer temporary support and can be easily removed once stitching is complete.
- Wash-Away Toppers are ideal for textured fabrics like towels, preventing stitches from sinking into the pile and ensuring your designs pop.
Magnetic Hoops: The Game-Changer
Traditional hoops rely on manual screw adjustments—a process that can be fiddly, time-consuming, and tough on your wrists. Enter magnetic hoops, like those from Sewtalent, which are revolutionizing garment embroidery. These hoops use powerful magnets to secure fabric instantly, adapting to various thicknesses without manual tweaking. The result?
- Up to 90% Time Savings: Hooping goes from a multi-minute struggle to a quick, 30-second snap—perfect for high-volume work or anyone tired of repetitive strain.
- Fabric Protection: Magnetic hoops distribute tension evenly, dramatically reducing the risk of hoop burn or distortion, especially on delicate or textured fabrics.
- Effortless Alignment: Built-in reference lines and user-friendly design make it easy to achieve perfect placement, even for complex or multi-layered projects.
Whether you’re prepping a single monogram or a hundred uniforms, mastering hooping—and upgrading your tools—can elevate your results from “homemade” to “high-end.”
5.2 Troubleshooting Essentials: Thread Breaks and Tension Control
Even the best machines have their off days. Knowing how to quickly diagnose and fix common issues keeps your creative flow (and your deadlines) on track.
The 7-Step Troubleshooting Methodology:
- Pinpoint the Problem: Pause the machine and use slow-motion playback in your digitizing software to identify where things went wrong—tight stitches, dense areas, or thick thread buildups are common culprits.
- Address Thread Breaks: Stop the machine, clear any error messages, raise the needle and presser foot, and remove tangled threads. Always backtrack 2-3 stitches before resuming to ensure seamless coverage.
- Check Needles: Bent or dull needles are a frequent source of trouble. Replace them every five projects or if you notice skipped stitches or fabric pulls. Use size 75/11 embroidery needles for most applications.
- Rethread Carefully: Ensure both upper and bobbin threads are correctly threaded through all guides and tension mechanisms. Old or poor-quality thread can cause frequent breaks—fresh, high-quality thread is your friend.
- Manage Bobbins: Insert bobbins correctly and check tension. When the bobbin runs low, follow your machine’s prompts for safe replacement—raise the presser foot and engage the needle exchange key to lock controls.
- Adjust Tension: Proper tension is the backbone of beautiful embroidery. Some machines offer auto-tension features; others require manual knob adjustments. Aim for balanced tension—no loops or puckering on either side.
- Regular Maintenance: Clean the bobbin area, replace needles, and run diagnostic tests as recommended. Many commercial machines provide step-by-step maintenance prompts and built-in tutorials.
Pro Tip: Most embroidery mishaps are user errors, not machine faults. Take your time, follow the steps, and don’t hesitate to tap into online communities or support resources for help.
By mastering these operational fundamentals, you’ll spend less time troubleshooting and more time bringing your creative visions to life.
6. Creative Applications: Personalization and Project Ideas
Computerized embroidery isn’t just about following patterns—it’s a gateway to boundless creativity, from custom apparel to home décor and beyond. Let’s explore the hottest trends, innovative techniques, and project ideas that are captivating both hobbyists and professionals.
6.1 Apparel Customization: Techniques for Professional Results
Personalizing clothing is where embroidery truly shines. Whether you’re adding a monogram to a crisp dress shirt or transforming a plain denim jacket into wearable art, the possibilities are as endless as your imagination.
Denim Jacket Embroidery: Denim offers a sturdy canvas for bold, colorful designs. With the right stabilizer (cutaway or no-show mesh) and a well-hooped setup, you can create intricate florals, statement graphics, or personalized patches that pop against the fabric’s texture.
Monogramming: Classic, timeless, and always in demand—monogramming elevates everything from shirts to tote bags. Use your machine’s built-in fonts or import custom lettering for a signature touch.
Sewtalent’s Role in Garment Projects: When it comes to garment embroidery, Sewtalent’s magnetic hoops are a standout choice. Their textured surfaces ensure even tension, preventing unsightly hoop marks and keeping your designs crisp and professional. This is especially valuable on textured or delicate fabrics, where traditional hoops may leave visible impressions or cause distortion.
Pro Tips for Apparel Embroidery:
- Always pre-test your design on a scrap of the same fabric.
- Use the largest hoop your project allows for fewer repositions and cleaner results.
- For multi-layered or thick garments, magnetic hoops offer superior stability and speed.
From personalized gifts to boutique fashion, mastering apparel embroidery opens up a world of creative and commercial opportunities.
6.2 Beyond Clothing: Home Décor and Accessory Innovations
Why stop at the closet? Computerized embroidery machines are revolutionizing home décor and accessory customization, turning everyday items into unique works of art.
Pillow and Towel Customization: Add a personal touch to pillows, towels, and linens with custom monograms, seasonal motifs, or intricate borders. For towels and other textured fabrics, a wash-away topper stabilizer keeps stitches from sinking—ensuring your designs stand out, wash after wash.
Bernina Use Cases: Bernina machines, celebrated for their precision and versatility, are frequently featured in home décor projects. Their large hoop sizes and advanced editing features make it easy to tackle everything from matching pillow sets to elaborate table runners.
Market Growth and Opportunity: The appetite for custom home textiles is surging, with the computer embroidery machine market projected to reach $2.8 billion by 2033. This growth is fueled by rising demand for personalized products, the DIY movement, and the ease of creating professional-quality results at home.
Accessory Customization: Don’t overlook the potential of bags, hats, and small accessories. With the right hoop and stabilizer, you can add logos, names, or decorative elements to everything from backpacks to makeup pouches—perfect for gifts, branding, or boutique sales.
Pro Tips for Home Décor Embroidery:
- Use wash-away stabilizers for textured or looped fabrics.
- Plan your design placement carefully—measure twice, hoop once!
- Experiment with different thread types and colors for unique effects.
With a computerized embroidery machine and a dash of inspiration, your home (and your accessory collection) becomes a canvas for endless creativity.
Ready to take your embroidery to the next level? Whether you’re personalizing a pillow, launching a home business, or scaling up commercial production, the right machine—and the right techniques—make all the difference. Dive in, experiment boldly, and let your creativity stitch new stories every day!
7. Evaluating Cost-Effectiveness and Business Scaling
When it comes to computerized embroidery machines, the conversation often pivots from creative potential to the cold, hard numbers—costs, efficiency, and the elusive return on investment (ROI). Whether you’re a solo artist or running a bustling production shop, understanding the true value of your machine and its accessories is the secret sauce for scaling your embroidery business smartly.
7.1 Accessory Impact: Pre-Wound Bobbins and Efficiency Boosters
Let’s start with the unsung heroes of embroidery: accessories. While the spotlight often shines on machines themselves, it’s the right accessories—like pre-wound bobbins and advanced hooping systems—that quietly supercharge your workflow and bottom line.
Pre-Wound Bobbins: The Time-Saving Secret
If you’ve ever found yourself pausing mid-project to wind a bobbin, you know how these tiny spools can hijack your momentum. Pre-wound bobbins are a simple upgrade with outsized impact. Instead of stopping to wind thread, you simply pop in a ready-to-go bobbin and keep stitching. As highlighted in both YouTube tutorials and expert guides, this switch can shave significant time off each project—especially in high-volume settings. Just remember: bobbin size compatibility is key, so always check your machine’s specs before stocking up.
Efficiency Boosters vs. Variety Expanders
Accessories for embroidery machines typically fall into two camps:
- Efficiency Boosters: These are your productivity powerhouses—think magnetic hooping systems, automated handling equipment, and pre-wound bobbins. For businesses aiming to scale, these tools reduce manual labor, speed up production, and minimize errors. For example, magnetic hoops like those from Sewtalent (for garment embroidery) can slash hooping time by up to 90% compared to traditional screw-based frames, while also protecting fabric from hoop burn and misalignment.
- Variety Expanders: Want to offer more than just T-shirts and towels? Variety expanders—such as cap drivers, 8-in-1 devices, and specialty hoops—let you diversify your product lineup. While they may not directly boost speed, they open doors to new markets and customer segments, making your business more resilient and adaptable.
The ROI Equation
When evaluating accessories, ask yourself: Will this tool help me complete more jobs in less time, or does it allow me to say “yes” to more types of orders? Efficiency boosters are the go-to for volume and labor savings, while variety expanders are your ticket to broader offerings and higher-value projects. Both play a crucial role in scaling your embroidery business, but the right balance depends on your unique goals and workflow.
| Fabric Type | Stabilizer Choice | Why It Works |
|---|---|---|
| Knits | Cut-away + adhesive spray | Prevents stretch distortion |
| Silk | Water-soluble film | Dissolves without residue |
| Leather | Tear-away + masking fabric | Cushions without sticking |
7.2 ROI Calculations: Outsourcing vs. Equipment Investment
Now, let’s talk numbers. Should you invest in your own embroidery machine, or is outsourcing the smarter move? The answer lies in a clear-eyed analysis of costs, capacity, and long-term vision.
Breaking Down the 5-Year Ownership Costs
According to industry research and Perplexity’s ROI frameworks, the total cost of owning a computerized embroidery machine over five years typically ranges from $3,600 to $13,800. This includes:
- Initial Machine Purchase: Entry-level to mid-range machines for small businesses often land in the $3,000–$6,000 range, while industrial-grade, multi-needle systems can exceed $10,000.
- Accessories & Consumables: Expect ongoing investments in hoops (including magnetic options), stabilizers, thread, and pre-wound bobbins. High-durability accessories like magnetic hoops may cost more upfront but pay off by lasting 40 times longer than standard options and reducing fabric waste by up to 15%.
- Maintenance & Software: Budget 5–10% of your machine’s value annually for tune-ups, part replacements, and software updates.
- Energy & Overhead: Efficient models can save hundreds in energy costs over time, especially in regions with higher utility rates.
Outsourcing: The Stitch-Based Pricing Model
Many small businesses start by outsourcing embroidery, paying per stitch or per design. While this minimizes upfront investment, costs add up quickly as order volume grows. Outsourcing also means less control over turnaround times, quality, and customization—potentially limiting your ability to scale or respond to client demands.
In-House Production: The Long-Term Advantage
Owning your own equipment transforms embroidery from a per-project expense into a scalable asset. You gain:
- Faster Turnarounds: No more waiting on third parties—rush orders and last-minute changes become manageable.
- Higher Margins: The more you produce, the lower your per-piece cost.
- Creative Control: Experiment, iterate, and deliver unique designs without external constraints.
The Bottom Line
Here’s the real kicker: For businesses with consistent or growing embroidery needs, the investment in a quality machine and the right accessories almost always pays for itself—often within the first year or two of operation. As your order volume increases, so does your ROI, especially when you factor in labor savings from efficiency boosters like magnetic hoops and pre-wound bobbins.
Pro Tip: When planning your embroidery business, don’t just focus on the machine—consider the full ecosystem of accessories and support tools. The right setup can mean the difference between a side hustle and a thriving, scalable enterprise.
8. Conclusion
Computerized embroidery machines have truly democratized the art and business of embroidery, blending technology with creativity to unlock new levels of efficiency, precision, and possibility. Whether you’re choosing your first machine or optimizing a growing studio, understanding the interplay of features, costs, and accessories is key to maximizing your investment.
From evaluating hoop sizes and accessory impact to calculating long-term ROI, the smartest embroidery entrepreneurs look beyond the sticker price and focus on total value. Embrace innovation, invest in efficiency, and let your creative vision—and your business—flourish in this exciting new era of digital embroidery.
9. FAQs
9.1 Q: What’s the difference between an embroidery machine and a sewing machine?
A: While both machines use needles and thread, an embroidery machine is designed specifically for creating decorative patterns, logos, and monograms, often using digitized designs. A sewing machine, on the other hand, is primarily for joining fabric pieces together. Many modern machines offer combination functionality, but embroidery machines excel at intricate, automated stitching.
9.2 Q: Are computerized embroidery machines beginner-friendly?
A: Yes! Many computerized embroidery machines are designed with beginners in mind, featuring intuitive touchscreens, step-by-step tutorials, and automatic threading. Brands like Brother, Bernina, and Janome offer models that balance ease of use with room to grow as your skills advance.
9.3 Q: How do I choose the right hoop size?
A: Hoop size determines the maximum area you can embroider in one go. Beginners often start with a 4x4" hoop, but many quickly outgrow it. If your budget allows, opt for a machine with a larger hoop (like 5x7" or more) to accommodate bigger designs and reduce the need for repositioning.
9.4 Q: How often should I maintain my embroidery machine?
A: Regular maintenance is crucial for smooth operation. Clean the bobbin area, replace needles every few projects, and follow your machine’s prompts for oiling or tune-ups. Commercial machines may require more frequent servicing, but most home models include built-in reminders and tutorials.
9.5 Q: What software options are available for creating embroidery designs?
A: Most embroidery machines support a range of design software, from beginner-friendly apps to advanced digitizing suites. Popular options include Embrilliance, Hatch, Wilcom DecoStudio, and brand-specific platforms like Brother’s PE-Design. Many machines allow you to upload designs via USB or even wirelessly, expanding your creative toolkit.
Ready to stitch your next masterpiece or scale your embroidery business? Dive in, experiment boldly, and let your creativity—and your investment—work for you!


