1. Introduction to Hand Sewing Fundamentals
Hand sewing is the enduring backbone of textile arts, from mending a favorite shirt to building custom garments and expressive embroidery. Even in a world of high-speed machines, a needle and thread give you creative freedom and practical self-reliance.
Whether you are patching a seam, hemming pants, or personalizing a handmade gift, core hand-sewing skills equip you for repairs and imaginative projects. This guide covers essential stitches, step-by-step threading and knot methods, smart tool choices, and troubleshooting tips so beginners can start sewing with ease and confidence.
Table of Contents
- 1. Introduction to Hand Sewing Fundamentals
- 2. Mastering Core Hand Sewing Stitches
- 3. Needle Threading and Knot Techniques Simplified
- 4. Beginner-Friendly Projects and Tutorial Resources
- 5. Essential Tools: Needles, Thread, and Accessories
- 6. Solving Common Hand Sewing Frustrations
- 7. Real-World Applications: Repairs and Garment Construction
- 8. Conclusion: Building Confidence in Hand Sewing
- 9. FAQ: Hand Sewing Essentials Answered
2. Mastering Core Hand Sewing Stitches
Hand sewing is more than moving a needle up and down. It means choosing the right stitch for the job and executing it with intention. Below are the foundational stitches every beginner should learn.
2.1 Running Stitch: The Foundation for Seams and Basting
Think of the running stitch as a dashed line that brings fabric pieces together.
How to do it step by step:
- Prepare your needle and thread; tie a secure knot at the end (single or double, see Section 3).
- Start on the wrong side so the knot stays hidden.
- Stitch forward about 1/4 inch at a time and pull the thread through, keeping a straight line.
- Adjust length: use shorter stitches (about 1/8 inch) for permanent seams and longer stitches (up to 1/2 inch) for basting.
- Secure the end by looping under the last stitch and tying a knot.
Pro tips:
- Sew from the wrong side for repairs so knots and ends stay out of sight.
- Keep tension even to prevent puckering.
- Mark the seam line with a fabric pen or chalk for accuracy.
Uses:
- Temporary seams for basting before machine sewing
- Lightweight projects and quick seams on soft fabrics
2.2 Backstitch for Strength and Slip Stitch for Invisible Finishes
Some tasks need muscle; others demand stealth. Use backstitch for durable seams and slip stitch for hidden closures.
Backstitch: the heavy lifter
- Purpose: Permanent seams and strong repairs
- How to: 1. Start with a knot from the wrong side. 2. Take one stitch forward; bring the needle up a stitch-length ahead. 3. Insert the needle back into the end of the previous stitch to lock it. 4. Continue overlapping each new stitch with the last. 5. Finish with a knot or a few back-and-forth stitches.
- Needle choice: A between needle for dense fabric or precision; a sharp for general sewing
- Tip: Even spacing maximizes strength and neatness
Slip stitch (ladder stitch): the master of disguise
- Purpose: Invisible closures on pillow openings, hems, and turned projects
- How to: 1. Fold raw edges inward. 2. Bring the needle up through one folded edge. 3. Catch a tiny bit of fabric from the opposite fold, then alternate sides. 4. Gently pull so the ladder closes and the stitches disappear. 5. Finish with a knot hidden in the fold.
- Tips: Use matching thread and moderate tension to avoid puckering; sew from the right side for a polished finish
| Stitch | Strength | Visibility | Best Use |
|---|---|---|---|
| Running | Low | Visible | Basting, lightweight seams |
| Backstitch | High | Visible | Permanent seams, embroidery |
| Slip Stitch | Moderate | Invisible | Closing openings, hems |
Troubleshooting:
- Uneven stitches: Practice on scrap fabric and guide yourself with marked lines.
- Tangling thread: Keep strands short (16–24 inches) and condition with beeswax.
3. Needle Threading and Knot Techniques Simplified
Threading and knotting seem small, but they make sewing smooth and reliable. Master these basics to keep thread where you want it, every time.
3.1 Single vs. Double Threading Methods
Single threading:
- Cut 18–24 inches of thread to reduce tangling.
- Trim the end at a 45-degree angle.
- Dampen the tip for easier threading.
- Pass through the eye and leave a 2–3 inch tail.
- Knot the long end.
Double threading:
- Cut a longer piece, fold in half, and pass both ends through the eye.
- Pull even and knot the ends together to form a doubled strand.
When to use which:
- Single thread: Most seams, delicate or lightweight fabrics, minimal bulk
- Double thread: Buttons, heavy-duty repairs, extra strength
Threading aids and tricks:
- Needle threader for small eyes
- Beeswax to stiffen and prevent tangles
- Hold a white card behind the eye for contrast
3.2 Secure Knots for Starting and Ending Stitches
Starting knot (loop and pull):
- Wrap, form a loop, pass the end through, and tighten. For double thread, knot both ends together.
Ending knot:
- Pass under the previous stitch to form a loop, pass the needle through, and tighten. Repeat for security.
Troubleshooting knot slippage:
- Use a surgeon’s knot (double wrap) on slippery or delicate fabrics.
- Consider a waste knot for extra insurance and trim later.
| Technique | Best For | Pro Tip |
|---|---|---|
| Single Thread | Most seams, light fabric | Cut at 45 degrees; dampen tip |
| Double Thread | Buttons, heavy fabric | Knot both ends together |
| Beeswax | All hand sewing | Prevents tangling, stiffens thread |
| Surgeon’s Knot | Slippery or delicate fabric | Double wrap before tightening |
4. Beginner-Friendly Projects and Tutorial Resources
Hand sewing shines when you put skills to work. These starter projects and resources help you build confidence while making useful items.
4.1 Starter Projects: Pillowcases, Pouches, and Hemming
Pillowcases: Sew two rectangles of cotton or muslin with a running stitch. Keep stitches about 1/4 inch apart for durability. For extra strength, use a backstitch along the edges. Turn inside out to finish.
Drawstring pouches: Stitch two pieces with backstitch for sturdy seams, then slip stitch the opening closed after turning right side out. Add a simple channel at the top for the drawstring.
Hemming: Use a whip stitch or blind hem stitch. Fold twice, press, and sew tiny, even stitches. Whip stitch wraps the edge for a decorative touch; blind hem nearly disappears for a polished look.
For straight hems and steady layers, holding fabric taut with an embroidery frame can improve stitch consistency.
Why these projects work: They rely on straight-line sewing and simple construction, so you can focus on even spacing and steady tension. Visual learning dominates—step-by-step photos and beginner video tutorials make them easy to follow.
Pro tips:
- Practice with contrasting thread, then switch to matching thread for final pieces.
- Mark seam lines with a fabric pen or chalk.
- Prioritize consistency over speed.
4.2 Top Free Learning Platforms and Pattern Sources
Instructables: Photo-rich guides for basic stitches and creative projects like needlebooks, clutches, and wallets. The Hand Sewing Class is ideal for visual learners.
YouTube: Channels such as Cutesy Crafts and Fashion Sewing Blog TV offer beginner-friendly videos, from fast crash courses to deep dives and troubleshooting.
Pattern libraries: Many sites provide free patterns for home decor, accessories, and wearables. Look for beginner or straight-line projects. You will also find free machine embroidery designs downloads and patterns for various projects.
If you plan decorative stitching, a magnetic embroidery hoop helps stabilize fabric for cleaner results.
Sustainability trends: Upcycling and reusable bags are popular. Try washable produce bags or a patchwork tote to save money and reduce waste while practicing stitches.
Best practices:
- Press fabric and mark lines before you sew.
- Create stitch samplers on scrap fabric.
- Use a seam ripper as needed—mistakes are part of learning.
5. Essential Tools: Needles, Thread, and Accessories
The right tools reduce snags, boost consistency, and improve your finish.
5.1 Choosing Needles and Thread for Fabric Types
| Needle Type | Characteristics | Best Uses |
|---|---|---|
| Sharps | Thin shaft, sharp point, short eye | General sewing, dressmaking, mending |
| Embroidery/Crewel | Sharp point, long eye | Embroidery, cross-stitch, thick threads |
| Betweens | Short, sharp, fine | Quilting, piecing, fine seams, appliqué |
| Glover/Leather | Triangular tip, sturdy shaft | Leather, suede, vinyl |
| Beading | Long, thin, flexible, long eye | Beading, sequins, ribbon embroidery |
Sharps are go-to for most cotton and medium-weight fabrics; choose sizes 2–4 for heavier fabrics and 5–10 for lighter ones. Embroidery needles suit thicker threads and larger eyes; betweens excel at small, even stitches.
Thread choices:
- All-purpose cotton works for most projects.
- Match thread weight to fabric: fine for silk, sturdy for denim.
- For embroidery, use floss or perle cotton for bold decorative stitches.
Needle and thread pairing:
- Embroidery needles with thicker threads
- Sharps with standard sewing thread for repairs and garment work
- Glover needles for leather and similar materials
Pro tip: Running your thread through beeswax and warming it with your fingers or a low iron reduces tangling and helps stitches glide.
5.2 Supplementary Tools: Thimbles, Beeswax, and Hoops
Thimbles protect your fingers when pushing needles through thick or tough layers. Beeswax minimizes static and knots, making stitching smoother.
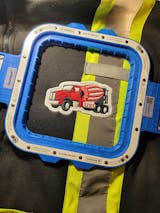
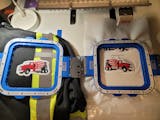
While magnetic embroidery frames are best known for stabilizing fabric during decorative stitching, they also help keep fabric taut for hand-sewn hems and detailed repairs.
Tools like magnetic hoops hold fabric evenly and reduce slippage.
Efficiency booster — Sewtalent Magnetic Hoops: For garment projects, Sewtalent’s magnetic embroidery hoops clamp fabric securely across different thicknesses and can reduce hooping time by up to 90 percent compared with traditional screw hoops. Paired with the HoopTalent station, batch processing becomes easier and more precise.
6. Solving Common Hand Sewing Frustrations
Every sewist faces tangles, stubborn knots, and unexpected puckers. Use these strategies to troubleshoot quickly.
6.1 Preventing Tangles, Knots, and Puckering
Why threads tangle: Twist from winding, mismatched needle-thread combinations, and overly long strands.
Solutions:
- Condition thread with beeswax or gently warm under a hot iron to smooth kinks.
- Keep strands to 18–24 inches.
- Occasionally spin the needle opposite the thread twist to realign fibers.
- Match needle size and type to fabric.
Knot security:
- Tie knots close to the fabric and trim excess.
- Use a surgeon’s knot on slippery or delicate materials.
- If a tangle forms, pull thread away from the fabric to avoid tightening the knot.
Puckering prevention:
- Maintain even tension—do not pull too tight.
- Choose appropriate needle and thread for the fabric.
- Pre-press seams to reduce bulk.
Did you know? Many hand sewists report puckering issues, but conditioning thread and keeping lengths short dramatically improves results.
6.2 Fabric-Specific Adaptations for Knits, Silk, and Denim
- Knits: Use a zigzag or catch stitch to allow stretch; ballpoint needles help prevent snags.
- Silk: Choose very sharp, fine needles and fine thread; keep stitches small and tension light.
- Denim: Heavy-duty needles, longer stitches, and sturdy thread handle thick layers.
Reference material comparisons to match tools and techniques to the fabric in front of you.
6.3 Efficiency Boosters: Ergonomics and Time-Saving Tools
Hand sewing should be comfortable and efficient. Use a thimble, take breaks, stretch your hands, and sew with good lighting in a supportive chair. Hoops keep fabric taut for even stitches.
For garment embroidery, magnetic hoops for embroidery machines can cut hooping time, prevent slippage on tricky fabrics like denim and towels, and support batch work with a hooping station.
Curiosity gap: What powers the most efficient embroidery workshops? Beyond skill, smart tools turn hours into minutes.
7. Real-World Applications: Repairs and Garment Construction
Hand sewing is a practical toolkit for repairs and custom garment work. With a few stitches, you can extend the life of clothing and add personal touches.
7.1 Mending Seams, Attaching Buttons, and Hemming
Seam repair with backstitch:
- Assess the fabric and seam direction; adjust tension to prevent puckers.
- Prepare a sharp or between needle and matching thread; double-thread for high-stress areas.
- Backstitch along the split with small, even stitches.
- Finish with a sturdy knot and trim.
For delicate fabrics like silk, a French seam encloses raw edges to prevent fraying and creates an invisible finish.
Button attachment:
- Stabilize the area on lightweight garments with a small scrap or interfacing.
- Use double thread for extra hold.
- Stitch through the button and fabric several times, forming a shank if the fabric is thick.
- Secure on the wrong side with a knot.
Hem finishing options:
| Method | Best For | Tools/Materials |
|---|---|---|
| Folded Hem | Lightweight cottons | Needle, thread, iron |
| Seam Binding | Stretchy knits | Hem tape, zigzag stitch |
| Blind Hem | Formal garments | Invisible thread, needle |
Troubleshooting:
- Knits benefit from darning needles and debobbling tools for runs and pilling.
- Heavy denim favors flat fell seams and sturdy thread.
The big picture: Repairing and constructing by hand supports sustainability and self-sufficiency.
7.2 Project Spotlight: From Simple Hems to Custom Accessories
Drawstring bags: Sew side seams with backstitch, add a top channel, and slip stitch the turning opening for a neat finish.
Skirt hems: Mark, double fold, press, and use a blind hem stitch for invisibility or a whip stitch for a decorative edge. Keep tension even to avoid puckers.
Custom accessories: Try a pouch, needlebook, or simple wallet to explore stitches, fabrics, and closures.
When precision matters for garments and embroidery, embroidery machine hoops improve stability and alignment. Sewtalent’s magnetic hoops hold fabric taut across thicknesses and, with the HoopTalent station for batch work, help deliver a professional finish.
Curiosity gap: Perfectly aligned, pucker-free embroidery on tricky fabrics comes from smart stabilization as much as skill.
8. Conclusion: Building Confidence in Hand Sewing
Hand sewing empowers you to repair, create, and customize with simple tools. Master core stitches, choose the right needles and thread, and use troubleshooting strategies to avoid tangles and puckers. When you are ready to elevate garment work, magnetic hoops bring added efficiency and precision. Happy sewing!
9. FAQ: Hand Sewing Essentials Answered
9.1 Q: Thread Length and Knot Security Tips?
A: Use 18–24 inches of thread to prevent tangling. Secure knots with double loops or surgeon’s knots for slippery fabrics.
9.2 Q: Needle and Fabric Pairing Guide?
A: Choose sharps for cotton, microtex for silk, and heavy-duty needles for denim.


