1. Introduction to Hat Embroidery
Hat embroidery on an embroidery machine blends creativity with precision. The curved crown, center seams, and varying fabric density make hats trickier than flat garments—but with the right prep, hooping, stitching, and finishing steps, you can achieve clean, professional results. In this guide, you’ll learn how to stabilize unstructured vs. structured caps, align designs on single- and multi-needle machines, dial in stitch settings (including 3D puff), and finish cleanly. Prefer the handmade look? We’ll also cover hand techniques, stitches, and when to choose hand vs. machine for your project goals.
Table of Contents
- 1. Introduction to Hat Embroidery
- 2. Step-by-Step Hat Embroidery Process
- 3. Hand vs. Machine Embroidery: Choosing Your Method
- 4. Design Inspiration and Free Resources
- 5. Essential Materials and Tools
- 6. Troubleshooting Common Problems
- 7. Advanced Techniques for Specialized Hats
- 8. Conclusion: Mastering Hat Embroidery
- 9. FAQ: Hat Embroidery Questions Answered
2. Step-by-Step Hat Embroidery Process
2.1 Preparation and Stabilization Techniques
- Choose the right hat:
- Hand embroidery: Use an unstructured canvas cap (no plastic/buckram in the crown). Structured fronts are near impossible to stitch by hand and can be tough on fingers.
- Machine embroidery: Structured caps often have fused buckram that acts like built-in support; unstructured caps typically need cap backing (stiff tear-away).
- Transfer and stabilize your design:
- Water‑soluble stabilizers (e.g., Sulky Stick ‘n Stitch) let you print or trace designs, stick them on the cap, and rinse clean afterward.
- Before rinsing, test your marker or printed stabilizer on scrap to ensure no ink bleed.
- For small stabilizer pieces, add a loose basting stitch around the edges so corners don’t lift while stitching.
- For single‑needle machine hats, hoop a medium tear‑away stabilizer (adhesive side up after removing the cover sheet), then place the cap onto the sticky surface, aligning centerlines.
- Hand hooping on a hat:
- Use a 3–4 inch embroidery hoop; put the inner ring inside the cap and the outer ring on top. Do not catch the hat’s inner lip in the hoop—this keeps tension even.
- Baste the stabilizer perimeter if needed, then embroider and knot thread tails securely inside. Rinse water‑soluble stabilizer thoroughly and let the hat air‑dry.
- Quick placement tips:
- Pre‑mark a straight baseline (for text) with tape or a water‑soluble marker before hooping to avoid slanted lettering.
- The center seam on the crown is your best friend for centering designs.
2.2 Machine Hooping Systems and Alignment
- Hooping systems:
- Tubular cap frames are the standard on multi‑needle machines (with driver, cap frame, and jig/station). Seat the sweatband under the plate, align the center seam to the frame’s center mark, and secure the bill.
- Hooping stations can speed consistent placement for production. For side placements on wide‑angle frames, use the back clips; they keep designs from "running downhill."
- Adhesive stabilizer method (single‑needle demo):
- Hoop adhesive tear‑away with the sticky side up.
- Use the hoop template to mark center dots and draw a centerline.
- Gently flatten the brim so the crown sits as flat as possible; secure inside flaps near the brim with painter’s tape or pins (keep pins clear of the stitch area).
- Place the cap on the adhesive, aligning the centerline. Press flat with fingers rather than stretching.
- Alignment and placement:
- Many machines provide visual guides; some include alignment grids or laser pointers to lock the vertical centerline.
- On a Brother PE 800, the touchscreen lets you resize, rotate, and nudge placement precisely. Use the trace function to ensure the needle path won’t hit pins or the brim.
- Placement from the brim:
- The tutorial above marks placement about 3/4 inch above the brim along the center seam on a single‑needle.
- As a general guideline across many machines, keep at least 1.5 inches of clearance from the brim to avoid interference with the visor or sweatband.
- Run sequence:
- Stitch bottom‑up and center‑out to minimize shifting on curved fronts.
- After stitching, cut jump stitches and remove tear‑away stabilizer cleanly from the back.
2.3 Stitching Parameters and Needle Selection
- Needle choice:
- Schmetz 90/14 topstitch needles are recommended for most cap embroidery. Change needles periodically on dense or multi‑layer designs.
- Stitch density and underlay:
- Curved side panels: reduce density to about 5–6 stitches per square millimeter.
- Crisp front text: 7–8 stitches per square millimeter looks clean and legible.
- Near the visor (within about 1.5 inches), reduce underlay roughly 15% to avoid bulk and mechanical interference.
- Speed and control:
- Avoid high‑speed stitching on caps. Slow down—especially on curved crowns—to reduce thread breaks.
- Always trace before you start to confirm clearance from pins and brim.
- Finishing:
- Secure thread ends on the interior and trim jump threads. For water‑soluble products, rinse thoroughly to clear residue from seams and crevices. Air‑dry the hat to preserve shape.
2.4 3D Puff Embroidery Techniques
- Foam and setup:
- Use 2–3 mm foam for a bold but wearable lift. Many hat makers prefer 3 mm for logos and simple shapes.
- A titanium needle handles thicker materials and extended runs well.
- Elevate the presser foot slightly (about 1.5–2 mm) so it glides over foam without damaging it.
- Step‑by‑step flow:
- Run placement/tack stitches first to define edges.
- Pause, place pre‑cut foam, and secure it with masking tape above and below the foam so it doesn’t shift.
- Resume with tight satin coverage to perforate the foam edges cleanly.
- Carefully tear away excess foam after stitching.
- Cleanup:
- Remove loose threads. A brief pass with a heat gun can help tighten thread appearance and slightly shrink any exposed foam for a cleaner finish.
3. Hand vs. Machine Embroidery: Choosing Your Method
3.1 Time Efficiency and Production Scaling
- Hand embroidery:
- Beautiful, but time‑intensive—projects can take hours or even days depending on complexity and stitch density. Labor cost per hat is high for volume.
- Machine embroidery:
- Typical hat stitch‑outs range from about 10–30 minutes to several hours per piece, depending on size and density.
- Multi‑needle machines can reach up to about 1,200 stitches per minute; single‑needle machines generally run around 400–500 stitches per minute.
- For batch orders, automation and repeatability make machine embroidery the practical choice.
- Practical takeaway:
- One‑offs and heirloom gifts? Hand embroidery shines.
- Uniforms, team caps, or brand runs? Machine wins on speed and scalability.
3.2 Aesthetic and Technical Differences
- Hand embroidery:
- Distinctive texture and an artistic, “bloomed” look. Uses fluffy embroidery floss (commonly cotton/rayon/silk). You can adjust on the fly and create one‑of‑a‑kind pieces with French knots, satin stitches, and textured fills.
- Machine embroidery:
- Pinpoint precision and consistency across multiples. Digitized designs stitch cleanly, especially for small text and logos. The trade‑off: some uniformity that may lack the human nuance of handwork.
- Hat‑specific nuance:
- Curvature and seams challenge both methods. Machines maintain tension and alignment well with proper hooping and bottom‑up, center‑out sequencing. Hand stitchers should stick to unstructured canvas caps and use small hoops plus water‑soluble stabilizers for best control.
3.3 Equipment and Investment Comparison
- Upfront needs:
- Hand embroidery: Minimal tools—small hoop, needles, scissors, water‑soluble stabilizer or transfer method, and floss.
- Machine embroidery: computer embroidery machine (single- or multi-needle), digitized files/software, cap frame/driver (for multi-needle), stabilizers, and threads.
- Cost vs. scale:
- Hand: Lowest startup cost, but limited throughput and higher labor per unit.
- Machine: Higher initial investment, but low per‑unit cost and easy scaling for bulk orders.
- Hooping solutions (garments):
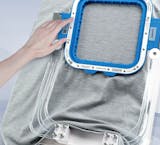
- For garment embroidery hooping (e.g., tees, hoodies, sweatshirts), magnetic hoops speed setup dramatically. MaggieFrame offers magnetic hoops in 17+ sizes, designed for garment hooping with strong holding power, wide machine compatibility, and quick, user‑friendly operation. Users often report substantial time savings and fewer defects in high‑volume garment work.
- Important: MaggieFrame is for garment embroidery hooping only—not for cap/hat hooping.
- Decision guide:
- Choose hand embroidery for artistic, small‑batch, or sentimental projects with flexible timelines.
- Choose machine embroidery when you need repeatable quality, faster turnarounds, and commercial viability.
Ready to commit? Define your aesthetic, volume, and budget—then pick the path that aligns with your goals.
4. Design Inspiration and Free Resources
4.1 Popular Motifs and Color Palettes
If you’re stuck at “what should I stitch on this cap?” start with motifs that love curved surfaces and read well from a distance.
- Floral and nature themes
- Wildflowers and daisies are perennial winners on “dad caps.” They’re beginner‑friendly and look great with simple stitches like satin for petals and french knots for centers. A classic three‑color palette for daisies: white petals, yellow centers, green foliage.
- Try these DMC pairings from a popular wildflower cap tutorial: petals in 554/550 (light/dark purple), leaves and stems in 907, 905, 472 (greens), accents in 718/957/956 (pinks/corals), and dark accents in 791 (blue‑violet). For a minimalist daisy, DMC 3865 (petals) + 725 (center) works beautifully.
- Landscapes and celestial elements (moon over mountains) also sit nicely on the crown. Tonal stitching—threads close to the hat color—gives a sophisticated, low‑contrast look that blends into the cap.
- Animals and character motifs
- Cat and dog icons are playful and personable. Keep details bold and avoid hair‑fine lines—hats get handled and worn hard.
- Typography that actually stitches clean
- Prioritize high contrast: light thread on dark caps (and vice versa) reads fastest at a glance.
- Favor wider lettering over skinny fonts to allow proper underlay and stable registration.
- For legibility on hats, follow these baseline design minimums:
Detail thickness: at least 0.05 inches (about 4 pt)
Letter height: about 0.3 inches for uppercase and 0.25 inches for lowercase - Consider the hat profile: a 2‑inch‑tall wordmark can overwhelm a low‑profile cap, while small, low‑profile lettering can look undersized on high‑profile foam truckers.
- Technique ideas: flat embroidery for logos and text; chain stitch for vintage script; 3D puff for bold, raised elements on structured fronts.
Tip: Pre‑mark a straight baseline with tape or a water‑soluble marker before hooping (especially for text). This prevents the “slanted slogan” surprise on a curved crown.
4.2 Free Pattern Libraries and Templates
Add great designs without reinventing the wheel. These resources offer free machine embroidery designs, tutorials, and formats that work for most machines.
- Ready‑to‑stitch freebies
- CrewelGhoul: a free PDF pack of 7 hat‑friendly designs (cat, dog, moon + mountain landscape, daisy, floral arrangement, potted cactus, monstera leaf). The site also shows how to hoop a hat for hand embroidery, stabilize, and rinse away water‑soluble products.
- LoveCrafts, EmbroideryDesigns.com, Ann The Gran: libraries with free and paid designs, commonly available in ART, DST, PES and other standard machine formats. Many listings include stitch counts and size notes to help you match your cap area.
- Transfer and setup aids
- Printable, water‑soluble stabilizers (e.g., Sulky Stick ’n Stitch/Fabri‑Solvy) let you print the pattern, stick it to the cap, stitch, then rinse away. Always test markers/inks on scrap to avoid bleed.
- Video walk‑throughs help with placement and hooping:
- Hand embroidery: Use a 3–4" hoop inside the cap, DMC 6‑strand floss, and a few large basting stitches around small stabilizer pieces so corners don’t lift.
- Single‑needle machine (e.g., PE900/PE800): Hoop adhesive tear‑away, mark the centerline with the hoop template, gently flatten the brim, pin the crown to the stabilizer, rotate the design on screen, and run a trace to avoid pins/sweatband. Many creators place designs roughly 3/4"–1" above the brim on single‑needle setups (confirm with your machine’s trace before stitching).
Action step: Download a design in your machine’s format (ART/DST/PES), print a paper template (or the stabilizer sheet), pin/tape for a dry run, and trace on your machine. When alignment looks right, stitch bottom‑up and center‑out for best registration on curved fronts.
5. Essential Materials and Tools
5.1 Hat Types and Fabric Considerations
- Structured vs. unstructured
- Structured caps: The front panels contain buckram (often laminated). That built‑in support makes detailed embroidery easier and helps designs hold shape over time.
- Unstructured “dad caps”: Soft and flexible, they put your art front and center but need careful stabilization and tension control to prevent puckering.
- Popular styles and how they behave
- OPF (foam truckers): High‑profile foam fronts are forgiving for 3D puff; just keep density reasonable—foam can only take so many needle penetrations.
- Varsity/collegiate: Unstructured, low profile; expect more fabric movement. Backing choice and hooping quality matter a lot.
- Fabric choices
- Cotton is the go‑to for crisp results thanks to dimensional stability and breathability. It can wrinkle or fade with heavy washing; cotton/poly blends can improve durability.
- Other materials you’ll encounter: polyester, wool, nylon, acrylic, leather, corduroy, suede. Each demands appropriate needles, tension, and stabilizers to avoid distortion.
5.2 Stabilizers and Hooping Solutions
- Match stabilizer to construction
- Tear‑away: The workhorse for structured caps (buckram already adds support). Medium tear‑away is common.
- Cut‑away: Best for stretchy/unstructured hats (beanies, bucket hats) and dense designs that need permanent support.
- Specialized options: E‑Zee Cap Tear Away is sized for cap frames and designed to remove cleanly. Fusible sheets like Fuse ’N Stick add firmness without spray mess; sticky stabilizers help control shifty fabrics and bucket hats. Toppers (wash‑away or heat‑away) keep stitches from sinking into napped/knit caps.
- Application tactics that hold up
- Stack support for flimsy caps: two layers of tear‑away or a cut‑away base with a topper for texture control.
- Efficient sheet use: one 8.5" x 12" adhesive sheet can be cut into strips—place 1" x 4" strips around the hoop opening (sticky side up) to secure multiple hats.
- For mesh/side placements on wide‑angle frames, use back clips; skipping them makes designs drift “downhill.”
- Cap hooping workflow (multi‑needle)
- On a cap station, align the center seam to the frame’s center mark. Many operators bias the cap seam slightly left before tightening because the strap tension nudges it back to center.
- Ensure the strap “catches” right at the base of the brim; fold the sweatband back so you don’t stitch over it. Select the cap hoop size in your machine, run the center/trace function, and start at slow speed. Steaming structured caps can soften the center seam for flatter stitchouts.
- Single‑needle workaround
- Hoop adhesive tear‑away, draw the centerline with the template, gently flatten the brim, then pin the crown onto the stabilizer. Rotate the design on screen and trace to avoid pins/sweatband.
- Hooping stations and magnetic systems (for garments)
- Hooping stations improve repeatability in production. For garment embroidery hooping (tees, hoodies, sweatshirts), magnetic systems like MaggieFrame offer strong holding power, broad machine compatibility, and can cut garment hooping time dramatically—up to about 90% versus manual screw hoops. Important: MaggieFrame is for garment embroidery hooping only—not for cap/hat hooping.
5.3 Threads, Needles and Accessories
- Thread weights and types
- 40‑weight polyester: Industry standard for hats—durable, vivid, and resilient around seams.
- 60‑weight: Use when you need finer detail or small lettering (respect the minimum letter heights above).
- Needles
- Common sizes: 75/11 or 90/14, selected by fabric density and thread weight.
- For structured fronts and dense runs, larger or titanium needles improve penetration and longevity. For 3D puff, a titanium needle handles foam and frequent penetrations well.
- Handy extras
- Leather thimble or grip aids for hand stitching through tough seams.
- Water‑soluble markers or printable water‑soluble stabilizers for accurate transfers.
- For single‑needle hats, fine pins/tape plus your machine’s trace function help you place designs precisely and avoid hardware strikes.
6. Troubleshooting Common Problems
6.1 Solving Puckering and Tension Issues
- Stabilizer‑to‑fabric pairing
- Think inversely: lighter fabrics need heavier support; heavier fabrics often do well with lighter stabilization. Structured caps typically like tear‑away; unstructured or stretchy hats may need stacked tear‑away or a cut‑away base. PolyMesh can help on curved, stress‑prone areas.
- Speed and tension
- Slow down to about 500 stitches per minute on hats. Reduced speed lowers pull and helps the crown keep its shape.
- Start from your embroidery sewing machine's recommended tensions, then fine‑tune upper and bobbin if you see distortion, looping, or breaks.
- Fabric‑specific tactics
- Slippery nylon/satin: hoop (don’t float) when possible, and use a topper to stop stitches from sinking. Fresh, sharp needles prevent snagging.
- Multi‑layer items (e.g., windbreaker‑style hats): secure all layers together in the hoop; cut‑away on the back can stabilize the stack.
- Underlay and density
- For hats, excessive density magnifies pull. Use proper underlay and avoid overpacking fills near the brim/center seam to minimize stress on curved panels.
6.2 Fixing Misalignment and Hooping Errors
- Verify before you stitch
- Use LED/laser pointers, center/trace functions, and on‑screen nudging to confirm the needle path won’t touch pins, the brim, or the sweatband.
- On multi‑needle cap setups, ensure the frame locks firmly into the driver and that you’ve selected the correct cap hoop size in the machine menu.
- Respect hat curvature
- Curved crowns distort circles and thin borders. Compensate at the digitizing stage with appropriate pull compensation and edge‑run underlay. Keep elements bold and avoid hairline details.
- Sequence matters
- Stitch bottom‑up and center‑out. This works with the cap’s structure, reduces buckling, and keeps registration tight across the center seam.
- Manage the sweatband and brim
- Fold the sweatband back so you don’t stitch through it (comfort and function suffer otherwise). On single‑needle hats, many makers find realistic placement lands roughly 3/4"–1" above the brim; always run a trace to verify clearance on your machine.
- When the seam fights back
- Center seams can trigger needle deflection and breaks. A slightly larger or tougher needle, solid backing (heavy tear‑away on structured caps), and a slower speed help you cross the seam cleanly.
- Document what works
- Keep notes on stabilizer stacks, tensions, needle sizes, and speeds for each hat style. Next time, you’ll skip guesswork and go straight to proven settings.
Ready to rescue a tricky cap? Start with a slow test stitch on scrap or a similar hat panel using the same stabilizer stack, verify with a full trace, and then commit to the real piece.
7. Advanced Techniques for Specialized Hats
When you move beyond flat fronts into mesh, sides, and multi‑color or 3D designs, small setup tweaks make a big difference. The keys: stabilize smartly, program strategic pauses, slow the machine where needed, and sequence bottom‑up, center‑out so curved panels won’t fight you.
7.1 Trucker Hat and Mesh Cap Strategies
- Stabilize the unstable
- Mesh fronts and sides need extra support. Use a topper (water‑soluble film) so stitches don’t sink, and pair it with backing: for mesh sides, a cut‑away is often the safest base; for standard twill sides, one piece of cap backing works. If the side backing won’t stay put during hooping, tack it to the cap frame with a strip of double‑sided tape (Embroidery Legacy).
- On wide‑angle cap frames, always use the back clip for side placements; skipping it makes designs "run downhill" (Embroidery Legacy).
- Program "frameout" pauses
- For trucker/mesh, program the machine to pause mid‑run. During the pause, adjust mesh tension if needed and re‑lay water‑soluble film topping so coverage stays even across open areas (Perplexity).
- Choose the right speed and needle
- Run mesh in the 600–800 SPM range to protect stitch quality and reduce thread breaks (Perplexity).
- A sharp‑point needle helps penetrate mesh cleanly without snagging (Perplexity).
- Hooping and alignment discipline
- Multi‑needle cap driver: align the center seam to the frame’s center mark, seat the sweatband under the plate, and secure the bill. Select the correct cap hoop in your machine menu, then trace before you stitch (BAI machine tutorials).
- For side placements, hoop the backing on top of the frame so it actually supports the stitch area (Embroidery Legacy).
- Bottom‑up, center‑out sequencing is non‑negotiable on curves (Embroidery Legacy).
- When to slow down further
- Complex side logos or sections near the visor benefit from the lower end of that 600–800 SPM range (Perplexity). If you still see distortion, drop speed and verify backing contact.
Pro tip: Binder clips can hold the cap edges on some frames during hooping; remove them before stitching (Big Brando).
7.2 Complex Multi-Color and 3D Designs
- Plan your color sequence
- Map out color order to minimize jumps and keep edges sharp. With variegated thread, plan sequencing so the color changes enhance the design rather than pool in one area (Perplexity). This works well on dad hats, truckers, structured caps—even beanies for flat work (Perplexity).
- 3D puff—dial in foam and foot height
- Foam thickness by hat/type (Perplexity + prior sections):
- Baseball cap front panels: ~2 mm closed‑cell foam.
- Side logos: ~1.5 mm foam for cleaner compression.
- Dad hats (unstructured): ~3 mm to compensate for fabric drape.
- Beanies: avoid foam over ~1 mm to prevent distortion.
- Elevate the presser foot about 1.5–2 mm so it glides over foam without chewing it up (Perplexity; prior section).
- A titanium needle stands up to dense runs and foam perforation (Perplexity; prior section).
- Execute the puff sequence cleanly
- Stitch placement/tack, pause to place pre‑cut foam, secure with masking tape above/below the foam, then run dense satin coverage to perforate edges. Tear away excess foam, trim jumps, and use a brief, careful heat‑gun pass to tidy the finish (prior section; Big Brando).
- Structured and fitted specifics
- Use cap hoops designed for structured/fitted hats; test tension—when you grab both bill and frame, there should be no movement before you run (Perplexity).
- Wide‑angle frames cover front and sides; use back clips for sides and center‑out sequencing to keep registration tight over the center seam (Embroidery Legacy).
- Single‑needle workaround (flatbed)
- Hoop adhesive tear‑away, mark center, gently flatten the brim, and pin the crown to the stabilizer. Rotate/nudge on screen and trace to ensure the needle won’t hit pins or the brim (PE800/PE900 tutorials).
8. Conclusion: Mastering Hat Embroidery
Consistent hat embroidery comes down to three habits: stabilize appropriately for the hat style, hoop with precision (and trace every time), and optimize stitches—speed, density, underlay, and, for puff, foam plus foot height. Use bottom‑up, center‑out sequencing to work with the crown’s curve, not against it. As you grow comfortable, layer in advanced moves—frameout pauses on mesh, variegated color planning, and tailored foam choices—to push quality and creativity across every hat style.
9. FAQ: Hat Embroidery Questions Answered
9.1 Q: How far above the brim should I place my design?
A: A general minimum is about 1.5 inches of clearance. On single‑needle flatbeds, many creators successfully place designs roughly 3/4–1 inch above the brim by flattening the brim, pinning carefully, and running a full trace to verify clearance before stitching (single‑needle tutorials).
9.2 Q: How do I reduce thread breaks on hats?
A: Slow down—around 500 SPM is a solid troubleshooting pace for caps (prior section). Use the right needle (90/14 or a titanium option for dense/seamed areas), verify smooth threading, and match backing to construction (tear‑away for structured fronts; cut‑away/stacked support for unstructured or mesh). Reduce density and underlay near the visor to minimize stress (prior sections; Embroidery Legacy).
9.3 Q: What’s the best way to remove water‑soluble stabilizer residue?
A: Rinse thoroughly with warm water, rubbing gently to clear residue from seams and tiny crevices. Let the hat air‑dry to preserve its shape (CrewelGhoul).
9.4 Q: Should I pre‑wash hats before embroidering?
A: If you plan to machine‑wash the finished hat, pre‑wash it the same way first to eliminate shrinkage and surprises (Swoodson Says).
9.5 Q: How do I handle thick center seams without distortion?
A: Digitize and stitch bottom‑up, center‑out; slow the machine; choose a tougher or slightly larger needle; and give the front enough support (cap backing on unstructured, solid tear‑away on structured). Fold the sweatband back so you don’t stitch through it, and always trace to confirm needle path over the seam (prior sections; Embroidery Legacy).


