1. Introduction
Embroidery frame stands have quietly revolutionized the world of machine embroidery. No longer must you endure aching hands or hunch over your work for hours—today’s stands are engineered to boost comfort, efficiency, and creative freedom. Whether you’re a studio owner, a professional embroiderer, or a passionate hobbyist, the right stand can transform your stitching experience. In this ultimate guide, we’ll explore how embroidery frame stands reduce fatigue, improve posture, and unlock new levels of precision. We’ll cover essential selection criteria, compare popular stand types, and dive into ergonomic solutions and performance reviews to help you make an informed choice for your unique workflow.
Table of Contents
- 1. Introduction
- 2. Key Selection Criteria for Optimal Embroidery Frame Stands
- 3. Comprehensive Comparison of Embroidery Stand Types
- 4. Performance Reviews and Value Assessment of Top Stands
- 5. Ergonomic Solutions for Pain-Free Machine Embroidery
- 6. User Experiences: Brand Reliability in Professional Settings
- 7. Industrial Setup and Maintenance Protocols
- 8. Conclusion
- 9. FAQ: Embroidery Frame Stand Essentials
2. Key Selection Criteria for Optimal Embroidery Frame Stands
Selecting the perfect embroidery frame stand isn’t just about picking the first model you see online. The right choice can mean the difference between hours of enjoyable, pain-free stitching and a session cut short by fatigue. Let’s break down the most important factors—ergonomics, adjustability, and material quality—that should guide your decision.
2.1 Ergonomic Design and Fatigue Reduction
Ever notice how your hands and arms ache after a long embroidery session? That’s where an ergonomic stand makes all the difference. According to Perplexity research, using a well-designed stand can reduce hand and forearm fatigue by 24–32%. The secret lies in posture: stands help you maintain a neutral spine and keep your elbows at a comfortable 90–100° angle. This setup minimizes strain injuries and allows you to stitch for longer periods without discomfort.
But there’s more. By supporting the weight of your hoop or frame, a stand takes the load off your shoulders and back. No more balancing heavy projects or contorting your body to reach tricky spots. The result? Less pain, fewer breaks, and a smoother workflow—so you can focus on the artistry, not the aches.
2.2 Adjustability and Project-Specific Compatibility
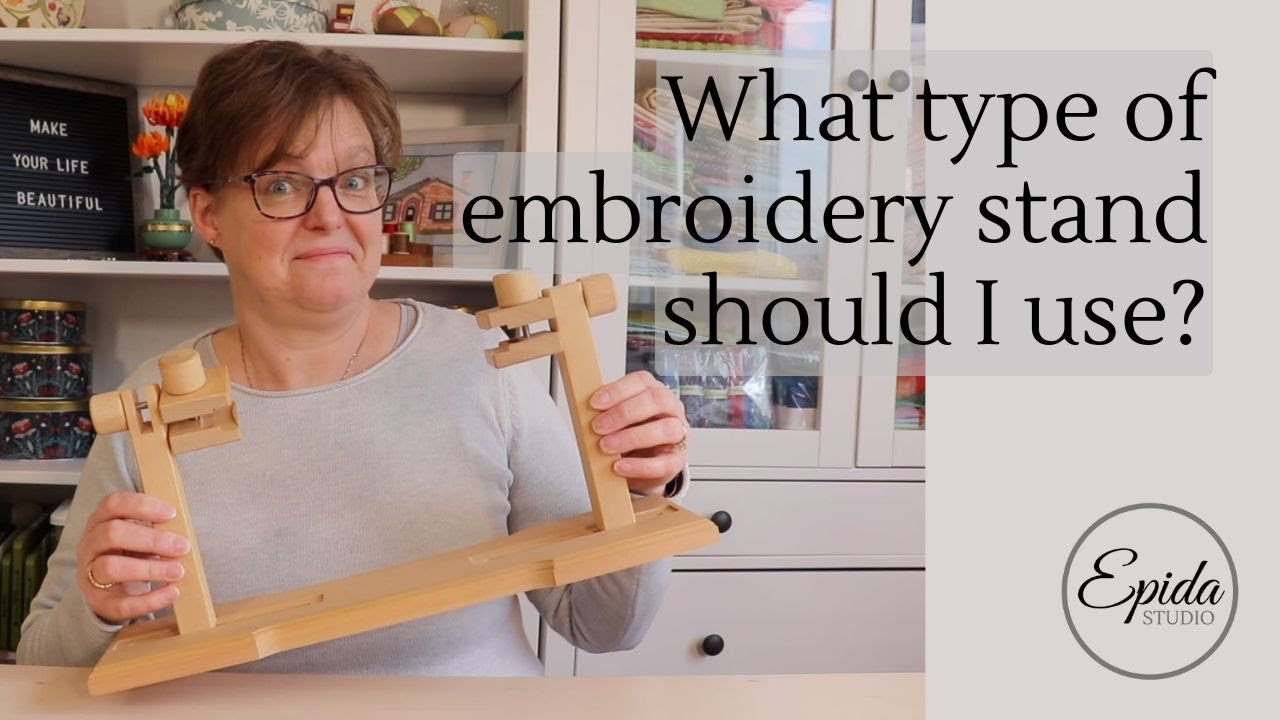
One size does not fit all in embroidery. The best stands offer a range of adjustments to suit your project and workspace. For small or medium pieces—think cross-stitch, beading, or tufting—table or lap stands like the Nurge Adjustable Table Stand shine. They’re portable, easy to store, and perfect for desk work or casual stitching on the couch.
Tackling a large or complex design? Floor stands and frame stands with scroll rods (such as the Millennium Frame) are your go-to. These prevent fabric distortion and let you work section by section, keeping your canvas taut and your stitches precise. Some stands, like those handmade in Ukraine, feature modular designs that can be disassembled for storage or quick project switching—a game changer for multi-taskers.
2.3 Material Durability and Clamping Mechanisms
Durability matters—nobody wants a stand that wobbles, cracks, or loses grip mid-project. High-quality stands are typically crafted from sturdy natural wood (like those from Nurge) or robust plastic (seen in many Ukrainian-made models). The choice of material impacts not just longevity but also stability and appearance, especially when considering embroidery machine repair near me.
When it comes to securing your hoop, pay close attention to the clamping mechanism. Look for stands with clamps that hold hoops tightly without obstructing your stitching area. Some advanced models now feature magnetic solutions that replace traditional screw-based tension systems. These magnetic stands offer even pressure, quick setup, and eliminate the risk of fabric distortion—making them a smart choice for both beginners and professionals seeking efficiency and precision.
3. Comprehensive Comparison of Embroidery Stand Types
The world of embroidery frame stands is wonderfully diverse, each type catering to different needs, spaces, and project sizes. Let’s compare the most popular options so you can find your perfect match.
3.1 Tabletop vs Floor Stands: Stability and Space Requirements
Tabletop stands are compact, freestanding units designed for small to medium projects. They’re affordable, easy to store, and ideal for beginners or anyone working in tight spaces. Their main advantage? Portability—you can move them from room to room or set up wherever inspiration strikes. However, they may lack the rock-solid stability needed for larger or heavier projects and can be less effective on uneven surfaces.
On the other hand, floor stands bring robust stability and ergonomic flexibility. With adjustable height ranges (for example, Brother’s stands can be set between 27.5″ and 41.5″), they allow you to customize your workspace for optimal comfort. Floor stands are compatible with scroll frames and multi-needle machines, making them a favorite for ambitious, large-scale designs. The trade-off? They’re bulkier, take up more space, and tend to be pricier.
Vibration control is another key consideration for machine embroidery. Floor stands with secure bases and locking wheels help minimize movement, ensuring your stitches stay crisp and your machine runs smoothly.
3.2 Lap Stands and Clamp Systems for Flexible Workspaces
If you crave flexibility and comfort, lap stands are a fantastic choice. Weighing as little as 1.5–3 lbs, these lightweight stands are perfect for stitching in a seated position—on the couch, at a guild meeting, or even on the go. Their adjustable height and width make them adaptable to various projects and body types.
Clamp systems, which attach directly to tables or work surfaces, offer customizable positioning and save valuable workspace. They’re especially handy for embroiderers who switch between projects or need to reposition their work frequently. A standout case study from Ukraine found that using a modular lap stand nearly doubled embroidery speed, thanks to the ability to use both hands and maintain consistent tension.
3.3 Magnetic Frame Innovations: Revolutionizing Garment Embroidery
The latest leap in embroidery technology? Magnetic frame systems. These stands use powerful magnets—like the N50-grade magnets found in Sewtalent’s products—to securely hold fabric without the need for screws or manual tightening. What does this mean for you?
- No Fabric Distortion: Magnetic force distributes pressure evenly, preventing hoop marks and ensuring your designs stay flawless.
- Quick Setup: Snap your fabric in place in seconds, saving valuable time—especially in high-volume production environments.
- Compatibility: Magnetic frames work seamlessly with scroll frames and Q-snaps, offering versatility for different project types.
Sewtalent’s magnetic frames go a step further by incorporating PPSU engineering plastic for industrial-grade durability. This combination of strength and precision makes them a top choice for garment embroidery and best embroidery machine for hats applications.
Ready to take your embroidery to the next level? In the next sections, we’ll dive deeper into performance reviews, ergonomic solutions, and user experiences—so stay tuned and discover which stand will become your new stitching sidekick!
4. Performance Reviews and Value Assessment of Top Stands
When it comes to embroidery frame stands, performance isn’t just a buzzword—it’s the difference between a satisfying, efficient workflow and a frustrating, fatiguing experience. Let’s dig into the real-world durability, material innovation, and long-term value of today’s leading stands, with a spotlight on magnetic frame technology and Sewtalent’s standout engineering.
4.1 Durability and Material Comparisons
Not all stands are created equal. The choice of material—wood, plastic, or magnetic composite—directly shapes a stand’s lifespan, stability, and everyday usability.
Wooden stands have a classic, robust feel and are favored for their stability and traditional appeal. Brands like Nurge use high-quality wood that holds up well for desk-bound, long-term projects. However, wood can be heavy and, if not well-finished, prone to splintering or wear over time. Maintenance is key to prevent these issues.
Plastic stands offer a lightweight, portable alternative, ideal for travel or casual projects. ABS plastic models, such as those found in Ukrainian lap stand combos, resist warping and are easy to store. The trade-off? They tend to be less durable than wood or magnetic frames, especially under the demands of frequent machine embroidery.
Magnetic frame systems represent the cutting edge in both material science and user convenience. Here’s where Sewtalent’s innovation shines. By using BASF Ultrason P3010 PPSU engineering plastic—a material more commonly found in aircraft interiors and automotive parts—Sewtalent frames deliver industrial-grade durability. This plastic outperforms ordinary plastics by over 40 times in impact and angle pressure tests, meaning your stand will withstand years of heavy use without cracking or warping.
But durability isn’t just about the frame; it’s also about the clamping mechanism. Traditional screw-based hoops can loosen or break with repeated tightening. Magnetic frames, by contrast, use N50-grade rare-earth magnets for a powerful, even grip. According to impact and angle pressure tests, Sewtalent magnetic frames last 40 times longer than competitors, maintaining their clamping force and structural integrity even after hundreds of thousands of uses.
| Material | Pros | Cons | Best For |
|---|---|---|---|
| Wood | Robust, stable, classic look | Heavy, can splinter | Long-term, desk-based projects |
| Plastic | Lightweight, portable, warp-resistant | Less durable | Travel, casual use |
| Magnetic | Lightweight, ultra-durable, quick to adjust | Higher cost, niche availability | Professional, frequent use |
If you’re seeking a stand that can keep up with industrial-level demands—or simply want a tool that won’t let you down—Sewtalent’s magnetic frames set a new standard for longevity and reliability.
4.2 Cost Efficiency and ROI Analysis
Let’s talk numbers—not just the price tag, but the true cost of ownership over time. When evaluating embroidery machine prices and frame stands as investments, the smartest choices are those that pay you back in saved time, reduced waste, and fewer replacements.
Traditional screw-based hoops may seem budget-friendly at first glance, but the hidden costs add up quickly. Manual adjustments are time-consuming, especially when switching between projects or fabrics of varying thickness. Frequent tightening can lead to wear, breakage, and ultimately, the need for replacements.
Sewtalent’s magnetic embroidery frames flip this equation on its head. By harnessing powerful magnets and precision engineering, they reduce the average hooping time for garments from 3 minutes to just 30 seconds—a staggering 90% time savings. For businesses or high-volume creators, this translates to hundreds of hours reclaimed each year. Imagine what you could create with that extra time!
But the savings don’t stop there. The even tension provided by magnetic clamping slashes embroidery defect rates by 15%, meaning less wasted fabric and fewer ruined projects. And thanks to the ultra-durable PPSU construction, Sewtalent frames last at least 40 times longer than ordinary plastic hoops—so you’ll spend far less on replacements.
| Stand Type | Initial Cost | Hooping Time per Garment | Defect Rate Reduction | Lifespan vs. Standard Hoops | Best For |
|---|---|---|---|---|---|
| Traditional Screw Hoop | Low | ~3 minutes | — | Standard | Occasional, low-volume use |
| Sewtalent Magnetic Frame | Moderate | ~30 seconds | 15% | 40x longer | High-volume, professional use |
For embroidery studios and production environments, the return on investment with Sewtalent is clear: faster output, fewer mistakes, and a frame that stands the test of time. The initial price is quickly offset by labor savings and reduced waste—often recouped within half a year, then continuing to deliver value long after.
5. Ergonomic Solutions for Pain-Free Machine Embroidery
Let’s face it: embroidery should be a joy, not a pain in the neck—or back, or hips. Yet studies show that 57% of machine operators experience back pain, and 62% struggle with hip discomfort due to poor posture and repetitive strain. The culprit? Non-ergonomic setups that force you to hold frames by hand or constantly adjust tension.
Ergonomic stands are the antidote. By securing your embroidery frame and freeing both hands, they transform your workflow and your well-being.
Key Ergonomic Features:
- Adjustable Height and Inclination: The best stands—like Amandine Bouet’s ergonomic models or modular Ukrainian lap stands—let you fine-tune height and angle to fit your body. This keeps your spine neutral, elbows relaxed, and shoulders at ease, whether you’re sitting at a desk or cross-legged on the floor.
- Hands-Free Operation: No more white-knuckling your hoop for hours. Stands with secure clips or magnetic systems hold your fabric steady, allowing you to stitch with both hands and maintain consistent tension. Case in point: Ukrainian lap stands with plastic clips and wooden handles have doubled embroidery speed for users while reducing shoulder fatigue.
- Magnetic Hoop Systems: Magnetic hoops, such as those featuring N50-grade magnets, deliver even tension without the repetitive twisting of screws. These magnetic stands offer even pressure, quick setup, making them the best beginner embroidery machine companion. This not only prevents fabric distortion and hoop burn but also minimizes the micro-movements that lead to strain injuries over time.
Design Considerations:
- Anthropometric Compatibility: The most effective stands are designed with real bodies in mind—seat height, backrest, and base width should all align with your proportions for maximum comfort.
- Material and Portability: Sturdy wood or metal ensures stability, while dismountable or modular designs make transport and storage a breeze.
The Big Picture: The shift toward magnetic and hands-free solutions isn’t just a trend—it’s a revolution in embroidery ergonomics. By reducing manual adjustments and supporting healthy posture, these stands help you stitch longer, faster, and pain-free. Imagine completing a marathon session without a single twinge—now that’s creative freedom.
6. User Experiences: Brand Reliability in Professional Settings
What do real embroiderers say when the dust settles and the stitches are counted? Let’s dive into hands-on feedback from the field, comparing classic brands like Nurge and generic models with the industrial-grade performance of Sewtalent in production environments.
6.1 Nurge and Generic Stands: Field-Tested Feedback
Nurge Adjustable Table Stand
Users consistently praise Nurge for its secure clamp and high-quality wood construction, which provide solid stability for hand embroidery and small projects. The rotating knucklehead joint is a standout feature, allowing partial access to the hoop’s backside for thread management without full removal. Its compact footprint is a blessing for desk-based work.
But it’s not all smooth stitching. Some users note limited adjustability—the height range (20–47 cm) is practical but lacks horizontal movement. The narrow clamp can occasionally dislodge hoops if bumped, and flipping the hoop for full backside access requires removal from the stand, which can interrupt workflow. For larger or heavier hoops, stability issues may arise, making Nurge less suitable for machine embroidery or big canvases.
Generic Adjustable Stands
Budget models, often found at big-box retailers, offer 360° adjustability and strong clamps for hoops up to 40 cm in diameter. They’re a solid entry point for casual hand embroidery, reducing hand fatigue and providing flexible positioning. However, users frequently report wobbling with heavier hoops or machine use, and the material quality lags behind premium brands. For machine embroidery, these stands may not deliver the robustness or longevity needed for daily production.
6.2 Sewtalent in Production Environments
Step into a high-volume embroidery studio, and you’ll see why Sewtalent is earning global acclaim. Testimonials from professionals highlight several game-changing advantages:
- Exceptional Fabric Grip Strength: Sewtalent’s magnetic system, powered by N50-grade magnets, holds even the thickest garments firmly in place. This ensures flawless tension—no more puckering, slippage, or misalignment, even on challenging materials like towels or layered denim.
- Reduced Thread Breaks and Defects: By maintaining even tension and preventing fabric distortion, Sewtalent frames dramatically cut down on thread breaks and embroidery defects. The result? Cleaner designs, less wasted material, and happier clients.
- Industrial-Grade Durability: Thanks to PPSU engineering plastic and rigorous impact testing, Sewtalent frames withstand the rigors of daily production—lasting 40 times longer than ordinary hoops. Operators report years of reliable use with minimal maintenance.
- User-Friendly Design: Features like multiple reference lines for precise fabric placement and compatibility with a wide range of garment sizes make Sewtalent a favorite among both seasoned professionals and ambitious newcomers.
Real-World Endorsements:
From the United States to Europe and beyond, users rave about Sewtalent’s ease of use and rock-solid performance. One American operator shared, “I use this magnetic frame every day on my ten-needle machine—it’s a total game changer!” Spanish users echo the sentiment, noting the “excellent tension” and “strong magnets” that make even the toughest jobs a breeze.
The Bottom Line:
While classic brands like Nurge excel in hand embroidery and smaller projects, and generic stands offer a budget-friendly entry point, Sewtalent stands out as the go-to choice for professional, high-volume garment embroidery. For multi-needle embroidery machine operators and high-volume creators, its blend of powerful grip, ergonomic design, and unmatched durability delivers peace of mind—and a serious edge in production efficiency.
Ready to transform your embroidery workflow? The next time you reach for a stand, remember: your hands, your back, and your creative spirit deserve the best.
7. Industrial Setup and Maintenance Protocols
industrial embroidery machines demand specialized setup—it's about building a workflow that's rock-solid, safe, and sustainable. Whether you're mounting a multi-needle beast like a Brother PR1055X or fine-tuning a Tajima SAI for marathon production, the right setup and maintenance routines are your secret weapons for flawless results. Let's break down the essentials, from installation to troubleshooting, so your stand works as hard as you do.
7.1 Machine-Specific Installation Guide
Setting up an embroidery frame stand for industrial machines demands precision and patience. Here's a step-by-step roadmap, blending best practices from Perplexity research and real-world assembly wisdom:
1. Base Preparation: Begin by attaching the main bolt to your stand's base, aligning it with the insert nut on the long timber or steel support. Use an Allen key to secure the primary structure—no wobbles allowed! For Brother machines, loosen the thumb screws on the frame holder, slide the frame into the positioning slots, and re-tighten to lock everything in place.
2. Component Attachment: For stands like Meistergram, secure the cap station bracket with hex screws, torquing them with a 4mm wrench. Add rubber pads, flat washers, and lock washers to dampen vibration and boost stability. On adjustable-height stands (think Babylock PRNSTD2), set your desired height—anywhere from 27.5" to 41.5"—in 2" increments for ergonomic bliss.
3. Safety Checks: Before powering up, make sure the frame doesn't obstruct the presser foot or any moving machine parts. Double-check that the "start/stop" button is red-lit—this simple habit can prevent accidental operation and costly mishaps.
4. Compatibility Matters: Industrial machines demand stands that can shoulder serious weight—sometimes 80 lbs or more. Always verify that your stand's mounting points align with your machine's base and anchor points. For reference, here's a quick compatibility snapshot:
| Machine Brand | Compatible Stand Models | Key Features |
|---|---|---|
| Babylock | PRNSTD2, Hoop Tech | PR-Series, height adjustable, locking casters |
| Brother | PRNSTD2, Adjustable Stands | Fits PR655/PR1055, up to 80 lbs, ergonomic adjustability |
| Tajima SAI | Hoop Tech | All-steel, leveling feet, multi-needle support |
| Janome | Hoop Tech | Powder-coated, USA-made, industrial-grade |
5. Technical Touches: Industrial stands often feature modular storage—think shelves and hanging brackets for hoops and threads. Locking casters are a must for mobility and vibration control.
6. Pre-Operation Calibration: Power up your machine and run a calibration sequence with no hoop attached. Use a 75/11 ballpoint needle to minimize thread breakage. Guide thread through all tension discs and levers, and opt for pre-wound bobbins for consistent tension.
By following these steps, you'll create a setup that's not just functional, but built for the rigors of industrial embroidery.
7.2 Troubleshooting Stability and Alignment Issues
Even the best stands can run into hiccups—wobbling frames, shifting fabric, or alignment headaches. Here's how to keep your workflow smooth and your output pristine:
Routine Maintenance:
- Lubrication: Add 1–2 drops of sewing machine oil to hinges and moving parts every 8–40 hours, depending on use intensity.
- Component Checks: Inspect screws, bearings, and brackets weekly for rust, misalignment, or wear. Replace any suspect parts promptly.
- Cleaning: Use compressed air daily to clear lint from sliding surfaces. Wipe down external areas weekly with a lint-free cloth.
- Bolt Tightening: Tighten all bolts quarterly (or more often in high-volume shops) with an Allen or socket wrench.
- Caster Care: Lock wheels during operation and lubricate as needed for easy movement.
| Task | Frequency | Tools/Methods |
|---|---|---|
| Lubricate joints | 8–40 hours | Sewing machine oil, dropper |
| Inspect screws/bearings | Weekly | Visual, torque wrench |
| Clean sliding surfaces | Daily | Compressed air, soft brush |
| Tighten bolts | Quarterly | Allen/socket wrench |
Troubleshooting Common Issues:
- Wobbling or Vibration:
- Cause: Loose bolts, uneven floors, or misaligned legs.
- Fix: Re-tighten all bolts, ensure legs are locked, and check for level surfaces.
- Caster Slippage:
- Cause: Unlocked wheels or debris in tracks.
- Fix: Always lock wheels during embroidery and clean casters regularly.
- Fabric Shifting or Misalignment:
- Stabilizer Selection: Use cutaway stabilizers for dense or stretchy fabrics.
- Hooping Technique: Fabric should be taut and centered. For slippery materials, wrap the inner hoop with cotton twill tape or use a magnetic hoop.
- Machine Movement: If the stand shifts during stitching, anchor it or use anti-vibration pads.
Preventive Strategies:
- Before assembly, check all parts for damage or missing pieces.
- After maintenance, run a test stitch on scrap fabric to ensure everything's in sync.
- If persistent issues arise, consult a technician—don't let chronic wobble or misalignment become your new normal.
By integrating these protocols, you'll minimize downtime, extend your equipment's lifespan, and keep every stitch on target.
8. Conclusion
Embroidery frame stands are more than just accessories—they’re the backbone of a pain-free, efficient, and precise embroidery workflow. The right stand not only supports healthy posture and reduces fatigue but also adapts to your project size, space, and machine setup. Durable materials and thoughtful design translate to long-term value, saving you both time and money. As you select your next stand, weigh your workspace, ergonomic needs, and the demands of your embroidery projects. Invest wisely, and your stand will become a trusted partner in every stitch.
9. FAQ: Embroidery Frame Stand Essentials
9.1 Q: Can one stand handle different hoop sizes?
A: Many modern stands are designed with adjustability in mind, allowing you to use a variety of hoop sizes—from small 3" rounds to larger 12" frames. Look for stands with sliding arms, interchangeable clamps, or adjustable tracks. Some models, like those reviewed in top blogs and YouTube videos, can easily accommodate both round and rectangular frames, making them versatile for multi-project workflows.
9.2 Q: How can I prevent fabric slippage while using a stand?
A: To keep your fabric taut, ensure the hoop or frame is properly tightened before you start stitching. For slippery or delicate fabrics, wrapping the inner ring with cotton twill tape can increase grip. Magnetic hoops offer even pressure and are especially effective at preventing slippage and distortion. Always double-check that your fabric is centered and stabilized before beginning your embroidery.
9.3 Q: Table vs. floor stands—which is better for small spaces?
A: Table stands are compact, lightweight, and easy to store, making them ideal for small workspaces or portable setups. They’re perfect for casual stitching at a desk or kitchen table. Floor stands, while offering greater stability and adjustability, require more room but excel for larger projects or dedicated studios. If space is tight, a table or lap stand is often the best choice.
9.4 Q: Do I need a stand for small embroidery projects?
A: For very small hoops or quick projects, holding the hoop by hand can be comfortable and convenient. However, as your projects grow in size or complexity, a stand becomes invaluable for reducing hand fatigue and improving stitching precision. Many embroiderers find that once they start using a stand, they rarely go back—especially for longer sessions.
9.5 Q: What maintenance does my embroidery stand require?
A: Regular maintenance is key for smooth operation. Lubricate joints every 8–40 hours of use, inspect and tighten bolts quarterly, and clean sliding parts daily. For stands with casters, lock wheels during use and keep them free of debris. These simple routines will keep your stand sturdy and reliable for years to come.
Still curious? Share your experiences with embroidery machines for sale or troubleshooting stories in the comments below—your insights might just help a fellow stitcher find their perfect setup!


