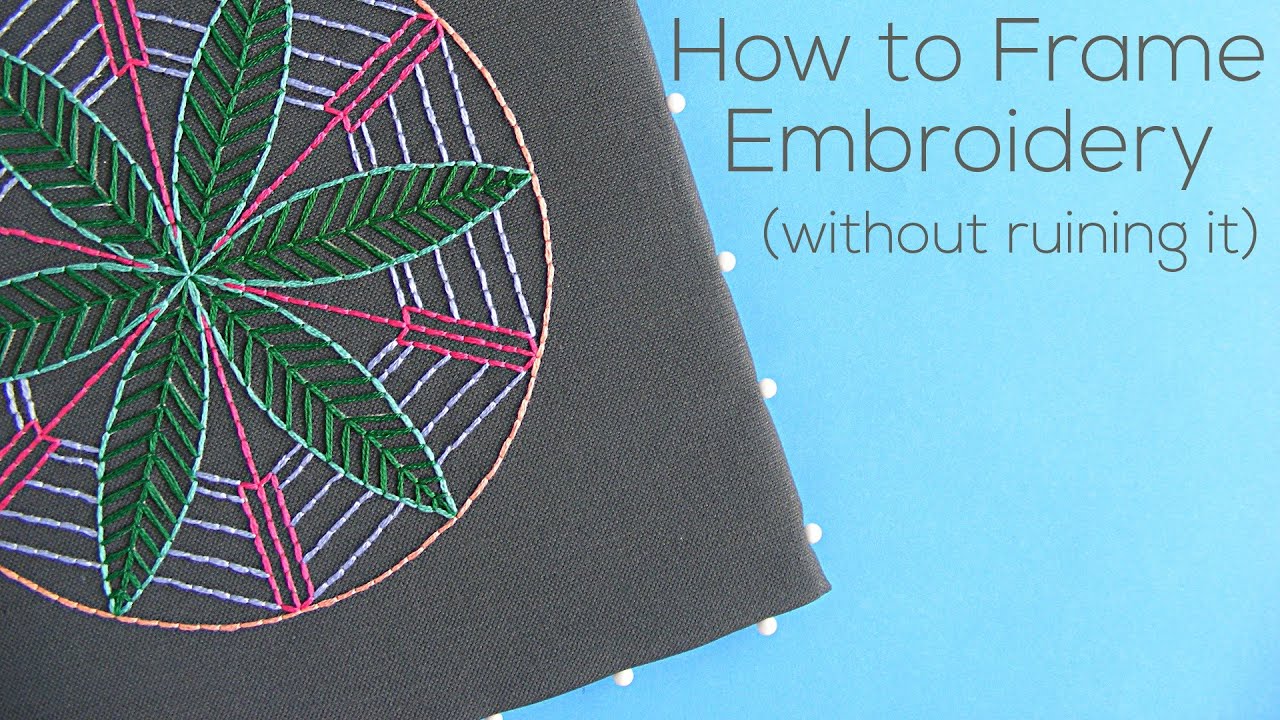
1. Introduction: Liberating Your Embroidery from Traditional Hoops
In the evolving world of embroidery, more creators are stepping away from the familiar circle of traditional hoops, seeking new ways to display their art. Why the shift? Modern embroiderers crave flexibility—methods that honor unique shapes, protect delicate stitches, and offer gallery-worthy style without sacrificing the integrity of their work. But hoopless framing brings its own challenges: managing fabric tension, adapting to irregular or oversized pieces, and ensuring long-term preservation. In this guide, we’ll explore proven alternatives like foam board mounting, shadow boxes for dimensional work, tension-control techniques, and innovative framing systems. The goal? To help you achieve flawless, hoop-free displays that balance aesthetics with the careful preservation your embroidery deserves.
Table of Contents
- 1. Introduction: Liberating Your Embroidery from Traditional Hoops
- 2. 5 Proven Methods for Framing Without Hoops
- 3. Mastering Tension Without Hoops
- 4. Glue-Free Mounting for Delicate Work
- 5. Framing Irregular Shapes & Oversized Pieces
- 6. Preservation Strategies for Long-Term Display
- 7. Conclusion: Choosing Your Perfect Hoopless Method
- 8. FAQ: Hoopless Framing Essentials
2. 5 Proven Methods for Framing Without Hoops
When it comes to showcasing embroidery, the hoop is no longer your only option. Whether you’re working with rectangular, oversized, or highly textured pieces, these five methods let your creativity—and your stitches—shine.
2.1 Foam Board Mounting: Wrinkle-Free Simplicity
If you’re after a crisp, wrinkle-free finish for rectangular embroidery, foam board mounting is a go-to solution. Here’s how to do it:
1. Cut the Foam Board Choose acid-free foam board and cut it slightly larger than your embroidery, leaving at least 3 inches around each edge. (Tip: Cut the board about 1/8 inch smaller than your frame to account for fabric thickness, as advised by Shiny Happy World.)
2. Center and Pin Lay your embroidery face up on the board, centering it by eye or with a ruler. Secure the fabric with flathead pins at the center of each side, adjusting as needed to avoid distortion.
3. Stretch and Secure Working from the center out, gently stretch the fabric over the board and add pins along each edge. Aim for snugness—tight enough to smooth wrinkles, but not so tight that you warp your design.
4. Fold and Tuck Fold excess fabric neatly to the back. No need for glue or tape; just tuck corners behind the board.
5. Frame It Slip the pinned board into your frame. For dimensional stitches, skip the glass to avoid flattening your work.
Pros:
- Fast, glue-free, and beginner-friendly - Ideal for rectangular or square pieces - No permanent alteration—fabric remains intact
Cons:
- Offers little dust protection - Tension may loosen over time if not secured well
Pro Tip: Always use acid-free materials to prevent yellowing and fabric degradation. For heirloom pieces, this is non-negotiable.
2.2 Shadow Boxes for 3D & Textured Embroidery
When your work features bullion knots, beads, or lush dimensional stitches, a shadow box is your embroidery’s best friend. Here’s why:
Depth Matters: Shadow boxes provide a deep recess—at least ½ inch—between the glass and your fabric, ensuring raised stitches remain pristine and uncrushed.
How-To:
1. Select a Deep Frame or Add Spacers Choose a shadow box or use spacers within a standard frame to create distance from the glass.
2. Mount on Backing Board Attach your embroidery to acid-free foam board or sturdy cardboard using pins or acid-free tape.
3. Assemble with Care Place the mounted piece inside the frame, ensuring the glass hovers safely above your stitches.
Preservation Perks:
- Shields from dust and accidental touches - Maintains the sculptural quality of textured embroidery
Considerations:
- Precision is key—measure carefully to avoid crowding - Shadow boxes may cost more than standard frames, but they’re worth it for 3D work
Real-World Example: Google’s top guides and YouTube tutorials agree: shadow boxes are the gold standard for preserving and displaying dimensional embroidery, keeping every knot and bead in the spotlight.
2.3 Canvas Stretching: Gallery-Style Presentation
Craving a modern, minimalist look? Stretching embroidery over a canvas frame delivers a gallery-worthy finish.
Step-by-Step:
1. Trim and Prep Leave 2–3 inches of fabric around your design for wrapping.
2. Stretch Over Frame Lay the fabric over a wooden canvas frame. Starting at the center of each side, pull the fabric taut and secure it with staples or thumbtacks on the back.
3. Work Evenly Alternate sides as you staple, smoothing wrinkles and maintaining even tension.
Pros:
- Clean, contemporary display - Great for rectangular or square pieces - Reusable—fabric isn’t permanently altered
Cons:
- Not suitable for irregular or non-rectangular shapes - No built-in dust protection
Contrast with Canvas Panels: Google sources note that mounting on a canvas panel offers similar aesthetics but may require adhesive—less ideal for preservation. The stretched canvas method is preferred for its reversibility and fabric safety.
2.4 Elastic Band Systems & Frame Adaptations
For those who want speed, adaptability, and minimal fuss, elastic band systems and frame adaptations are a revelation.
Elastic Band & T-Pin Methods:
- Elastic Bands: Stretch fabric over a frame and secure with elastic bands for instant tension—perfect for large, heavy pieces like denim jackets. - T-Pins: Attach fabric to a mountboard with T-pins, allowing easy adjustments and removal.
Lacing Techniques: YouTube tutorials highlight lacing—crisscrossing sturdy thread across the back of a mountboard—for adjustable, glue-free tension that preserves fabric integrity.
Frame Innovations: Beginner or working on garment embroidery? Consider Sewtalent frames. These frames are designed for garment embroidery projects and feature a quick-install elastic band system, making hooping and display up to 90% faster than traditional methods. Their compatibility with various hoop sizes and user-friendly design make them a favorite for both beginners and pros seeking efficiency and precision in a professional embroidery machine.
Pros:
- Fast setup and removal - Reusable and non-destructive - Especially efficient for garment embroidery with Sewtalent frames
Cons:
- Primarily for hoop-compatible or rectangular pieces - May not suit all irregular shapes
3. Mastering Tension Without Hoops
Achieving flawless embroidery without a hoop isn’t just possible—it’s a skill that can elevate your work. Here’s how to keep your stitches smooth and your fabric under control.
3.1 Fabric Handling & Stitch Control Techniques
Tactile Feedback Is Key: When working hoopless, your hands become your tension tool. Hold the fabric in one hand, stitch with the other, and feel for the subtle resistance of thread and cloth. This direct contact lets you adjust instantly—preventing puckering, loose loops, or over-tightening.
Managing Large Projects: For bigger pieces, bunch excess fabric in your non-stitching hand to keep the working area taut. It’s a bit like juggling, but with practice, you’ll maintain even tension across the entire design.
Thread & Needle Choices:
- Heavier Threads: Use looser tension to avoid distorting the fabric (e.g., perle cotton #8 in Hungarian Braided Chain Stitch).
- Finer Threads: Tighten up for crisp, flat stitches.
- Needle Selection: Sharper needles glide through tightly woven fabrics, while blunt ones suit looser weaves.
Pro Tips from the Pros:
- Practice muscle memory—gentle, consistent pulls are better than yanking.
- Steam-block finished areas to relax any minor puckering (as suggested by April Sproule).
- Wash hands before stitching to keep fabric clean, especially when handling large sections.
3.2 Modern Solutions for Consistent Tension
While traditional hoopless embroidery relies on skill and touch, today’s embroiderers have access to innovative tools that simplify the process—especially for garment projects.
Traditional vs. Hoopless Tension:
| Factor | With Hoop (Traditional) | Without Hoop (Manual) |
|---|---|---|
| Tension Control | Mechanical, even | Manual, variable |
| Portability | Bulky | Lightweight, flexible |
| Stitch Precision | Consistent | Requires skill, practice |
Enter Sewtalent Magnetic Hoops: For garment embroidery, Sewtalent’s magnetic hoops for embroidery machines are a game-changer. Their powerful magnets automatically adapt to fabric thickness, delivering even tension without the need for constant manual adjustments. This not only reduces distortion during framing prep but also slashes setup time—up to 90% faster than screw-based hoops. The result? Smoother stitches, less fabric waste, and a far more enjoyable hoopless experience.
Why It Matters:
- Automatic Fabric Adaptation: Handles everything from delicate silks to thick denim, keeping tension uniform.
- Reduced Distortion: No more hoop marks or stretched edges—just pristine, ready-to-frame embroidery.
- Efficiency: Perfect for high-volume or repetitive garment projects, saving you time and effort.
If you’re ready to upgrade your tension game, Sewtalent’s magnetic hoops offer a modern solution that blends tradition with innovation—making hoopless embroidery easier, faster, and more precise than ever before.
Ready to try these methods? Whether you’re a seasoned stitcher or just starting out, hoopless framing opens a world of creative possibilities. Experiment, adapt, and let your embroidery take center stage—no hoop required.
4. Glue-Free Mounting for Delicate Work
Preserving the beauty and integrity of your embroidery means saying "no" to glue—especially for heirloom or delicate pieces. Glue can bleed through, leave stains, or cause long-term damage. Instead, professional finishers and seasoned stitchers rely on time-tested, reversible techniques that keep your work pristine and ready for generations to admire.
4.1 Acid-Free Lacing Techniques
Lacing is the gold standard for glue-free mounting, prized for its reversibility and gentle hold. Think of it as corseting your embroidery—secure, adjustable, and never permanent.
What You'll Need:
- Acid-free mountboard (such as Elmer's Acid-Free Foam Board)
- Strong thread (embroidery floss or quilting thread)
- Needle
- Temporary pins
Step-by-Step:
- Prepare the Mountboard: Cut the board about 3 inches larger than your embroidery on all sides. This margin gives you room to work and adjust.
- Center and Pin: Lay your embroidery face up on the board, centering it carefully. Use pins to temporarily hold it in place.
- Crisscross Lacing: Thread your needle with all six strands of floss for strength. Sew a grid of long, loose stitches across the back, pulling gently to smooth the fabric. Adjust as you go for even tension—think of tightening shoelaces, not yanking them.
- Final Adjustments: Once satisfied, tie off the thread securely. The fabric should be taut but not stretched to distortion.
Why Lacing Wins:
- Reversible: Simply snip the threads to remove your work—no damage, no residue.
- Preserves Integrity: No glue means no risk of stains or chemical degradation.
- Adjustable: If the fabric sags over time, you can re-tighten the lacing.
Pro Tip: For sheer fabrics, use thread that matches your fabric to minimize visibility. If you want to hide the back of your stitches, layer a piece of muslin behind your embroidery before lacing.
YouTube tutorials like Shiny Happy World's "How to Frame Embroidery in a Hoop (with no glue!)" echo this advice, showing how big, loose running stitches can cinch fabric neatly without a drop of glue. It's easy, quick, and completely safe for your art.
4.2 Non-Adhesive Alternatives: Pins & Tape
Not every project calls for lacing—sometimes, you need a faster, equally gentle approach. Enter T-pins and acid-free tape, two tools that offer secure, glue-free mounting with a few caveats.
T-Pin Method:
- Place your embroidery over acid-free foam board.
- Starting at the center of each edge, insert T-pins to anchor the fabric, then work outward, smoothing as you go.
- Adjust tension to avoid puckering or distortion.
Acid-Free Tape:
- Use only on the back edges of sturdy, opaque fabrics.
- Apply acid-free double-sided tape to the board, fold the fabric over, and press gently.
- Avoid on sheer or delicate materials, as even acid-free tape can leave marks or show through.
Key Considerations:
- Residue Risks: Google and Perplexity sources warn that even the best tapes may leave residue on fine fabrics or become visible over time, especially on light-colored or sheer materials.
- Reversibility: Pins are easily removed, but tape is less forgiving—test on a scrap first.
| Method | Pros | Cons | Best For |
|---|---|---|---|
| Lacing | Fully reversible, precise tension | Time-consuming, thread may show | Heirloom/delicate pieces |
| T-Pins | Quick, adjustable, reusable | May leave pinholes on thick fabrics | Large, sturdy projects |
| Acid-Free Tape | Fast, no sewing required | Residue risk, less durable | Quick, casual displays |
Bottom Line: For the most precious or fragile embroidery, lacing is your safest bet. Pins and tape offer speed and simplicity for sturdier works, but always prioritize acid-free materials and test before committing. When in doubt, skip the glue—your stitches will thank you.
5. Framing Irregular Shapes & Oversized Pieces
Not all embroidery fits neatly into rectangles or circles. When your masterpiece defies convention—think ovals, large banners, or uniquely shaped textiles—creative, hoopless solutions let you display your work with pride and precision.
5.1 Circular/Oval Adaptations
Framing non-rectangular embroidery requires a blend of tension control and clever finishing. Here’s how to keep curves crisp and fabric distortion at bay:
Needlework Frame Method:
- Materials: Round or oval frame, embroidery fabric, sturdy thread.
-
Steps:
- Center your embroidery in the frame, ensuring even tension all around.
- Trim excess fabric, leaving about an inch for securing.
- Use running stitches around the outer rim (three strands of thread for strength), then pull gently to cinch the fabric tight—like gathering a drawstring bag.
- Secure the back with a few knots or, for a permanent finish, a dab of glue (only if you’re certain you’ll never want to remove it).
Backing Method:
- Mark and cut the fabric about 1.5 inches beyond the frame edge.
- Sew running stitches around the edge, then pull to create drum-tight tension.
- Attach the fabric to the frame with additional stitches or, if necessary, a minimal amount of adhesive.
Cardboard Cover Method:
- Cut a piece of cardboard to fit the back of your frame.
- Attach it with glue or tape to cover raw edges and protect your work.
Key Considerations:
- Tension Calibration: Over-tightening can distort your design, while loose fabric will sag. Adjust gradually, checking from the front as you go.
- Shape Adaptation: For ovals, mark and cut carefully, considering embroidery hoop dimensions, to avoid bunching or overlap at the corners.
Pro Tip: YouTube creators recommend using strong, smooth thread and working slowly—think of it as sculpting fabric into a perfect curve. A ruler or template helps keep everything centered.
5.2 Large-Scale Solutions: Stretcher Bars & Scroll Frames
When your embroidery project is too grand for standard frames—think wall hangings, banners, or goldwork—professional tools step in.
Stretcher Bars:
- Adjustable wooden bars (like Evertite Frames) allow you to stretch fabric to professional-level tautness.
- Ideal for techniques requiring a smooth, drum-tight surface (goldwork, silk embroidery).
- Reusable and durable, though they require some assembly and investment.
Scroll Frames:
- Fabric is rolled around two bars, exposing only the area you’re working on.
- Perfect for ongoing or very large projects—think of it as a conveyor belt for your stitches.
- Offers adjustable tension and protects unworked areas, but is primarily designed for stitching, not permanent display.
| Method | Pros | Cons | Best For |
|---|---|---|---|
| Stretcher Bars | Professional tension, reusable | Cost, assembly required | Goldwork, silk, large pieces |
| Scroll Frames | Space-saving, protects fabric | Not for permanent display | Ongoing/large projects |
Tips for Success:
- Always use acid-free materials for mounting.
- For display, consider adding a deep frame or shadow box for dust and UV protection.
- Portability is a trade-off: stretcher bars are sturdy but less mobile, while scroll frames are lightweight but not intended for final display.
Bottom Line: Choose your method based on the size, shape, and purpose of your embroidery. With the right tools and a little patience, even the most unconventional pieces can hang proudly—no hoop required.
6. Preservation Strategies for Long-Term Display
Your embroidery deserves to look as vibrant and flawless years from now as it does today. Long-term preservation is all about shielding your work from dust, light, and time itself—while maintaining the tension and integrity of every stitch.
6.1 Dust & UV Protection Essentials
Deep Frame Canopy Effect: Framing embroidery in a deep, voluminous frame creates a protective “canopy” that keeps dust at bay. This technique, echoed in both Perplexity and Google’s top guides, mimics museum display practices—recessed frames shield fabric from airborne particles and accidental touches.
UV-Protective Glass: Install UV-filtering glass or acrylic (museum-grade if possible) to block harmful ultraviolet rays. This not only preserves color vibrancy but also adds an extra layer of defense against dust and environmental contaminants.
Light Exposure Guidelines:
- Limit direct sunlight and high-intensity artificial lighting.
- For sensitive textiles, keep ambient light below 50 lux.
Pro Tip: If you’re framing highly textured or 3D embroidery, use spacers to keep the glass from pressing on your stitches. Shadow boxes are ideal for this purpose.
6.2 Material Selection for Fabric Integrity
Acid-Free Everything: Always use acid-free, lignin-free backing boards, mats, and foam cores. These materials resist yellowing and chemical breakdown, ensuring your embroidery stays crisp and vibrant.
Mounting Choices:
| Material | Tension Control | Preservation Level |
|---|---|---|
| Canvas/Stapling | Even tension, easy to adjust | Moderate (no dust barrier) |
| Deep Frame | Taut over rigid backing, dust/UV safe | High (dust + UV protection) |
| Foam Core | Supports gentle, even tension | High (if acid-free) |
Stabilizers: For tricky fabrics, adhesive water-soluble or heat-away stabilizers can help maintain tension during stitching and be removed after, leaving your embroidery ready for mounting.
Professional Tip: If your piece has fugitive dyes, old adhesives, or signs of mold or insect damage, consult a textile conservator before framing. Sometimes, the best preservation is expert intervention.
Bottom Line: Preserving embroidery is a blend of smart material choices and thoughtful display. Prioritize deep frames, UV protection, and acid-free supports for heirloom results. Your stitches are a story—make sure they last for generations to come.
7. Conclusion: Choosing Your Perfect Hoopless Method
Framing embroidery without a hoop is more than a workaround—it's an invitation to creative freedom. Whether you're just starting out or refining your craft, the best method depends on your project's needs. Foam board mounting offers simplicity and is perfect for beginners seeking a crisp, wrinkle-free finish. Shadow boxes shine for 3D or textured work, preserving every bead and bullion knot in pristine, dust-free splendor. For professionals or those tackling large-scale pieces, stretcher bars deliver drum-tight tension and gallery-level support. No matter your path, remember: consistent tension and preservation are the twin pillars of flawless display. Don't be afraid to experiment with non-adhesive techniques—pins, lacing, and careful folding—to find what suits your style and safeguards your stitches. Your embroidery deserves to take center stage, hoop or no hoop.
8. FAQ: Hoopless Framing Essentials
8.1 Q: Can I use glass over embroidery?
A: Yes, but proceed with care. Glass protects your embroidery from dust and dirt, but if it rests directly on your stitches, it can flatten textured or 3D elements. To prevent this, use a deep frame or install spacers between the glass and your fabric—shadow boxes are ideal for this purpose. This creates a protective "canopy," preserving both the look and feel of your work.
8.2 Q: How should I clean mounted embroidery pieces?
A: Always opt for dry cleaning methods. Use a soft brush or a gentle pass with a lint roller to remove dust. Avoid sprays or wet cleaning, as moisture can damage both fabric and thread, especially when the piece is mounted. Regular, gentle dusting keeps your embroidery fresh without risking residue or distortion.
8.3 Q: What's the best framing method for heirloom embroidery?
A: Prioritize reversible, glue-free techniques. Acid-free lacing and pinning allow you to mount your work securely without permanent alteration or adhesive residue. These methods preserve fabric integrity and make future restoration or reframing possible—essential for pieces you hope to pass down through generations. Always use acid-free materials and avoid trimming away excess fabric whenever possible.
---
Your embroidery tells a story—display it with confidence, using the method that honors both your vision and your craft.
