1. Introduction: Your Ultimate Guide to Crafting Personalized Hoodies
Custom hoodies are more than just cozy layers—they’re wearable art, personal statements, and sometimes, even the start of a business. Whether you dream of bold graphics, hand-painted flourishes, or a hoodie stitched from scratch, this guide is your creative launchpad. We’ll walk you through every major method: from no-sew vinyl and fabric paint hacks, to digital print-on-demand platforms, to the full mastery of sewing your own hoodie. No matter your skill level—beginner, seasoned maker, or aspiring entrepreneur—you’ll find techniques tailored for you. Ready to transform a blank hoodie into something unmistakably yours? Let’s dive in and unlock your path to hoodie customization mastery.
Table of Contents
- 1. Introduction: Your Ultimate Guide to Crafting Personalized Hoodies
- 2. DIY No-Sew Customization: Transform Hoodies with Vinyl, Paint & Upcycling
- 3. Digital Design & Print-on-Demand: Create Pro-Quality Hoodies Online
- 4. Sewing from Scratch: Pattern Drafting, Fabric Selection & Assembly
- 5. Advanced Techniques & Troubleshooting: Avoiding Common Pitfalls
- 6. Business Insights: Profiting from Custom Hoodie Ventures
- 7. Conclusion: Choosing Your Path to Custom Hoodie Mastery
- 8. FAQ: Your Custom Hoodie Questions Answered
2. DIY No-Sew Customization: Transform Hoodies with Vinyl, Paint & Upcycling
When it comes to making your mark, you don’t need a sewing degree or a studio full of machines. No-sew customization lets you unleash creativity with tools as simple as a Cricut, a paintbrush, or even a pair of scissors. Let’s break down the most popular, beginner-friendly techniques that turn any basic hoodie into a one-of-a-kind statement piece.
2.1 Cricut & Heat Press Mastery: Precision Application for Flawless Designs
If you crave crisp, professional-looking graphics, the Cricut and heat press combo is your secret weapon. Here’s how you can achieve flawless, long-lasting designs—no sewing required:
Step-by-Step Workflow:
1. Design Like a Pro:
- Start in Cricut Design Space. Upload your custom artwork or use built-in fonts for text-based projects.
- Resize designs to fit your hoodie—think about 10.5" wide for chest graphics, and scale sleeve designs to match name length.
- Always mirror your design before cutting HTV (heat transfer vinyl) to ensure it reads correctly when applied.
2. Cutting & Weeding:
- Place HTV shiny side down on the cutting mat.
- Use the Cricut’s rotary blade for fabric-based appliqué or standard blade for vinyl.
- After cutting, use a weeding hook to carefully remove excess vinyl—especially from intricate details.
3. Heat Press Application:
- Set your heat press to 330°F for 30 seconds (for most HTV).
- Layer order: heat press, protective tan paper, vinyl design (plastic side down), hoodie, heat-resistant mat.
- Pre-press your hoodie for 5 seconds to remove moisture—this helps the vinyl adhere better.
- Position your design, press, and let cool before peeling off the carrier sheet.
Pro Tips from the Pros:
- Combine glitter vinyl with fabric patches for layered, textured effects.
- If you don’t have a heat press, a household iron works in a pinch—just be aware that uneven heat can cause peeling. Use a towel or ironing board for support.
- For multi-part designs, ensure plastic carrier sheets don’t overlap during pressing to prevent unwanted adhesion.
Material Choices:
- HTV brands like B-Flex Gimme5 or gold glitter vinyl provide vibrant results.
- Choose hoodies made from cotton or poly blends for best adhesion and durability.
Avoiding Peeling: If your vinyl starts to lift during peeling, simply reapply the carrier sheet and press again. Always wait until the design is completely cool before removing the plastic for best results.
Why Cricut & HTV? This method offers precision, durability, and endless design flexibility—perfect for gifts, small business runs, or just flexing your style on the street.
2.2 Fabric Painting and Hand-Embellishment: Accessible Creativity Without Machines
Want to channel your inner artist? Fabric painting and hand-embellishment are the ultimate in accessible, budget-friendly customization—no machines, no fuss.
Fabric Painting Techniques:
- Materials: Acrylic fabric paint mixed 1:1 with fabric medium, a variety of brushes, cardboard insert (to prevent bleed-through), parchment paper for heat-setting.
- Freehand or Stencil: Trace or freehand your design. For crisp logos or geometric patterns, secure stencils with tape and dab paint with sponges or foam brushes.
- Layer & Heat-Set: Apply thin layers, letting each dry. Once finished, heat-set with an iron (medium heat, 3–5 minutes) using parchment paper to protect your artwork.
Fabric Markers & Sponges:
- Use fabric markers for outlines, lettering, or tiny details.
- Sponges create gradients or abstract effects—dab gently for a soft, textured look.
Iron-On Transfers:
- Print your design onto transfer paper, then apply with a heat press or iron (follow manufacturer’s instructions).
- Great for photographic images or bold text, though not as durable as screen printing.
Adhesive-Based Embellishments:
- Attach patches, lace, or ribbon with fabric glue—just ensure it’s fabric-safe to avoid stiffness.
- Reinforce edges to prevent peeling, especially after washing.
Care & Maintenance:
- Wash hoodies inside out in cold water with gentle detergent.
- Air-dry flat to prevent shrinkage and preserve your design.
Skill Level & Durability Comparison:
| Method | Skill Level | Durability | Best For |
|---|---|---|---|
| Fabric Painting | Intermediate | High (if heat-set) | Detailed artwork, portraits |
| Stenciling | Beginner | Medium-High | Logos, geometric designs |
| Upcycling | Beginner | Medium | Trendy cuts, repurposing |
| Iron-On Transfers | Intermediate | Medium | Photographic images, text |
Why Choose These Methods? They’re affordable, require minimal tools, and let you experiment with color, texture, and personal touches—perfect for one-off gifts or making a thrifted find feel brand new.
2.3 Upcycling Magic: Reverse Appliqué and Garment Reconstruction
Why settle for ordinary when you can transform thrifted sweatshirts into runway-ready art? Upcycling isn’t just eco-friendly—it’s a creative playground where mistakes become features and old becomes bold.
Popular Upcycling Techniques:
- Cropped Hoodie: Cut above the pockets for a modern, cropped look. Mark your hem evenly with chalk before cutting.
- Sleeveless Top: Remove sleeves and fold raw edges under for a clean finish.
- Lace-Up Front: Add grommets along the front, thread with laces for an adjustable, eye-catching closure.
- Boat Neck Modification: Cut a curved neckline and shorten sleeves for a breezy, off-shoulder vibe.
Reverse Appliqué—Step-by-Step (Inspired by YouTube’s Spider-Man Hoodie Case Study):
1. Choose Your Base & Layer:
- Select a thrifted hoodie and a contrasting fabric (like a graphic tee or jersey knit).
2. Cut Your Shape:
- Trace your desired shape on the hoodie, cut out a “window” to reveal the layer beneath.
3. Layer & Secure:
- Pin or use hem tape to hold the backing fabric in place behind the cutout.
4. Stitch & Trim:
- Top stitch around the edge, then carefully trim away excess fabric from the inside. Jersey knits are ideal—they won’t fray.
5. Finishing Touches:
- Zigzag stitch the edges for extra durability and a pop of texture.
Pro Design Alignment Trick: When placing your design, “eyeball it and hope for the best”—but for symmetry, use a ruler and mark equal distances from the sides.
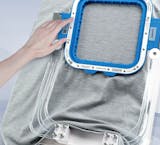
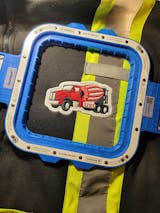
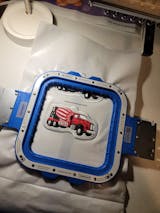
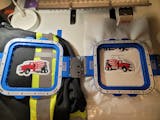
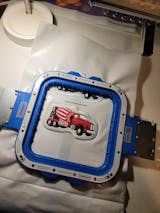
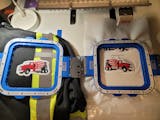
Machine Embroidery on Pockets: For those adding embroidery to upcycled pockets, open the pocket from the inside for easier access and stability. If you’re using a magnetic embroidery hoop like Sewtalent, it can help stabilize thick hoodie fabrics and ensure your design stays perfectly aligned—especially useful for garment embroidery (not for caps or hats).
Why Upcycle? Upcycling is the ultimate in creative freedom—curved cuts, asymmetry, and layering all come together to make something truly unique. Plus, it’s budget-friendly and environmentally conscious.
3. Digital Design & Print-on-Demand: Create Pro-Quality Hoodies Online
Not everyone wants to wield a glue gun or thread a needle. Sometimes, you want pro results with a few clicks—and maybe a side of passive income. Enter the world of digital design and print-on-demand (POD): your shortcut to custom hoodies that look store-bought, without ever touching a sewing machine.
3.1 Platform Deep Dive: Canva vs. Printify for Stunning Results
Canva: Design Playground for All
- Templates & Smartmockups: Canva offers thousands of ready-to-use hoodie templates and a Smartmockups tool for realistic previews. You can start with a blank canvas or remix a pro-designed template.
- Customization: Add graphics, text, effects (shadows, gradients), and even play with color palettes for both front and back designs.
- Export & Print: Download your design in high-resolution (300 DPI) formats, or print directly through Canva’s integrated service—great for bulk orders or personalized gifts. Export your design in formats compatible with digitizing software for embroidery machines, such as DST or PES, to ensure stitch precision.
Printify: POD Powerhouse
- Product Creator: Upload your design, adjust placement, and preview on a 3D mockup. Printify’s tool supports layering, text editing, and precise print-area guidelines.
- Fulfillment: No upfront costs—your design is printed and shipped only after a customer orders, eliminating inventory risk.
- Global Reach: Printify partners with suppliers worldwide, ensuring quality and speedy delivery.
Design Best Practices:
- Resolution: Always design at 300 DPI or higher to avoid pixelation.
- Bleed Area: Extend your background or patterns into the bleed zone so seams don’t reveal blank spots.
- Color Contrast: Use light text on dark hoodies (and vice versa) for maximum readability.
- Mockup Previews: Leverage platform previews to check placement, sizing, and overall vibe before ordering.
| Feature | Canva | Printify |
|---|---|---|
| Focus | Design & creative tools | Print-on-demand fulfillment |
| Templates | Extensive, customizable | Product-specific, 3D previews |
| Fulfillment | Direct via partners | Global print providers |
| Cost | Free to design, pay per print | Free to design, pay per order |
| E-commerce | Limited | Full integration |
Why Go Digital? It’s fast, scalable, and perfect for anyone who wants to create pro-quality hoodies—whether for a family reunion, a small brand, or a viral TikTok drop.
3.2 Selling AOP Hoodies: Capitalize on the $736M POD Market
Ready to turn your creativity into cash? All-over-print (AOP) hoodies are the rising stars of the $736 million print-on-demand apparel market, with a projected 25.3% annual growth rate. Here’s how to get in on the action:
AOP Design Strategies:
- Printing Techniques:
- Sublimation: Full-coverage, vibrant designs using heat transfer—ideal for seamless patterns and bold colors.
- DTG (Direct-to-Garment): Perfect for detailed, high-color graphics on individual garments.
- Gang Sheet Optimization: Arrange multiple designs on a single print sheet to maximize efficiency and reduce costs—especially useful for testing new ideas.
- Niche Targeting: Focus on themes with high demand and strong margins (think Hawaiian prints, which can yield 40–60% profit margins).
POD Business Workflow:
1. Design Upload: Create your AOP hoodie design and upload to platforms like Printify or Printful.
2. Order Routing: Customer orders trigger automated production—no inventory, no risk.
3. Printing & QC: Suppliers print, inspect, and package each hoodie.
4. Shipping: Direct delivery to your customer, worldwide.
Success Metrics:
- Profit Margins: Average sellers see 20% margins; niche products can soar to 40–60%.
- Market Reach: Shopify dominates as the go-to e-commerce platform, with PayPal accounting for 45% of global payments.
- Sample Testing: Always order samples to check color accuracy, print quality, and fabric feel before launching at scale.
Why Sell AOP Hoodies? They offer infinite design possibilities, high profit potential, and a global market hungry for unique, comfortable apparel. With POD, you can test ideas with zero upfront investment—just creativity and hustle.
Ready to create your own hoodie masterpiece? Whether you’re wielding a Cricut, a paintbrush, or a mouse, the world of custom hoodies is wide open. Choose your path, experiment boldly, and let your style (and maybe your side hustle) shine.
4. Sewing from Scratch: Pattern Drafting, Fabric Selection & Assembly
Sewing your own hoodie from scratch is the ultimate creative flex—a blend of engineering, artistry, and hands-on skill. Whether you’re after a perfectly oversized fit or a sleek, tailored look, this chapter guides you through every step: from precise pattern drafting and fabric science to assembly and professional embroidery. Ready to turn raw fabric into your new favorite hoodie? Let’s get stitching.
4.1 Pattern Engineering: Measurements, Adjustments & Hood Construction
Drafting a hoodie pattern is like building the blueprint for your comfort zone. Here’s how to engineer a fit that’s uniquely yours:
Body Pattern Basics:
- Front/Back Measurements:
- Neckline: Divide your neck measurement by 6, then add 2 cm for ease.
- Shoulder: Add 1 cm to your shoulder measurement.
- Armhole: Divide the armhole by 3 for guidance; mark 1.5 cm inward for the front, 0.5 cm for the back.
- Shape: Draw a vertical line for the hoodie’s length, then create a 90° angle at the base. The back pattern should have a higher neckline—lowered by 4 cm compared to the front for that classic hoodie drape.
Sleeve Pattern:
- Armscye Matching: Use a soft tape measure to ensure the sleeve’s curve aligns with the body’s armscye.
- Cuff Integration: Draft the sleeve with a fold line at the bottom for ribbing, adding 1 cm seam allowance to all edges except the fold.
Hood Construction:
- Stitching Lines: Measure the front and back neckline stitching lines (e.g., 10 1/8″ front, 4 1/2″ back) to calculate the total hood circumference.
- Depth and Shape:
- Center Depth: Measure from the inner shoulder to the center front stitching line (e.g., 7 3/4″).
- Adjustments: Lower the back center seam for a cowl effect or curve the front edge for style points.
Assembly Workflow (inspired by YouTube tutorials):
1. Cut Your Pieces: One front (on fold), one back (on fold), two sleeves, two hoods, cuffs, hem bands, and a front pocket (if desired).
2. Sew Shoulder Seams: Attach front and back at the shoulders.
3. Attach Sleeves: Pin and sew sleeves to the body, aligning armscye curves.
4. Sew Side Seams: With right sides together, sew from the sleeve cuffs down to the hem in one continuous line.
5. Assemble Hood: Sew hood pieces together along the curved seam, hem the front edge, and attach to the neckline.
6. Add Cuffs & Hem Band: Fold ribbing in half and sew to sleeves and hem.
7. Install Pocket: Hem pocket edges and topstitch to the front bodice.
Pro Tips:
- Use staytape on pocket edges to prevent stretching.
- For zippers, interface the center front before installation.
Customization: Want an oversized look? Lower the shoulder line and widen the bust by a couple of centimeters. Prefer a slim fit? Stick to your exact measurements and reduce ease.
Pattern engineering is where your hoodie’s personality is born—whether you crave classic, cropped, or avant-garde, it all starts here.
4.2 Fabric Science: Fleece Types, Stretch Properties & Care Durability
Choosing the right fabric is the difference between a hoodie that’s “meh” and one you’ll never want to take off. Let’s dive into the science of softness, stretch, and staying power.
Fleece Types & Their Superpowers:
| Fleece Type | Material | Weight (g/m²) | Key Features | Best For |
|---|---|---|---|---|
| Polar Fleece | 100% Polyester | 100–300 | High insulation, quick-drying, durable | Cold climates, layering |
| Microfleece | Polyester | 100–200 | Lightweight, moisture-wicking, flexible | Active wear, mild temps |
| Sherpa Fleece | 100% Polyester | N/A | Fuzzy, wool-like, extra cozy | Winter, plush hoodies |
| Cotton Fleece | Cotton/Blend | N/A | Breathable, soft, less moisture-wicking | All-day comfort |
Stretch & Blend Breakdown:
| Fabric | Stretch | Additives | Best Use |
|---|---|---|---|
| Cotton | Low | None | Loungewear, casual |
| Polyester Blends | Moderate | Spandex (3–5%) | Sports, fitted styles |
| French Terry | High | Knit structure | All-season, stylish, breathable |
| Jersey Knit | High | Knit structure | Lightweight, trendy |
- Spandex Blends: Add 3–5% spandex for extra elasticity—great for fitted or athletic hoodies.
- Nylon/Spandex: Wrinkle-resistant and holds shape through every movement.
Performance Factors:
- Breathability: Cotton is king for airflow; polyester wicks sweat for active days.
- Moisture Management: Cotton absorbs, polyester repels and dries fast.
- Softness: Sherpa for plush, cotton for gentle skin feel.
Durability & Care:
| Fabric | Durability | Care Tips |
|---|---|---|
| Cotton | Moderate | Prone to shrinkage, iron |
| Polyester | High | Machine-wash, wrinkle-free |
| Fleece | Moderate | May pill, avoid abrasives |
- Sustainability: Consider recycled polyester or bamboo/cotton blends for eco-friendly options.
Application-Based Recommendations:
| Use Case | Optimal Fabric | Why | |||||||||||||||||||||||||||
|---|---|---|---|---|---|---|---|---|---|---|---|---|---|---|---|---|---|---|---|---|---|---|---|---|---|---|---|---|---|
| Athletic Wear | Polyester/Spandex Blend | Stretch, moisture-wicking, durable | |||||||||||||||||||||||||||
| Winter Layering |
| Issue | Solution |
|---|---|
| Vinyl Peeling | Check peel type, re-press if needed |
| Puckering Seams | Use walking foot, adjust tension |
| Fraying Edges | Zigzag/overcast stitch, fabric glue |
| Embroidery Placement | Open pocket, use magnetic hoop |
| Design Alignment | Mark with chalk/ruler before application |
| Adhesion Problems | Pre-wash, avoid softeners |
Remember: Mistakes are part of the process—each one is a lesson in disguise. Embrace the “trust the process” mindset, and don’t be afraid to experiment. Your next hoodie might just be your best yet.
6. Business Insights: Profiting from Custom Hoodie Ventures
Turning your hoodie-making passion into a profitable business? You're not alone. The print-on-demand (POD) market for custom apparel is booming, with hoodie sales riding a wave of creativity and consumer demand. Here's how to make your mark—and your margin.
POD vs. Handmade Models:
- Print-on-Demand (POD):
- Platforms like Printify and Printful let you upload designs, set up shop, and fulfill orders automatically—no inventory, no upfront costs.
- The global POD market is projected to grow at 25.3% CAGR, with apparel-specific POD valued at $736 million in 2025.
- POD offers unlimited design flexibility and minimal risk, making it ideal for testing new ideas or scaling quickly.
- Handmade Customization:
- Offers higher perceived value and uniqueness—think hand-embellished, upcycled, or sewn-from-scratch hoodies.
- Best for niche markets, premium pricing, or limited edition drops.
Pricing Psychology:
- Average profit margins hover around 20% for most sellers, but specialized niches (like Hawaiian-themed AOP hoodies) can reach 40–60%.
- Use pricing tiers and bundle deals to entice buyers and increase average order value.
Social Media Mockup Strategies:
- Use Canva or Printify's mockup tools to create eye-catching visuals for your online store and social channels.
- Showcase both front and back designs, and use lifestyle photos to help customers envision themselves in your hoodie.
Platform Dominance:
- Platforms like eBay and Shopify host thousands of embroidery machines for sale, catering to startups and scaling businesses.
- PayPal accounts for 45% of global payments—make sure your checkout process supports it for maximum conversion.
Success Metrics:
- 24% of POD stores remain operational after three years—focus on adaptive strategies, quality control, and customer engagement to beat the odds.
- Always order samples to check print quality, fit, and fabric feel before launching at scale.
| Aspect | Traditional Production | POD Model |
|---|---|---|
| Inventory | Bulk, high upfront cost | No inventory, pay-per-order |
| Design Flexibility | Limited | Unlimited customization |
| Risk | High (unsold stock) | Minimal |
| Scalability | Slow, labor-intensive | Fast, automated |
Action Steps:
- Identify your niche—what designs, themes, or techniques set you apart?
- Build a strong brand presence with consistent visuals and messaging.
- Leverage social proof—share customer photos, reviews, and behind-the-scenes content.
Final Word: Whether you're side-hustling or scaling a full-fledged brand, the custom hoodie market is rich with opportunity. Stay creative, stay agile, and let your hoodies do the talking (and selling).
7. Conclusion: Choosing Your Path to Custom Hoodie Mastery
Custom hoodie creation is a journey—one that can be as quick as a digital click or as hands-on as hours spent at the sewing machine. Each method has its own magic. Digital printing and print-on-demand services like Canva and Printify offer unmatched speed, letting you design, preview, and order professional-quality hoodies in minutes. This is the express lane for those who crave instant results or want to launch a business with minimal risk.
But if you're drawn to the slow art of making, sewing from scratch or upcycling old sweatshirts unlocks a different kind of creativity. Here, every stitch and brushstroke is a chance to experiment, personalize, and turn "mistakes" into design features. Whether you're freehand painting, reverse appliquéing thrifted finds, or assembling a hoodie that fits you just right, the process is as rewarding as the finished piece.
And for those who want their embroidery to look as sharp as their ideas, tools like Sewtalent magnetic embroidery hoops can take your garment embroidery to the next level—offering fast, stable, and professional results that help your vision shine through.
So, what's your next move? Will you dive into digital design, master the art of upcycling, or stitch your own signature hoodie from scratch? Whichever path you choose, remember: the best hoodie is the one that tells your story. Now's the time to create, experiment, and wear your imagination on your sleeve—literally. Your masterpiece awaits. Investing in the best embroidery machine for home business ensures professional results while maximizing profitability.
8. FAQ: Your Custom Hoodie Questions Answered
8.1 Q: Can I use a household iron instead of a heat press for vinyl designs?
A: Yes, you can use a household iron if you don’t have a heat press. However, keep in mind that irons may not provide as even or consistent heat and pressure, which can lead to uneven adhesion or peeling over time. For best results, use a heat-resistant surface and follow the vinyl manufacturer’s instructions.
8.2 Q: How do I prevent my hoodie from shrinking after customization?
A: Pre-wash your hoodie fabric or blank garment before applying any customization. This helps remove sizing and reduces the risk of shrinkage after your design is applied. Always follow care instructions—wash inside out, use cold water, and air dry flat when possible.
8.3 Q: What’s the best hoodie color for making designs pop?
A: Choose a hoodie color that contrasts with your design. For light-colored graphics or text, opt for dark hoodies like black or navy. For bold, dark designs, use lighter hoodie shades. This ensures your artwork stands out and doesn’t get lost in the background.
8.4 Q: Can I design both the front and back of my custom hoodie?
A: Absolutely! Most online platforms like Canva allow you to customize both the front and back of your hoodie. Just make sure to preview your design and check placement before ordering.
8.5 Q: What’s the difference between a hoodie and a sweatshirt?
A: A hoodie features a hood and often a front pocket or zipper, while a sweatshirt is a collarless pullover with long sleeves and no hood. Both can be customized with your favorite techniques.
8.6 Q: How do I choose the right size for my custom hoodie?
A: Measure a hoodie or sweatshirt you already love—check the chest width and body length when laid flat. Compare these measurements to the sizing chart provided by your blank supplier or print-on-demand service to ensure a comfortable fit.
8.7 Q: What’s the best way to wash and care for custom hoodies?
A: Turn your hoodie inside out before washing, use cold water, and avoid fabric softeners. Air dry flat to maintain shape and preserve your design. For painted or vinyl designs, avoid high heat in dryers.
8.8 Q: Is it hard to make a hoodie from scratch?
A: Sewing a hoodie from scratch does require some basic pattern drafting and sewing skills, but with the right tutorial and patience, it’s an achievable and rewarding project—even for ambitious beginners. Prices vary widely—basic models start at $300, while industrial-grade how much are embroidery machines can exceed $10,000.
---
Have more questions? Drop them in the comments below or share your hoodie creations with us—we’d love to see what you make!


