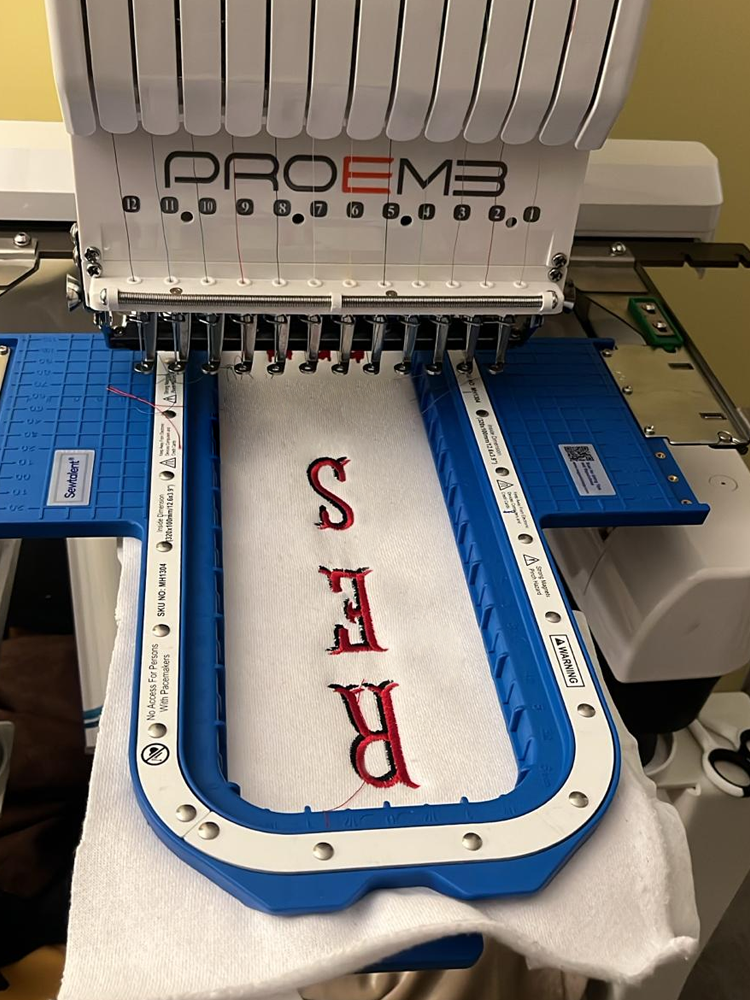
1. Introduction: Mastering the Needle Threader for Flawless Embroidery
Threading a needle—whether for hand sewing or machine embroidery—can feel like threading a camel through the eye of, well, a needle. For beginners and seasoned sewists alike, squinting at a stubborn needle eye or wrestling with fraying thread is a universal frustration. Enter the needle threader: a simple yet transformative tool that turns a tedious task into a breeze, restoring joy and efficiency to your stitching routine, especially when using the best embroidery machine for hats.
In this guide, you'll discover step-by-step techniques for using needle threaders, visual tips for accessibility, troubleshooting advice, and comparisons of popular threader types. We'll also explore how the right tools—like Sewtalent magnetic embroidery hoops—can amplify your embroidery experience by keeping fabric stable and reducing the need for constant re-threading in garment embroidery. Ready to thread with confidence? Let's dive in.
Table of Contents
- 1. Introduction: Mastering the Needle Threader for Flawless Embroidery
- 2. Step-by-Step Needle Threader Techniques for Beginners
- 3. Visual Guidance & Adaptive Techniques for Accessibility
- 4. Troubleshooting Common Needle Threader Issues
- 5. Needle Threader Types Compared: Choosing Your Tool
- 6. DIY Alternatives and Creative Solutions
- 7. Maintenance and Advanced Threading Techniques
- 8. Conclusion: Thread with Confidence
- 9. FAQ: Needle Threader Essentials
2. Step-by-Step Needle Threader Techniques for Beginners
Threading a needle doesn’t have to be a test of patience. With the right approach and a trusty needle threader, you’ll be stitching in no time. Below, you’ll find beginner-friendly methods for both hand sewing and machine embroidery, complete with practical tips drawn from expert sources and real-world demonstrations.
2.1 Hand Sewing Method: Precision for Delicate Work
Let’s start with the basics—hand sewing. The humble wire loop threader is a game-changer for threading even the tiniest needle eyes. Here’s a simple four-step process, inspired by Perplexity’s guidance and echoed by top sewing tutorials:
1. Prepare the Needle and Threader
Ensure your needle is clean and free of debris. Select a wire loop threader—these are the classic, diamond-shaped tools you’ll find in most sewing kits.
2. Position the Threader
When using a sewing embroidery machine, hold the needle vertically with the eye facing up. Gently insert the threader’s wire loop through the needle’s eye, letting the needle rest in the threader’s groove. If you’re struggling, a tip from Google’s top results: stabilize the needle in a pincushion or cork for extra control.
3. Thread Insertion
Place the end of your thread through the wire loop. For best results, cut the thread at a 45° angle—this sharpens the tip and prevents fraying, making threading smoother. Think of it like folding a piece of paper to fit through a narrow slot, as seen in popular YouTube analogies.
4. Secure the Thread
Gently pull the threader back through the needle’s eye, bringing the thread along for the ride. Remove the threader and trim any excess thread near the eye. For hand sewing, finish by tying a knot at the end of your thread—wrap it around your finger or loop it through the needle, whichever feels most comfortable.
Pro Tips:
- Use freshly cut thread ends for better results.
- Hold both the needle and threader firmly to prevent slippage.
- For extra visual clarity, watch YouTube demonstrations that show each step in real time.
2.2 Machine Embroidery Application: Speed for High-Volume Projects
When it comes to machine embroidery, speed and consistency are key—especially for high-volume projects. Here’s how to harness the power of needle threaders on your machine:
1. Raise the Needle
Turn your machine’s handwheel to lift the needle to its highest position. This ensures the threader aligns perfectly with the needle eye.
2. Threader Alignment
Lower the presser foot to create working space. Insert the threader’s wire through the needle’s eye, forming a sharp point by squeezing the metal bars if needed.
3. Thread Management
Feed the thread through the threader’s loop, ensuring it isn’t twisted. For machine embroidery, you can thread two strands simultaneously by laying both threads in the slot.
4. Final Adjustments
Pull the threader back to seat the thread, then lift the presser foot and position the thread for sewing.
Synergy Tip: When using Sewtalent magnetic hoops for garment embroidery, stable fabric placement can reduce re-threading needs by up to 90%. The hoop’s secure grip keeps your fabric perfectly taut, so you spend less time fixing thread issues and more time creating.
YouTube Insights: Video tutorials often highlight the importance of proper needle elevation and threader placement. Watching these demos can help you visualize each step and avoid common pitfalls, like bent wires or tangled threads.
3. Visual Guidance & Adaptive Techniques for Accessibility
Threading a needle shouldn’t be a barrier—no matter your vision or dexterity. Modern solutions, from high-contrast tools to ergonomic designs, make threading accessible for everyone. Let’s explore practical visual aids and adaptive techniques that empower all sewists to thread with ease.
3.1 Video Demonstrations and High-Contrast Tools
For visual learners, nothing beats a clear, close-up demonstration. YouTube is packed with step-by-step videos that break down the threading process, often using slow-motion or magnified views for clarity. Here’s how to leverage these resources:
- Step-by-Step Visuals: Videos show the standard technique—insert the threader’s wire loop through the needle eye, feed the thread through, and gently pull it back. Many creators recommend cutting your thread to twice the needed length to minimize re-threading.
- Alternative Methods: If you’re without a threader, try the folded paper trick: fold a strip of paper, slip the thread inside, and pass it through the needle eye. This method, demonstrated in both Google results and YouTube clips, is a lifesaver in a pinch.
- High-Contrast and Tactile Tools: Opt for threaders with bright colors or large loops for better visibility. Some threaders feature textured handles or ridges, making them easier to grip and navigate by touch—a boon for users with visual impairments.
| Type | Description | Use Case |
|---|---|---|
| Wire Loop Threader | Metal/plastic loop guides thread through needle eye | Hand sewing, general use |
| Manual Machine Threader | Combines needle inserter and threader (e.g., Dritz) | Sewing/serger machine threading |
| Tension-Based Tools | Hooks/slots manage thread tension during insertion | Heavy-duty or machine threads |
Key Takeaways:
- Cut thread to a manageable length to reduce tangling.
- Use tactile feedback—threaders with ergonomic handles are easier to control.
- Pre-threaded needles are available for immediate use, bypassing threading altogether.
3.2 Ergonomic Solutions for Limited Mobility
Threading doesn’t have to be a dexterity challenge. Hands-free alternatives and grip-friendly designs offer independence and comfort:
- Desktop Threaders: These stationary devices let you thread needles by simply pressing a lever—no steady hands required.
- Magnetic Holders: Keep your tools organized and within easy reach, reducing the need for fine motor movements.
- 3D-Printed Adaptations: Custom threaders with enlarged handles or unique shapes cater to specific mobility needs.
Sewtalent Synergy: For garment embroidery, Sewtalent magnetic embroidery hoops reduce physical strain during setup. The hoops’ effortless clamping mechanism means less repetitive motion, making them especially valuable for users with limited hand strength or mobility.
Perplexity Insights: Threaders with textured or contoured grips are recommended for better control. Look for models designed with accessibility in mind—your hands (and your patience) will thank you.
---
Ready to thread like a pro? Stay tuned for troubleshooting tips, tool comparisons, and creative DIY solutions in the next sections. And remember: with the right tools and a little know-how, anyone can master the art of threading—no squinting required!
4. Troubleshooting Common Needle Threader Issues
Needle threaders are a game-changer—until they aren’t. If you’ve ever stared in disbelief at a bent wire or wondered why your thread keeps slipping, you’re not alone. Let’s dive into the most common problems and smart, field-tested solutions, so you can get back to stitching with confidence.
4.1 Fixing Breakage and Small-Needle Challenges
Ever heard that metallic "pop" when your threader just gives up? You’re not imagining things—threader breakage is a frequent frustration, especially with delicate wire loop models and automatic threaders. Here’s why it happens and how to fix it:
Common Causes & Quick Fixes:
- Misaligned Hook: If the threader’s hook isn’t perfectly lined up with the needle eye, it can bend or break. For automatic threaders, gently nudge the hook back into position using a seam ripper, small screwdriver, or tweezers. Lower the lever, check alignment, and adjust as needed—just like tuning a tiny machine.
- Forcing Thick Threads: Trying to pull chunky threads through small needle eyes (common in mid-range embroidery machines costing $500-$800) is a recipe for disaster. Instead, switch to manual threading for needles sized ≤80/12, or use a threader specifically designed for small eyes and fine threads.
- Wear and Tear: Wire loop threaders are notorious for snapping after repeated use. If yours is bent or broken, don’t hesitate—replace it. Automatic threaders, while convenient, are fragile and prone to damage over time.
Pro Tips:
- Always check that your needle is installed correctly and fully raised before using an automatic threader.
- Condition your thread with a thread conditioner or use high-quality spun polyester to reduce friction and minimize breakage.
- If you’re working with ultra-fine or beading needles, consider specialized micro-threaders like the Puffin micro threader, which are designed to handle those tiny eyes with finesse.
Wire Fragility in Perspective: Google’s top sewing tutorials and user forums echo this: wire threaders are affordable but tend to break easily, especially when used with thick threads or small needles. If you’re a frequent stitcher, it’s wise to keep a few spares in your kit.
4.2 Preventing Thread Slippage and Tension Errors
Nothing derails your flow like a thread that slips out mid-pull or tension that’s just... off. Here’s how to lock in that perfect thread every time:
Taming Thread Slippage:
- Moisture Methods: Lightly moisten the thread tip or needle eye to help the thread grip and slide through smoothly. It’s a classic trick that reduces fraying and slippage, especially with stubborn or slippery threads.
- Thread Guards: Use a thread guard to keep the thread from sliding off the spool, which can cause drag and uneven tension.
- Rocking Technique: Borrow a move from expert YouTubers and FlossTube pros: when pulling the threader through the needle, use a gentle up-and-down rocking motion—not side-to-side. This minimizes stress on the wire or hook and helps the thread glide through securely.
| Issue | Solution |
|---|---|
| Top tension too tight | Bobbin thread pulls to the top. Loosen top tension. |
| Bobbin tension too tight | Top thread pulls to the bottom. Loosen bobbin tension. |
| Incorrect spool orientation | Use horizontal spool pin for cross-wound threads; vertical for stack-wound threads. |
| Slippery threads | Use a thread guard and ensure thread quality is high. |
Additional Tips:
- Always test thread tension on a scrap piece of fabric before starting your main project.
- Make sure your presser foot is down and the buttonhole lever is up before threading—this small step can make a big difference.
- Avoid overloading the spool pin, and use thread stands for large spools to reduce drag.
By addressing alignment, needle/thread compatibility, and tension, you’ll resolve the vast majority of threader-related headaches. Remember: patience and the right technique are your best allies.
5. Needle Threader Types Compared: Choosing Your Tool
With so many needle threaders on the market, how do you pick the right one? Let’s break down the main types—wire, hook, and automatic—and see which fits your stitching style and project needs.
5.1 Wire vs. Hook vs. Automatic Threaders
Wire Loop Threaders: These classics use a thin wire loop to pull thread through the needle’s eye. They’re affordable, compact, and great for everyday hand sewing or embroidery—think Dritz Looped or Bohin Easy.
- Pros:
- Excellent for small to medium needles (sizes 3–10) and single-strand threads.
- Budget-friendly and easy to stash in your kit.
- Cons:
- Wires can bend or break, especially with thick threads or tiny needle eyes.
- Not ideal for ultra-fine needles or heavy-duty threads.
Hook Threaders: Featuring a rigid or flexible hook, these tools (like Clover Double or LoRan Standard Hook) are versatile and sturdy.
- Pros:
- Handle a wide range of needle sizes and thread types.
- Sturdier than wire threaders—less prone to bending.
- Cons:
- Some models have fragile wires; careful handling is a must.
- May require practice to master the “rocking” pull technique.
Automatic Threaders: These automatic embroidery machine mechanisms make threading nearly effortless—just press a button or flip a lever.
- Pros:
- Perfect for beginners or high-volume projects.
- Work with multiple needle sizes and thread types.
- Reduce hand strain and speed up workflow.
- Cons:
- Higher upfront cost.
- Less portable and can be fragile if mishandled.
| Type | Best Needle Sizes | Thread Types | Durability | Cost |
|---|---|---|---|---|
| Wire Loop | 3–10 (single-strand) | Single-strand | Moderate | $3–$10 |
| Hook | 3–10 (varies by model) | Single/multi-strand | High (rigid) | $5–$10 |
| Automatic | All sizes | Single/multi-strand | Very High | $20–$30+ |
Special Mention: For beading or ultra-fine needles, consider the Puffin micro-threader. As highlighted in top Google results and YouTube demos, this tiny flat-hook marvel is designed for the smallest eyes—just remember to use a gentle rocking motion for best results.
5.2 Material Science: Why Durability Matters
Not all needle threaders are created equal—especially when it comes to what they’re made of. Let’s get a little nerdy about materials, because longevity matters when you’re threading dozens (or hundreds) of needles a week.
PPSU vs. Metal Construction:
- PPSU (Polyphenylsulfone): Used in high-end threaders, PPSU is renowned for its strength, toughness, and heat resistance. It’s the same material found in aircraft interiors and automotive engine parts. Threaders made with BASF PPSU can last up to 40 times longer than those made from standard plastics or lower-grade metals.
- Metal Threaders: Traditional wire or hook threaders often use aluminum or steel. While steel models (like the LoRan) are sturdy and magnetic (great for attaching to your needlework station), aluminum and thin wires are more prone to bending or breaking.
The Sewtalent Standard: Just as Sewtalent magnetic embroidery hoops leverage BASF PPSU for unbeatable durability, top-tier needle threaders built from PPSU or high-grade steel offer a serious edge in longevity. Investing in quality materials means fewer replacements, less frustration, and smoother stitching—especially for garment embroidery where efficiency is key.
6. DIY Alternatives and Creative Solutions
Sometimes, your trusty threader vanishes at the worst possible moment. Don’t panic—your home is full of surprising stand-ins. Here’s how to MacGyver your way out of a threading jam, using everyday items and a dash of creativity.
6.1 Household Hacks: Paper, Copper Wire, and Broom Fibers
Copper Wire Threader: Got an old electrical cord? Strip out a thin strand of copper wire (30-gauge or thinner works best), bend it into a loop, and attach it to a small piece of tin (like from a soda can) for a handle. Insert the wire through the needle’s eye, thread your floss, and pull it back through. This DIY tool is reusable, durable, and customizable for any needle size.
Folded Paper Method: A classic for classrooms and emergencies. Fold a small strip of printer paper lengthwise, slip your thread inside the crease, and slide the paper through the needle’s eye. Once through, pull the paper out—your needle is threaded! Sharpen the paper’s corner with scissors for easier insertion.
Broom Fiber Hack: Snip a thin, stiff fiber from a household broom, fold it in half, and use it as a makeshift threader. Thread goes in the bend; the broom fiber glides through even small needle eyes. For added grip, secure the ends in a straw and melt them together (as shown in YouTube tutorials).
Medicine Foil Trick: Cut a sharp corner from a pillbox foil, pierce a tiny hole, and use it to guide the thread through the needle eye. The foil’s rigidity helps direct the thread with surprising accuracy.
Fold-and-Pinch Technique: Fold your thread tip to double its thickness, pinch tightly, and push the folded loop through the needle’s eye. Works best for larger needles.
Tweezers-Assisted Method: Use tweezers to grip the thread tip and guide it through the needle eye—especially handy for small needles or shaky hands.
Moisture-Assisted Threading: Dampen the thread tip or needle eye to reduce fraying and help the thread glide through. Combine with the “reverse approach”—bring the needle to the thread—for even better results.
Old Thread Guiding: If there’s a snippet of old thread left in your needle, use it to pull a new thread through. Wrap the old thread around the needle, attach the new thread, and pull it through together.
| Method | Best For | Ease of Use | Household Items Required |
|---|---|---|---|
| Copper Wire Threader | Small/large needles | Moderate | Wire, tin, tools |
| Folded Paper | Beginners/children | Easy | Paper |
| Fold-and-Pinch | Large needles | Easy | None |
| Tweezers | Small needles | Moderate | Tweezers |
| Moisture-Assisted | All needles | Easy | Water |
| Old Thread Guiding | Small needles | Easy | Existing thread |
Key Tips for Success:
- Always cut your thread at a 45° angle for a clean, fray-free tip.
- Use good lighting and, if possible, magnification to improve visibility.
- Don’t be afraid to reverse the process—sometimes bringing the needle to the thread is easier than the other way around.
A Word of Caution: While these hacks are lifesavers in a pinch, they’re best reserved for emergencies or quick fixes. For regular stitching, invest in a quality threader—it’ll save you time, frustration, and a few choice words. Always test free embroidery patterns for embroidery machine on a scrap before committing to your main project.
Ready to conquer every threading challenge? With these troubleshooting strategies, tool comparisons, and creative hacks, you’ll never be left tangled at the starting line. Keep your favorite threader (and a backup or two) handy, and remember: every great stitch starts with a perfectly threaded needle.
7. Maintenance and Advanced Threading Techniques
Needle threaders may be small, but with the right care and a few advanced tricks, they’ll serve you faithfully through countless projects—whether you’re hand-stitching heirlooms or running a bustling embroidery shop. Let’s dive into the best practices for extending the life of your threaders and tackling thicker threads or industrial-scale demands.
7.1 Extending Lifespan: Cleaning and Storage
A needle threader’s worst enemies? Bent hooks, hidden debris, and careless storage. But with a little TLC, you can keep your tools in tip-top shape:
Routine Inspection and Cleaning
- Visual Checks: Before each use, give your threader a quick look. Is the hook straight? Any lint or thread bits stuck in the mechanism? For multi-needle machines, remove all threads and use a piece of white paper behind the threader to illuminate any hidden gunk.
- Compressed Air: A gentle blast of compressed air can clear away dust and stray fibers, especially in automatic threaders where buildup might block the hook’s path.
- Gentle Realignment: If you notice a bent hook, don’t panic. Use a seam ripper or small screwdriver to nudge it back into place—just like a watchmaker tuning a tiny gear. This simple fix can save you from buying a replacement.
Smart Storage
- Protective Cases: Thin-wire threaders are notoriously fragile. Store them in a hard case or a padded compartment in your sewing kit to prevent accidental bending or breakage.
- Avoid Rough Handling: Resist the urge to toss your threader into a jumble of pins and needles. Treat it with care, and it’ll return the favor.
- Thread Management: Keep your threads trimmed to the right length before threading. This reduces tangling and friction, protecting both the threader and your sanity.
Consistency Across Tools
Just as you’d clean and protect your Sewtalent magnetic embroidery hoops—wiping away dust, checking for wear, and storing them securely—apply the same diligence to your needle threaders. Consistent maintenance routines across all your tools mean fewer interruptions and smoother stitching sessions.
Troubleshooting Quick Reference
| Issue | Solution |
|---|---|
| Bent hook | Gently realign with seam ripper or screwdriver |
| Threader not working | Inspect for debris/misalignment; clean or replace |
| Thread won’t pull through | Ensure thread is correctly seated in slot or loop |
A little preventive care goes a long way—your future self (and your next embroidery masterpiece) will thank you.
7.2 Thick Threads and Industrial Applications
When your project calls for more than just standard cotton—think embroidery floss, wool, or even industrial-weight threads—ordinary threading tricks might fall short. Here’s how to level up:
Flat-Hook Techniques for Embroidery Floss
- Choose the Right Tool: Flat-hook threaders excel with embroidery floss or multiple strands. Their sturdy design handles thicker threads without bending or snapping—a must for dense, decorative stitching.
- Rocking Motion: As demonstrated in expert YouTube tutorials and echoed by seasoned embroiderers, use a gentle up-and-down rocking motion (never side-to-side) when pulling thick threads through the needle. This minimizes stress on the hook and ensures a smooth glide.
Industrial-Scale Solutions
- Automated Threaders: For industrial embroidery machines in high-volume workshops, automated threaders are the unsung heroes. They streamline repetitive threading tasks, reduce hand fatigue, and keep production humming.
- Sewtalent Synergy: Much like how Sewtalent magnetic hoops simplify and speed up garment embroidery by keeping fabric stable and reducing setup time, automated threaders bring efficiency and consistency to threading—especially when you’re juggling dozens of needles or running multiple machines.
Pro Tips:
- Always match your threader to the thread and needle size. Forcing thick threads through small eyes is a recipe for breakage.
- For embroidery floss, separate strands before threading to prevent bunching. If you’re working with specialty threads, test on a scrap before committing to your main project.
With the right maintenance and advanced techniques, your needle threader becomes more than just a convenience—it’s a powerhouse tool, ready to tackle any thread, any project, any time.
8. Conclusion: Thread with Confidence
Mastering the needle threader is more than a time-saver—it’s a gateway to effortless, frustration-free embroidery. By focusing on alignment precision, choosing the right tool for your thread and needle, and practicing preventive care, you’ll transform threading from a tedious chore into a seamless part of your creative flow.
Remember, efficiency isn’t just about speed—it’s about working smarter. That’s why tools like Sewtalent magnetic embroidery hoops and well-maintained threaders are essential allies for anyone serious about garment embroidery. They keep your fabric stable, your workflow smooth, and your projects looking sharp.
So, thread with confidence. With a little practice and the right tools, every stitch becomes a joy.
9. FAQ: Needle Threader Essentials
9.1 Q: Can needle threaders handle beading needles?
A: Yes, but you'll need a specialized micro-hook or ultra-fine wire threader. Standard wire threaders are often too large for the tiny eyes of beading needles, but micro-threaders (like the Puffin micro threader) are designed specifically for this purpose. Use a gentle rocking motion for best results.
9.2 Q: Why does my needle threader keep breaking?
A: Material quality and technique matter. Thin-wire threaders are affordable but prone to bending or snapping, especially if used with thick threads or small needle eyes. Always match your threader to your needle and thread size, and avoid excessive force. Regular inspection and gentle handling will extend your threader's lifespan.
9.3 Q: What's the best way to clean and store my needle threader?
A: Use compressed air to remove dust and lint, inspect for bends or debris, and store your threader in a protective case or padded compartment. Avoid tossing it loosely into your sewing kit, as rough handling can lead to damage.
9.4 Q: Can I use a needle threader with embroidery floss or thick threads?
A: Absolutely—just choose a flat-hook or robust threader designed for multi-strand threads. Forcing thick threads through a small wire loop can cause breakage, so opt for a tool that matches your materials.
9.5 Q: How do I fix a bent needle threader hook?
A: Gently realign it using a seam ripper or small screwdriver. If the hook is severely damaged, replacement may be necessary, but minor bends are often easy to correct with a steady hand.
Armed with these tips, you're ready to conquer any threading challenge—no squinting, no frustration, just pure creative flow. Happy stitching!