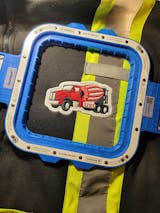
1. Introduction to Bernina Jumbo Hoop Capabilities
The bernina embroidery hoop (Jumbo) unlocks a new world of creative possibilities for embroidery enthusiasts and professionals alike. With its generous 260x400mm (10.2 x 15.7 inches) capacity, this hoop is purpose-built for ambitious, large-scale projects—think expansive quilt blocks, bold border designs, and intricate motifs that simply don’t fit in standard frames. The Jumbo Hoop’s transformative impact lies in its ability to minimize rehooping, streamline workflow, and empower users to tackle everything from oversized tote bags to edge-to-edge quilting with confidence.
In this ultimate guide, we’ll explore the technical essentials of machine compatibility, demystify setup and alignment, and dive deep into advanced techniques for maximizing your embroidery area. Whether you’re a seasoned Bernina user or just stepping into the world of large-format embroidery, you’ll discover practical tips, troubleshooting advice, and workflow strategies to elevate your craft and make the most of your Bernina Jumbo Hoop.
Table of Contents
- 1. Introduction to Bernina Jumbo Hoop Capabilities
- 2. Machine Compatibility & Setup Essentials
- 3. Advanced Techniques for Quilts & Large Formats
- 4. Solving Common Hooping Challenges
- 5. Bernina Hoop System Comparison
- 6. Accessory Integration Guide
- 7. Maintenance & Longevity Best Practices
- 8. FAQ: Expert Answers to Common Queries
- 9. Conclusion: Elevating Your Embroidery Game
2. Machine Compatibility & Setup Essentials
The Bernina Jumbo Hoop’s impressive size is only as powerful as the machine it’s paired with. Let’s break down compatibility, setup, and how to get flawless results from the very first stitch.
2.1 Series-Specific Embroidery Areas Demystified
Not all Bernina machines unlock the full potential of the Jumbo Hoop. Here’s how the major series stack up:
| Machine Series | Max Embroidery Area | Key Models |
|---|---|---|
| 7 Series | 210 x 400 mm | bernina 790, B 780 |
| 8 Series | 260 x 400 mm | B 880, B 830 |
- 7 Series machines, while compatible with the Jumbo Hoop, are limited to a 210 x 400 mm embroidery field due to hardware constraints. This means you get the full length (great for borders or vertical motifs) but a slightly narrower width.
- 8 Series machines shine brightest, offering the full 260 x 400 mm area—perfect for large motifs, complex multi-hoop designs, and ambitious quilting projects.
- Q16 compatibility isn’t universally confirmed; always check with Bernina or your local dealer for the latest guidance.
Alignment Templates: Every Jumbo Hoop comes with a precision template, making it easy to align borders, combine designs, or place motifs exactly where you want them. Simply mark your fabric’s center line, use the template to check positioning, and secure everything in place before you start. This step is crucial for seamless, professional results—especially when working with continuous designs or multi-hooping workflows.
Alternative Solutions for Multi-Machine Studios: If your studio juggles different machine brands or you crave even more versatility, magnetic embroidery hoops like those from Sewtalent offer universal compatibility and rapid hooping for garment projects. These magnetic hoops excel at adapting to various machines and fabric types, streamlining production for busy studios. (Note: Sewtalent hoops are for garment hooping, not caps or hats.)
2.2 Ratchet System Optimization Guide
The Jumbo Hoop’s ergonomic twist-lock ratchet mechanism is a game-changer for tension and ease of use. Here’s how to master it:
Step-by-Step Tensioning:
1. Place your fabric and stabilizer in the hoop, aligning with the template for accuracy.
2. Engage the ratchet mechanism—you’ll hear and feel satisfying audio/visual clicks as you tighten. These clicks indicate even, secure tension across the entire hoop.
3. Check tautness: Your fabric should be drum-tight, with no puckering or slack. This prevents misalignment and ensures crisp, flawless stitching.
4. Release with ease: When finished, a simple twist unlocks the hoop, making removal effortless and protecting your fabric from unnecessary stress.
Contrast with Magnetic Hooping Systems: While the Jumbo Hoop’s ratchet system is robust and intuitive, magnetic hooping systems—like those from Sewtalent—offer a different kind of magic for garment embroidery. With strong magnets and a user-friendly design, magnetic hoops automatically adapt to fabric thickness, deliver even tension, and virtually eliminate hoop burn. They’re especially handy for multi-layered or tricky-to-hoop garments, saving time and reducing operator fatigue.
Pro Tips:
- Avoid abrupt movements or excessive force when attaching or removing the hoop—this protects the ratchet mechanism for the long haul.
- For heavy or slippery fabrics, always use the recommended stabilizers and double-check alignment before starting your design.
3. Advanced Techniques for Quilts & Large Formats
Big projects require big strategies. Here’s how to ensure your quilts, tote bags, and other large-format creations look as stunning as you imagine.
3.1 Three-Layer Stabilization Strategies
Building the Perfect Quilt Sandwich:
1. Backing Fabric: Place right side down and secure with masking tape to prevent wrinkles.
2. Stabilizer: Choose an 80% cotton/20% polyester blend or a high-quality tear-away stabilizer, trimmed to fit your hoop.
3. Quilt Top: Center carefully, ensuring minimal fabric bulk near the embroidery arm for smooth movement.
Stabilizer Selection:
- Cotton/Polyester blends are breathable and stable—ideal for quilting.
- Tear-away stabilizers work best for dense stitching, allowing for easy removal post-quilting.
- Stick-on stabilizers can be applied to the hoop’s underside for taut mounting, especially helpful when you want to avoid interference with the hoop’s mechanism.
Needle and Thread Choices:
Match your needle to your thread and fabric—universal 14 for cotton, embroidery needles for specialty threads, and top stitch needles for variegated options. Adjust thread weight for project density (heavier threads for tote bags, for example).
Tension Management:
Tighten the hoop so the entire sandwich is secure, adjusting screws or ratchets for uniform tension. For even greater accuracy, hooping stations compatible with Sewtalent magnetic hoops can streamline alignment and boost productivity for batch projects.
3.2 Multi-Hooping Workflow Automation
Software-Driven Multi-Hooping:
Modern embroidery software like OESD Bernina embroidery designs can split large designs into multiple hoop positions, generating registration marks for perfect alignment. This means you can tackle intricate, oversized patterns with confidence—no guesswork required.
Manual Multi-Hooping:
Prefer hands-on control? Manually adjust hoop positions and design splits for complex layouts. Always use registration marks to ensure seamless continuity between sections.
Physical Re-Hooping Techniques:
1. Initial Hooping: Mount your quilt sandwich in the Jumbo Hoop, aligning the design with the quilt top’s center.
2. Horizontal/Vertical Re-Hooping: Shift the quilt within the frame—left/right for horizontal moves, up/down for vertical progress.
3. Registration Marks: Use software-generated marks or your own reference points to guarantee flawless transitions between hoopings.
| Factor | Single Hoop (Midi/Oval) | Multi-Hooping (Jumbo + Frame) |
|---|---|---|
| Project Size | Limited to 5" blocks | Full quilts/tote bags |
| Time Efficiency | Lower (more hooping) | Higher (streamlined moves) |
| Design Complexity | Basic patterns | Intricate, multi-section |
Critical Considerations:
- Choose stabilizers based on stitch density and fabric weight.
- Keep fabric bulk away from the embroidery arm to avoid machine strain.
- Match bobbin thread to your backing fabric for a polished, professional finish.
By integrating these advanced techniques and leveraging the full capacity of your Bernina Jumbo Hoop, you’ll transform daunting large-scale projects into streamlined, joy-filled creative journeys. Ready to see your next quilt or tote bag come to life—without the headache? The Jumbo Hoop is your ticket to embroidery mastery.
4. Solving Common Hooping Challenges
Every embroidery journey hits a few speed bumps, but nothing derails a project faster than fabric shifting or uneven tension—especially when working with the expansive Bernina Jumbo Hoop. Let’s break down the most common culprits, proven fixes, and practical protocols so your next large-scale masterpiece stays smooth, crisp, and frustration-free.
4.1 Fabric Shift Prevention Protocols
Why does fabric shift or tension go wonky? It’s usually a perfect storm of small missteps: not tightening the ratchet system until you hear that satisfying "click," skipping the right stabilizer, or letting a stray thread sneak into the clamp mechanism. Even choosing the wrong hoop in your machine’s settings can trigger errors and halt your workflow with a dreaded "Attach Correct Hoop" message.
Troubleshooting Checklist for Tension Issues
- Proper Hoop Tightening & Alignment: Always tighten the Jumbo Hoop’s lock until you hear an audible click—this is your green light for maximum tension. Hold the inner ring firmly at tension points to avoid lifting and uneven pressure. Before you even reach for the hoop, smooth your fabric and stabilizer so they’re drum-tight and wrinkle-free.
- Stabilizer Selection: Don’t skimp here. Use cut-away or tear-away stabilizers to give your fabric the grip it needs. For denser or multi-layered projects, opt for blends that match your fabric’s weight and stitch density.
- Machine Settings & Calibration: Make sure you’ve selected the Jumbo Hoop in your embroidery settings. If your Bernina embroidery machine can’t "see" the hoop, you’ll hit error messages and lose precious time. Run the calibration routine—using functions like "Check Embroidery Design Size" or "Pinpoint Placement"—to align the hoop’s grid with your design perfectly.
- Maintenance & Inspection: Lint, thread bits, or debris around the clamp or tension points can sabotage even the best setup. Regularly clean these areas to keep everything running smoothly. The twist-lock mechanism is engineered for ergonomic, reliable performance—avoid third-party springs, which can interfere with Bernina’s design.
Best Practices at a Glance
| Step | What to Do |
|---|---|
| Hoop Tightening | Tighten until you hear a click; hold inner ring at tension points. |
| Fabric Prep | Smooth fabric and stabilizer; ensure both are taut and wrinkle-free. |
| Stabilizer Choice | Use cut-away or tear-away suited to your fabric and design density. |
| Machine Settings | Select Jumbo Hoop in menu; calibrate with built-in alignment tools. |
| Maintenance | Clean clamp and tension areas regularly; avoid makeshift modifications. |
Common Errors & Quick Fixes
| Error | Resolution |
|---|---|
| "Attach Correct Hoop" | Double-check hoop selection in settings; ensure physical attachment with a click. |
| "1010 Main Sync Drive" | Look for thread jams or debris; restart the machine. |
| CrystalWork Design Issues | Remember: CrystalWork designs are not compatible with the Jumbo Hoop. |
Key Design Features of the Jumbo Hoop
- Twist-Lock Mechanism: Effortless opening/closing, reducing fabric strain.
- Audible Click Indicator: Confirms secure locking—no more guessing if you’ve tightened enough.
- Weight-Sensitive Design: Lets your machine detect hoop presence and size, boosting both safety and accuracy.
By following these protocols, you’ll sidestep the most common pitfalls and keep your embroidery journey on track. Ready to level up even further? For garment embroidery, magnetic hoop alternatives like Sewtalent can provide even tension and lightning-fast setup—especially for tricky fabrics. But for quilts and large flat projects, mastering your Jumbo Hoop’s ratchet system is your best bet for professional, frustration-free results.
5. Bernina Hoop System Comparison
Choosing the right hoop can feel like picking the perfect paintbrush—each has its own strengths, and the "best" one depends on your project's canvas. Let's pit the Bernina Jumbo Hoop against the Mega and Large Oval Hoops in a border project showdown, so you can optimize every stitch.
5.1 Jumbo vs Mega Hoop: Border Projects Showdown
| Hoop Type | Embroidery Area (mm) | Embroidery Area (inches) | Special Features |
|---|---|---|---|
| Jumbo Hoop | 260 x 400 (8 Series) / 210 x 400 (7 Series) | 10.2 x 15.7 / 8.3 x 15.7 | Ergonomic twist-lock, ratchet system, three embroidery positions, template |
| Mega Hoop | 150 x 400 | 5.9 x 15.7 | Three embroidery positions for continuous stitching, border alignment template |
| Large Oval Hoop | 145 x 255 | 5.7 x 10 | Template for precise placement, compatible with standard freearm adapters |
Size and Project Optimization
- Jumbo Hoop: The heavyweight champion for oversized motifs, multi-part designs, and full quilt blocks. Its three embroidery positions allow you to stitch continuous borders with minimal rehooping—perfect for ambitious, edge-to-edge projects.
- Mega Hoop: Tailor-made for long, continuous borders (think table runners or garment hems). Its three-position template makes repetitive patterns seamless, but you may need to realign more often for intricate designs.
- Large Oval Hoop: The all-rounder—ideal for medium-to-large designs, quilting blocks, or multi-motif layouts. Its template guidance is a lifesaver for beginners or precise placements.
| Factor | Jumbo Hoop | Mega Hoop | Large Oval Hoop |
|---|---|---|---|
| Clamping Mechanism | Ergonomic twist-lock with ratchet | Standard twist-lock or screw system | Standard twist-lock or screw system |
| Fabric Support | Superior for heavy fabrics/quilts | Moderate support for medium-weight | Moderate support for general use |
| Alignment Tools | Included template for precise placement | Included template for border alignment | Included template for design placement |
Compatibility and Use Cases
| Hoop | Machine Compatibility | Best For |
|---|---|---|
| Jumbo Hoop | 8 Series (primary), 7 Series (optional) | Oversized motifs, multi-part designs, quilts |
| Mega Hoop | 7 Series and 8 Series | Borders, continuous stitching, large motifs |
| Large Oval Hoop | All BERNINA embroidery modules | Medium-sized designs, quilting blocks, apparel |
| Metric | Jumbo Hoop | Mega Hoop | Large Oval Hoop |
|---|---|---|---|
| Max Width | 260 mm | 150 mm | 145 mm |
| Max Height | 400 mm | 400 mm | 255 mm |
| Precision Features | Twist-lock + ratchet | Three-position template | Standard template |
| Ideal Projects | Quilts, large motifs | Borders, continuous stitching | Medium designs, quilting |
Bottom line: For maximum efficiency in border projects, compare Bernina hoop sizes against your design dimensions before starting.
- Choose the Jumbo Hoop for large, complex projects where minimizing rehooping is key
- Opt for the Mega Hoop when seamless, border-to-border stitching is your goal
- The Large Oval Hoop is your everyday workhorse for versatile, medium-sized projects
6. Accessory Integration Guide
Precision isn’t just about the hoop—it’s about the tools and workflow you build around it. The right accessories can transform your Bernina Jumbo Hoop experience, making every placement pixel-perfect and every stitch count.
6.1 Template Alignment Mastery
The Power of Precision Templates
Every Bernina Jumbo Hoop includes a precision alignment template designed to make centering your designs a breeze. These templates attach with holder clips, slotting into the inner ring for pinpoint accuracy. Notched attachments—like those found on the Large Freearm Hoop—further streamline the process, ensuring your motifs land exactly where you want them.
| Feature | Detail |
|---|---|
| Max embroidery area | 260 x 400 mm (7 Series: 210 x 400 mm) |
| Template functionality | Ensures exact fabric positioning |
How to Use:
1. Attach the Template: Secure the template to the hoop using the provided holder clips or notches.
2. Mark and Align: Mark your fabric’s center or design line, then use the template grid to align your motif.
3. Hoop with Confidence: Once aligned, hoop your fabric and stabilizer, ensuring everything stays perfectly in place.
Accessory Integration for Specialized Tasks
- Freearm Adapter: Embroidering on pre-made bags, T-shirts, or tubular items? The Freearm Adapter lets you slide these projects under the hoop without unpicking seams—no more wrestling with awkward shapes. The ergonomic twist-lock mechanism ensures secure, even tension, compatible with both 7 and 8 Series machines.
- Hoop 'n' Buddyz Inserts: For challenging fabrics or cap embroidery, third-party inserts like Hoop 'n' Buddyz add extra stability, expanding your hoop’s versatility.
- Bernina Magnetic Hoop Systems: Enhance workflow efficiency with Bernina magnetic hoop systems that maintain perfect fabric alignment during complex embroidery sequences.
Workflow Optimization Tips
- Always raise your needle to the highest position before attaching the hoop to avoid snagging.
- Guide the hoop under the embroidery foot, aligning with your template for flawless placement.
- Gradually adjust tension with the ratchet mechanism, listening for that reassuring click.
Gaps and Considerations
- While bungee straps and custom leaders aren’t explicitly covered in the official documentation, accessories like Hoop 'n' Buddyz can offer similar stabilization benefits for complex projects.
- For machine-specific integration, always consult Bernina’s latest resources or your local dealer.
By mastering template alignment and leveraging the right accessories, you’ll unlock the full potential of your Bernina Jumbo Hoop—turning every project into a showcase of precision and creativity.
7. Maintenance & Longevity Best Practices
A well-cared-for Bernina Jumbo Hoop is your passport to years of flawless embroidery—think of it as the secret ingredient behind every crisp border and perfectly aligned quilt block. Let’s unlock the keys to hoop longevity, so your creative journey never gets derailed by a sticky ratchet or a warped frame.
7.1 Proactive Ratchet Care Routine
Monthly Maintenance Schedule
The heart of the Jumbo Hoop’s reliability is its ergonomic twist-lock ratchet mechanism. Over time, lint, stray threads, and dust can sneak into the ratchet system, threatening the even tension you rely on for pristine stitch-outs. Here’s how to keep things running like clockwork:
- Brush Cleaning Techniques
Use a soft-bristled brush to gently sweep away lint and thread fragments from the ratchet mechanism. Always work from the top down—this prevents debris from getting pushed deeper into the system. Resist the urge to lubricate the ratchet; oils can attract more lint and compromise the mechanism’s precision.
- Wear Indicators & Part Replacement
While the Jumbo Hoop is built for durability, high-volume use can eventually wear down clamps or other components. Always opt for genuine BERNINA replacement parts to maintain perfect alignment and clamping force—third-party parts might seem tempting but risk embroidery accuracy. Before installing any new parts, double-check compatibility with your specific machine model, as embroidery areas differ (260 x 400 mm for most, 210 x 400 mm for 7 Series).
- Proper Storage for Oversized Hoops
Avoid accidental warping or scratches by storing your Jumbo Hoop in its original box or a padded case. Lay it flat—never on its side or under heavy objects—to protect the ratchet and clamp arms from bending.
- Calibration & Alignment After Maintenance
After cleaning, replacing parts, or pulling your hoop out of storage, recalibrate using your machine’s Setup Program. This step is essential for keeping your hoop and embroidery module in sync, especially for those edge-to-edge or border projects where millimeter-perfect placement matters.
| Task | How Often | Details |
|---|---|---|
| Brush clean ratchet | Monthly | Use soft brush, avoid oils |
| Inspect for wear | Monthly | Look for loose clamps, cracks, or misalignment |
| Replace parts | As needed | Only use genuine BERNINA components |
| Store hoop properly | Always | Flat in padded case or original packaging |
| Recalibrate after care | After cleaning/part replacement | Use Setup Program for alignment |
Additional Best Practices
- Clean your machine’s bobbin area, hook race, and thread cutter regularly—lint here can indirectly affect hoop performance.
- Schedule annual Bernina machine checkups with a BERNINA-certified technician to ensure tension calibration and firmware are up to date.
By following these simple but essential routines, you’ll extend the life of your Jumbo Hoop and keep your embroidery results as sharp as day one. Think of it as a little spa day for your most valuable embroidery tool—your future self (and your next quilt) will thank you.
8. FAQ: Expert Answers to Common Queries
8.1 Q: How do I troubleshoot tension issues with the Bernina Jumbo Hoop?
A: Tension problems often stem from debris in the ratchet mechanism, improper stabilizer choice, or uneven hoop tightening. Start by cleaning the ratchet with a soft-bristled brush, ensuring no lint or threads are trapped. Always tighten the hoop until you hear the audible click, confirming even tension. Use stabilizers that match your fabric and stitch density, and double-check that your machine settings are calibrated for the Jumbo Hoop.
8.2 Q: Is the Bernina Jumbo Hoop compatible with the Q16 and Q16 PLUS machines?
A: The Bernina Q16 and Q16 PLUS are compatible with the Bernina Hoop Frame system, which features its own ratchet and clamp mechanisms. While the Jumbo Hoop is primarily designed for 7 and 8 Series embroidery machines, always confirm compatibility with your specific machine and frame setup through Bernina’s latest resources or your local dealer.
8.3 Q: What software or firmware requirements should I be aware of for the Jumbo Hoop?
A: For optimal performance, ensure your embroidery machine’s firmware is up to date—especially if you're using newer hoops or accessories like the Large Freearm Hoop. Firmware updates may be model-specific (e.g., separate updates for the 880, 790, 770, 7 Series, 590, 500, and 570). Always consult your dealer or Bernina’s support site for the latest updates and installation instructions.
9. Conclusion: Elevating Your Embroidery Game
Mastering the Bernina Jumbo Hoop is about more than maximizing stitch area—it’s about embracing a workflow that blends precision, creativity, and efficiency. By following best practices for setup, maintenance, and alignment, you’ll unlock the full potential of your hoop and machine, transforming ambitious projects into showstopping results. Stay curious, keep your tools in top shape, and let technology empower your artistry—your next masterpiece is just a hoop away.


