1. Introduction to Computerized Embroidery Machines
Computerized embroidery machines have transformed the textile arts, merging the precision of traditional sewing with the limitless possibilities of digital design. Imagine taking a sketch from your tablet and watching it come to life, stitch by stitch, on your favorite jacket—no more hand tracing, no more guesswork. These machines are not just tools; they’re creative partners that empower both seasoned professionals and curious beginners to produce intricate, consistent embroidery with remarkable efficiency.
What sets computer embroidery machines apart? It’s the seamless blend of hardware and software: advanced hooping systems, intuitive touchscreens, and automated features like thread cutting and tension adjustment. Whether you’re dreaming up custom monograms, launching a small embroidery business, or simply looking to personalize gifts, computerized embroidery machines open the door to professional-quality results at home. In the following sections, we’ll break down the essential features—hoop sizes, connectivity, automation—and compare top-rated models to help you find the perfect fit for your creative journey.
Table of Contents
- 1. Introduction to Computerized Embroidery Machines
- 2. Core Features Demystified: What Makes These Machines Unique
- 3. Top Machines Compared: From Beginners to Professionals
- 4. Combo vs. Dedicated: Choosing Your Machine Type
- 5. Essential Setup & Accessories for Flawless Results
- 6. Sourcing & Customizing Designs: From Built-ins to Digitizing
- 7. Conclusion: Matching Machine to Mastery
- 8. FAQ: Your Top Machine Embroidery Questions Answered
2. Core Features Demystified: What Makes These Machines Unique
Computerized sewing machines with embroidery functionality are marvels of modern engineering, designed to make embroidery accessible, precise, and endlessly customizable. Let’s unravel the core features that set these machines apart from their analog ancestors.
2.1 Hoop Sizes Decoded: From 4x4 to 8x8 Fields
When it comes to embroidery, the hoop size is your creative canvas—and its true dimensions can be a bit of a puzzle. While a “4x4” hoop might sound straightforward, the actual stitching area is often slightly smaller due to the machine’s need for clearance around the edges. For example, a 4x4 hoop typically provides a sewing field of about 3.93x3.93 inches, even though the physical hoop itself is larger. Why does this matter? Because the size of your hoop directly impacts the designs you can stitch without interruption or re-hooping.
Here’s a quick breakdown of common hoop sizes:
| Hoop Size (inches) | Typical Use |
|---|---|
| 4x4 | Entry-level, small motifs, monograms |
| 5x7 | Industry standard, versatile for most projects |
| 6x10 | Larger designs, mid-to-high-end machines |
| 8x8 and above | Professional, oversized or complex designs |
Most embroidery designs you’ll find online are digitized for 4x4 or 5x7 hoops—making the 5x7 field the industry sweet spot for flexibility and cost efficiency. Entry-level machines often include only a 4x4 hoop, while advanced models support multiple sizes. If you’re planning to tackle bigger projects, investing in a machine with at least a 5x7 hoop is a wise move. Remember: a larger hoop not only expands your design options but also saves you time by reducing the need to split and reposition your work.
2.2 Smart Connectivity: USB, Wi-Fi & App Integration
Gone are the days of clunky cables and manual pattern transfers. Today’s computerized embroidery machines offer a buffet of connectivity options that make importing and editing designs a breeze.
- USB Connectivity: The universal standard—simply load your embroidery files onto a USB stick and plug it into your machine. Models like the Brother SE600 make this process seamless, letting you access thousands of designs from online marketplaces or your own digital creations.
- Wi-Fi & App Integration: Higher-end machines, such as the Brother SE2000 and Baby Lock Altair 2, take it up a notch with wireless design transfer. Imagine sketching a motif on your phone and sending it directly to your machine via the Artspira or IQ Intuition Positioning app—no thumb drives required. These apps often include built-in libraries, digitizing tools, and even AR features for previewing designs on your fabric.
- On-Device Editing: Touchscreens aren’t just for previewing; they let you drag, drop, resize, rotate, mirror, and recolor designs right on the machine. Want to arc your lettering or tweak thread colors before you stitch? It’s all at your fingertips, thanks to intuitive interfaces and built-in color palettes.
This smart connectivity not only streamlines your workflow but also fuels creativity, giving you the freedom to experiment with new designs and techniques without technical hurdles.
2.3 Automation Power: Thread Control, Precision & Efficiency
If you’ve ever tangled with manual threading or struggled to keep your stitches even, you’ll appreciate the automation baked into modern embroidery machines.
- Automatic Needle Threading: Machines like the Brother SE2000 and Bernette B79 make threading as simple as pressing a button—no more squinting or frustration.
- Automatic Thread Cutting & Tension Control: Say goodbye to tedious snipping and constant tension tweaks. With features like upper thread and bobbin sensors, your machine monitors thread status and adjusts tension on the fly, ensuring crisp, clean results every time.
- Stitch Density & Precision Adjustments: Onscreen tools let you fine-tune stitch density for different fabrics and designs, optimizing both appearance and durability.
- Integrated Sewing-Embroidery Workflows: Combo machines allow you to switch between sewing, quilting, and embroidery without missing a beat—perfect for multi-step projects or creative experimentation.
These automated features don’t just make embroidery easier; they elevate the quality and consistency of your work, whether you’re monogramming a single towel or producing a batch of branded uniforms. The result? More time creating, less time troubleshooting.
3. Top Machines Compared: From Beginners to Professionals
Choosing the right computerized embroidery machine can feel like navigating a maze of specs, brands, and buzzwords. Let’s cut through the clutter and spotlight the standout models in our embroidery machine reviews for every skill level, drawing on expert reviews, user experiences, and real-world performance.
3.1 Entry-Level Champions: Brother SE600 & PE535
If you’re just dipping your toes into embroidery, the Brother SE600 and PE535 are crowd favorites for a reason. The SE600 is a versatile combo machine—sewing and embroidery in one—featuring a 4x4 embroidery area, 80 built-in designs, and 103 sewing stitches. Its color LCD touchscreen, easy drop-in bobbin, and USB port make it approachable for beginners, while on-screen tutorials guide you every step of the way. The PE535, an embroidery-only model, offers similar ease of use with 80 built-in designs and a 4x4 field, making it lightweight and perfect for those focused solely on embroidery.
Both models earn high marks from the Good Housekeeping Institute and YouTube creators for their intuitive controls and reliability. While the 4x4 hoop may feel limiting for larger projects, these machines are ideal for small motifs, monograms, and learning the ropes without breaking the bank.
3.2 Mid-Range Powerhouses: Brother SE2000 vs. Baby Lock Altair 2
Ready to level up? The Brother SE2000 and Baby Lock Altair 2 bring a suite of advanced features for hobbyists and small business owners alike.
- Brother SE2000: Boasts a generous 5x7 embroidery area, 193 built-in designs, 13 fonts, and a large touchscreen. Wireless connectivity via the Artspira app lets you upload and edit designs effortlessly. Automatic threading, thread cutting, and needle up/down controls streamline your workflow. Experts and users alike praise its “intuitive controls, big touchscreen, and larger than average embroidery area.”
- Baby Lock Altair 2: A premium pick with a massive 10.1-inch touchscreen, Bluetooth connectivity, and the IQ Intuition Positioning app for wireless design uploads and precise placement. It comes loaded with 534 built-in designs, 30 fonts, and supports hoops up to 9.5x14 inches—perfect for ambitious projects. Automation features like thread cutting and tie-off are a boon for intricate, multi-color designs.
Both machines offer robust performance, but the SE2000 stands out for its blend of speed, connectivity, and value, while the Altair 2 shines for those seeking a luxury, large-format experience.
3.3 Professional-Grade Solutions: Janome MB-7 & Industrial Options
For high-volume production and serious embroidery entrepreneurs, the Janome MB-7 is a powerhouse. This seven-needle, embroidery-only machine is engineered for efficiency, with a maximum embroidery size of 9.4x7.9 inches and the ability to pre-thread all needles for rapid color changes. It features 50 built-in designs, 10 fonts, and an independent bobbin winder—so you can prep the next spool while the machine is running.
Industrial models like the Janome HD3000 are built to handle heavy fabrics and demanding workloads, with metal frames for durability and consistent stitch quality across multiple layers. While these machines require a steeper investment and learning curve, they deliver the speed, precision, and reliability needed for professional studios and thriving embroidery businesses.
Curious which machine fits your goals and budget? Stay tuned as we dive deeper into setup essentials, accessories, and design sourcing in the next chapters—or jump ahead to our in-depth comparison tables for a side-by-side look at specs and standout features!
4. Combo vs. Dedicated: Choosing Your Machine Type
When it comes to computerized sewing machines with embroidery functions, one of the most pivotal decisions is whether to opt for a combo machine (sewing + embroidery) or a dedicated embroidery-only unit. Let’s break down the real-world trade-offs, drawing from industry research, expert reviews, and user experiences.
4.1 Space and Budget Considerations
Imagine your creative space: is it a sprawling studio or a cozy corner in your living room? If you’re tight on room or working with a modest budget, combo machines like the Brother SE700 shine. These dual-purpose marvels consolidate sewing and embroidery into a single footprint, freeing up precious workspace and eliminating the need for two separate machines. As highlighted in the ZDigitizing SE700 review, the compact design is “ideal for beginners or those with limited room,” letting you switch from hemming pants to personalizing tote bags without missing a beat.
From a budget perspective, combo machines offer a compelling value proposition. For example, the Brother SE700 and SE2000 deliver both sewing and embroidery capabilities at a price point that’s often lower than buying two separate machines. According to SewingMachineFun and Good Housekeeping, entry-level combo models can start “for a couple of hundred dollars,” while embroidery-only machines like the Janome 400E typically command a higher upfront investment.
But what if you have the luxury of space and a more flexible budget? Dedicated embroidery machines, such as the Janome 400E, require their own workspace and represent a higher initial cost. However, this separation allows you to sew and embroider simultaneously—a game-changer for multitaskers or small business owners ramping up production.
Here’s a quick comparison to help visualize your options:
| Machine Type | Space Needed | Typical Price Range | Best For |
|---|---|---|---|
| Combo (e.g., SE700) | Single, compact footprint | $300–$1,400 | Beginners, hobbyists, small spaces |
| Embroidery-Only (400E) | Separate, larger area | $1,300+ | Serious hobbyists, business, high volume |
The bottom line: Combo machines are space- and cost-efficient, perfect for those just starting out or working in tight quarters. If you’re planning to scale up or want to run multiple projects at once, a dedicated embroidery machine may justify the extra investment.
4.2 Workflow Impact: When Specialization Wins
Let’s talk workflow—the hidden engine of productivity. Combo machines are the Swiss Army knives of the sewing world: they let you pivot between sewing and embroidery with a few taps, making them incredibly versatile for creative experimentation or multi-step projects. The Brother SE700, for example, boasts 103 built-in stitches and 135 embroidery designs, allowing you to tackle everything from garment construction to intricate monograms in one session.
However, there’s a trade-off. With a combo machine, you can only sew or embroider at any given moment. Need to stitch a quilt block while embroidering a logo? You’ll have to pause and switch modes, which can interrupt your creative flow—especially if you’re juggling deadlines or batch orders.
Dedicated embroidery machines, on the other hand, are built for uninterrupted focus. They often feature larger embroidery fields (like the Janome 400E’s 7.9" x 7.9" area), faster stitching speeds, and advanced editing tools. This specialization pays off in efficiency: you can sew on one machine while your embroidery-only unit churns out designs, doubling your output and minimizing downtime.
For business owners or high-volume creators, this separation is more than a luxury—it’s a necessity. As seasoned users on forums like Quilting Board point out, “two machines are better than one” when you need to keep multiple projects moving. Commercial setups, especially with multi-needle embroidery machines, take this to the next level, supporting simultaneous color changes and larger designs without constant thread swaps.
In summary:
- Combo machines = flexibility, space savings, and budget-friendliness, but limited to one task at a time.
- Dedicated machines = optimized for productivity, larger designs, and simultaneous workflows—ideal for those ready to scale.
5. Essential Setup & Accessories for Flawless Results
A powerful machine is just the beginning. The right setup and accessories transform your embroidery from “good enough” to gallery-worthy. Let’s dive into the foundational tools and pro tips every embroiderer should know.
5.1 Stabilizers & Threads: The Foundation Matters
Think of stabilizers as the unsung heroes of embroidery—they’re the secret sauce that keeps your designs crisp and your fabric distortion-free. For most projects, you’ll choose between two main types:
- Cutaway Stabilizer: Best for stretchy fabrics like t-shirts, hoodies, or sweaters. It provides permanent support, ensuring your stitches stay put wash after wash. No-show mesh cutaway stabilizers are a favorite for lightweight garments, preventing unsightly shadows on thin fabrics.
- Tear-Away Stabilizer: Perfect for stable, non-stretch fabrics such as tote bags, jeans, or leather. It offers temporary support and can be easily removed after stitching.
Pro tip: Always hoop your stabilizer and fabric together, making sure everything is taut—think “drum-tight” for optimal results.
Now, let’s talk thread. The gold standard for machine embroidery is 40wt polyester. Why? It’s strong, colorfast, and resists breakage even at high speeds. As highlighted in both industry research and YouTube tutorials, 40wt polyester thread delivers vibrant, glossy results that hold up to repeated washing. Whether you’re a beginner or a seasoned pro, stocking up on a variety pack ensures you’re ready for any project.
5.2 Revolutionizing Hooping: Magnetic Solutions for Garments
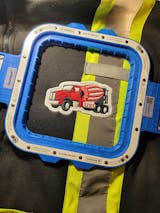
If you’ve ever fumbled with traditional hoops—struggling with screw adjustments, uneven tension, or dreaded hoop burn—magnetic embroidery hoops are about to become your new best friend. Brands like Sewtalent and hoopmaster hooping station have redefined garment hooping with their innovative magnetic systems.
Why go magnetic?
- Speed: Magnetic hoops can cut hooping time by up to 90%, letting you secure fabric in seconds instead of minutes.
- Even Tension: The powerful magnets automatically adapt to various fabric thicknesses, ensuring your material stays flat and secure throughout the embroidery process.
- Durability: Unlike plastic hoops that may warp or crack, magnetic hoops are built to last, maintaining their clamping strength over countless uses.
- Fabric Protection: The even pressure of magnets helps prevent hoop marks and fabric distortion—a must for high-quality results.
Compatibility is broad, but always check that your hoop matches your machine and project needs. For garment embroidery, magnetic hoops are a game-changer, making setup faster, easier, and more consistent—whether you’re running a business or crafting at home.
5.3 Needles, Bobbins & Workflow Tools
Don’t overlook the small stuff—these details make all the difference:
- Needles: The 75/11 embroidery needle is a workhorse, suitable for most projects and 40wt polyester thread. Keep extras on hand, as needles can dull or break, especially when learning.
- Pre-Wound Bobbins: Save time and reduce interruptions with pre-wound bobbins. Just be sure to choose the correct size for your machine—compatibility matters!
- Essential Tools: Invest in sharp fabric scissors for cutting materials and stabilizers, curved-tip embroidery scissors for trimming threads close to your work, and tweezers for precise thread handling. As one YouTube creator puts it, “We are now surgeons of embroidery, so we want the best tools for the job.”
Other workflow boosters include thread stands for smooth feeding, ergonomic embroidery feet for better visibility, and built-in machine tutorials to guide you through setup and troubleshooting.
Pro tip: Always test your setup on scrap fabric before starting your main project. This simple habit can save you hours of frustration and ensure flawless results every time.
6. Sourcing & Customizing Designs: From Built-ins to Digitizing
Your embroidery machine is a blank canvas—now it’s time to fill it with art. Whether you crave instant gratification or total creative control, today’s design options are more diverse and accessible than ever.
6.1 Built-in Libraries vs. Marketplaces
Most modern machines come loaded with a library of built-in designs—think of these as your starter palette. Brother and Baby Lock models, for example, offer anywhere from 50 to over 500 patterns, covering everything from florals to monograms. These onboard designs are perfect for quick projects and beginners, offering instant access without the need for extra software or downloads.
But what if you want more variety or something truly unique? Enter third-party design marketplaces:
- EmbroideryLibrary.com: Thousands of artist-crafted designs, meticulously tested and available in all major machine formats.
- AnnTheGran: Home to one of the largest collections of free embroidery designs, organized by hoop size and file type for easy compatibility.
- EmbroideryDesigns.com: Features a robust membership program with free design packs, fonts, and access to a vast library—plus handy format conversion credits for tricky file types.
Marketplaces have shifted toward digital downloads and subscription models, making it easier than ever to expand your design collection on demand. Just remember to double-check file format compatibility with your specific machine (PES for Brother, JEF for Janome, etc.).
6.2 App Ecosystems: Artspira & Design Doodler Explored
Ready to take your creativity mobile? App-based design tools are transforming the embroidery landscape, making customization and digitizing accessible to everyone.
- Artspira (Brother): This free-to-download app connects wirelessly to compatible Brother machines, offering thousands of embroidery and cutting patterns—including Disney-inspired designs. The AR (augmented reality) feature lets you preview your creation on your actual fabric before stitching, and cloud storage keeps your favorites handy. Upgrading to Artspira+ unlocks even more designs, premium editing functions, and expanded storage.
- Design Doodler: Perfect for hobbyists and creative explorers, Design Doodler allows you to sketch, trace, or doodle your own embroidery designs on an iPad or desktop. Its intuitive interface converts your artwork into machine-friendly stitches, making custom design creation fun and approachable—no professional digitizing skills required.
Both apps cater to different needs: Artspira is ideal for those who want quick access to a vast design library and basic customization, while Design Doodler empowers you to create original, hand-drawn motifs with ease.
Pro tip: For advanced editing or combining multiple design elements, you may still want to explore best digitizing software for embroidery.
Curious about the next step? In the following sections, we’ll wrap up with expert recommendations and answer your most pressing embroidery machine questions. Ready to unlock your machine’s full potential? Let’s keep stitching!
7. Conclusion: Matching Machine to Mastery
Choosing the right computerized sewing and embroidery machine is more than a technical decision—it’s about aligning your creative ambitions with the right tools for the journey ahead. Whether you’re a hobbyist eager to personalize gifts or a professional aiming to scale production, today’s market offers a machine for every level of mastery.
For versatile hobbyists and growing small businesses, the Brother SE2000 stands out with its intuitive controls, generous 5x7 embroidery area, and seamless wireless connectivity. It bridges the gap between beginner-friendly usability and advanced features, letting you experiment and expand your skills without feeling boxed in. For high-volume production, the Janome MB-7 commercial embroidery machine for sale is a powerhouse.
Efficiency doesn’t stop at the machine. For garment embroidery, magnetic hoops like those from Sewtalent can revolutionize your workflow—saving up to 90% of hooping time, ensuring even tension, and protecting your fabrics from hoop burn. These accessories are more than time-savers; they’re game-changers for anyone serious about quality and productivity.
The key to future-proofing your embroidery setup lies in choosing machines and accessories with expandable features—think larger hoop compatibility, wireless design transfer, and robust editing tools. As your confidence grows, your equipment should be able to grow with you.
In short: match your machine to your current needs, but don’t be afraid to invest in tools that inspire you to reach the next level. The right combination of technology, accessories, and creative drive will keep your embroidery journey both rewarding and limitless.
8. FAQ: Your Top Machine Embroidery Questions Answered
8.1 Q: What’s a realistic starter budget for a computerized sewing and embroidery machine?
A: For beginners, quality entry-level combo machines like the Brother SE600 or PE535 typically range from $400 to $600. These models offer essential features—built-in designs, color touchscreens, and USB connectivity—suitable for learning and small projects without a hefty investment.
8.2 Q: Are combo machines (sewing + embroidery) less capable than embroidery-only models?
A: Combo machines provide excellent flexibility, especially for those with limited space or budget. While they allow you to both sew and embroider, they usually have a single needle and a smaller embroidery field compared to dedicated embroidery machines. For high-volume or large-scale embroidery, a dedicated machine offers greater efficiency and larger design capacity, but for most hobbyists, a combo machine is more than sufficient.
8.3 Q: How do I know if my embroidery files are compatible with my machine?
A: Each brand has preferred file formats—PES for Brother, JEF for Janome, and so on. Always check your machine’s manual for supported formats. Most machines with USB or Wi-Fi connectivity can import standard file types, and many online marketplaces allow you to filter designs by format to ensure compatibility.
8.4 Q: What maintenance is required to keep my machine running smoothly?
A: Regular maintenance includes cleaning lint from the bobbin area, changing needles frequently, and using the correct stabilizers and threads. Follow your machine’s manual for oiling and part replacement schedules. Built-in tutorials and online videos can guide you through basic upkeep, ensuring your machine stays in top shape for years to come.
Still have questions? Drop them in the comments or explore our in-depth guides for more expert tips. Happy stitching!


