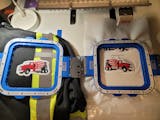
1. Introduction to Embroidery Hoop Display
Displaying embroidery hoops is more than a final step—it’s a celebration of your work. Whether you run a studio, stitch for fun, or just started, how you present your hoop art can lift it from "just finished" to "truly admired." Expect practical finishing, inventive placements, and clear tutorials to help your pieces shine.
From quick pro finishes to gallery walls, you’ll turn stitched creations into striking decor. If you favor flexible setups, magnetic embroidery hoops make seasonal swaps fast without compromising tension.
Table of Contents
- 1. Introduction to Embroidery Hoop Display
- 2. Essential Finishing Techniques for Professional Display
- 3. Creative Display Methods and Location Strategies
- 4. Practical Implementation Guides and Tutorials
- 5. Materials and Tools for Successful Display
- 6. Machine Embroidery Display Solutions
- 7. Long-Term Preservation Techniques
- 8. Conclusion: Creating Your Display Masterpiece
- 9. Frequently Asked Questions
2. Essential Finishing Techniques for Professional Display
A clean, polished back distinguishes casual projects from gallery-worthy pieces. These steps keep edges crisp, fabric taut, and the overall look professional.
2.1 Preparing and Trimming Your Hoop Fabric
Press your fabric and center it in the hoop before trimming. Leave a ½–¾ inch margin; for larger hoops or thicker materials, a 1–2 inch margin adds security. Sharp scissors create smooth cuts, while pinking shears help reduce fraying. Weave thread tails into stitches or add a small dab of fabric glue to tame loose ends. Even if you use magnetic hoops for embroidery machines, these trim margins and tension tips still apply.
2.2 Securing Methods: Running Stitch, Cardboard & Felt Backing
Choose one of three proven ways to close the back:
-
Running Stitch Method - Trim to a ½–¾ inch margin. - With embroidery floss (no knot), sew a running stitch around the perimeter, about ¼ inch apart and ½ inch from the edge. - Gently pull to gather, then secure with a few stitches or a knot. Pros: Adjustable, reversible, beginner-friendly.
-
Cardboard Backing - Trace the inner hoop on sturdy cardboard; cut slightly inside the line. - Fit the disc inside the back, aligning with gathered fabric. - Secure with glue or a few stitches. Pros: Adds structure, resists sagging, budget-friendly.
-
Felt Attachment - Cut a stiff felt circle slightly larger than the inner hoop. - Gather fabric with a running stitch; sew or glue the felt over the back. - Finish with a running, whip, or decorative blanket stitch. Pros: Conceals threads, looks polished, avoids bulk.
| Material | Method | Benefits |
|---|---|---|
| Felt | Stitch or glue to back | Soft, non-fraying, color-matched |
| Cardboard | Glue/stitch to fabric | Sturdy, cost-effective |
| Fabric | Use excess/matching | Reversible, seamless look |
2.3 Adding Decorative Elements for Enhanced Appeal
Elevate function with flair: - Ribbons or Trim: Wrap the outer hoop or tie a bow at the screw; add a ribbon for hanging. - Embellishments: Blanket stitch around felt, or add pom-pom trim for playful texture. - Hanging Hardware: Use the metal clasp as a hanger, or add a ball chain, ribbon, or decorative hook.
Group hoops by theme or color for a statement wall or a charming vignette.
3. Creative Display Methods and Location Strategies
Put your finished hoops in the spotlight with wall and tabletop ideas that suit any space.
3.1 Wall Display Techniques: Gallery Arrangements to Hanging Systems
- Gallery Walls: Mix sizes (like 7″ and 8″) and shapes in patterns or grids; integrate with framed art to add texture.
- Removable Hooks: Adhesive hooks make damage-free hanging and easy rearrangement—renter friendly.
- String or Ribbon Suspension: Thread ribbon or twine through the clasp for a rustic or boho vibe.
- Thematic Groupings: Cluster seasonal motifs or color palettes for a cohesive story.
Pro tip: Step back—the art outshines the hardware. Wooden/bamboo hoops are among the best for framing.
3.2 Shelf and Tabletop Displays: Easels, Stands and Vignettes
- Mini Easels and Plate Stands: Prop 3″–8″ hoops for a studio look; easy to rotate designs.
- Layered Vignettes: Lean hoops on shelves with books, candles, or plants for depth.
- Trays and Props: Arrange on trays or against vintage books for a collected feel.
Seasonal rotation is simple—store finished hoops in labeled containers and swap as inspiration strikes.
3.3 Comparative Analysis: Wall vs. Shelf Display Pros and Cons
| Factor | Wall Hanging | Shelf Propping |
|---|---|---|
| Ease of Setup | Moderate (needs hardware/hooks) | High (no tools needed) |
| Adjustability | Limited (fixed placement) | High (easy to rearrange) |
| Aesthetic Flexibility | Polished, curated look | Casual, eclectic vibe |
| Preservation | High (protected from dust/moisture) | Moderate (exposed to environment) |
| Cost | Moderate (hooks/frames) | Low (uses existing shelves/stands) |
Key Considerations: - Space Constraints: Walls maximize vertical space; shelves excel in open areas. - Design Complexity: Shadow boxes or hoop-as-frame methods suit textured work; an embroidery frame helps if you want a more traditional look. - Trend Alignment: Flexible setups—think magnetic hoops for easy swaps—are on the rise.
Mix and match to create a dynamic, ever-evolving showcase.
4. Practical Implementation Guides and Tutorials
Turn finished stitching into display-ready art with approachable, repeatable methods.
4.1 Frame-Based Display Methods Step-by-Step
Framing in the hoop delivers a taut, ready-to-hang finish while protecting stitches.
Step-by-Step Guide: 1. Layering Fabric and Felt - Cut a square of white cotton (for example, 10.5" x 10.5") sized to your hoop. - Place this cotton behind the embroidery to brighten and support the design. - Stretch both layers into the hoop, pulling diagonally and side-to-side to smooth wrinkles.
-
Adding Felt Backing - Trace the inside of the hoop on thick white felt and cut three circles to fit the back. - On the reverse, gather excess fabric with a running or whip stitch about ½" from the edge. - Insert felt circles and secure with stitching or glue.
-
Finishing Touches - Sew a final felt circle over the gathers to conceal knots and threads. - Choose felt colors that complement your design.
Materials Needed: White cotton, thick white felt, embroidery floss or strong thread, scissors, needle.
Pro Tips: Maintain tension so the piece can be reframed or washed later; gather evenly for flat results; wrap the outer hoop in ribbon or fabric for added charm. If you prefer tool-free closures, a magnetic embroidery hoop can hold layered fabrics evenly.
4.2 Mounting Board Techniques for Professional Results
For a sleek, gallery-style finish—especially for rectangular pieces—use adhesive or reversible mounting boards.
Adhesive Mounting Board Method: 1. Prepare: Cut fabric with a 1" margin and iron flat. 2. Attach: Align an acid-free adhesive board; press from center outward to smooth. 3. Finish: Fold fabric to the back and glue; cover with a felt piece for a tidy reverse.
Non-Adhesive (Reversible) Mounting: 1. Use photo corners on a backing board to hold the fabric. 2. Or use see-thru Mylar strips to secure without adhesives.
Materials Needed: Adhesive or acid-free foam core, felt, hot/fabric glue, photo corners or Mylar strips.
Considerations: Adhesive boards are permanent and crisp; reversible methods are conservation-friendly and best for smaller works. Always use acid-free materials and ensure shadowbox mounts fit without compressing stitches.
5. Materials and Tools for Successful Display
The right toolkit keeps fabric taut, edges neat, and stitches protected.
5.1 Essential Display Toolkit: Hoops, Backing and Adhesives
Hoops and Frames: - Screwless hardwood hoops: Minimal, hardware-free look; may need extra fabric layers or cardboard for tension. - Wooden/bamboo hoops: Classic for framing; strong grip and attractive finish. - Plastic hoops: Lightweight and budget-friendly; better for stitching than display. - Spring tension hoops: Adjustable but less precise tension than wooden options.
| Hoop Type | Material | Best Use Case |
|---|---|---|
| Screwless | Hardwood | Minimalist, clean display |
| Traditional | Wood/Bamboo | Framing, tension control |
| Plastic | Plastic | Stitching (not display) |
Backing Materials: Felt for softness and clean edges; cardboard or acid-free mounting board for structure; muslin or tape to boost grip in screwless hoops.
Adhesives and Stabilizers: Fabric glue, spray adhesives for blocking, and starch for crispness.
Display Accessories: Mini easels, plate stands, ribbons, D-rings, or ball chains. Blocking tools like cork boards and steam help set tension.
Key Considerations: Wooden hoops hold tension best; linen and cotton pair well with hardwood hoops; repurpose household materials for savings.
5.2 Specialized Hoops for Enhanced Display Durability
For garment embroidery enthusiasts and professionals, Sewtalent magnetic machine embroidery hoops deliver industrial-grade durability, superior tension control across different fabric thicknesses, quick operation without screws, broad size and machine compatibility, and strong long-term value. These hoops are designed for garment embroidery hooping and are not suitable for cap or hat embroidery. For a related setup option, consider robust magnetic embroidery frames that complement durable display workflows.
6. Machine Embroidery Display Solutions
Larger formats, heavier fabrics, and scale demand sturdy hooping, smart stabilization, and resilient display choices.
6.1 Industrial-Scale Display Considerations
Hoop Selection: - Circular commercial hoops distribute tension evenly on large designs. - Magnetic hoops reduce hoop burn and excel on thick fabrics like denim or leather. - Scroll frames keep panoramic projects taut for continuous stitching.
| Hoop Type | Size Range | Best For |
|---|---|---|
| Circular Commercial | 8"–12" diameter | Large-scale, uniform tension |
| Magnetic | Varies | Thick fabrics, quick adjustments |
| Scroll Frame | Custom | Continuous borders, panoramic |
Fabric Prep and Stabilization: Pre-wash and iron; finish edges to prevent fraying; use stabilizers (interfacing, felt, or tear-away) to avoid puckers and distortion.
Hooping Technique: Layer stabilizer under fabric, center the design, and seat the outer hoop in one smooth motion. Aim for drum-tight tension; for extra-large frames, T-pins or cotton twill tape improve grip.
Display and Preservation: Use wooden stands up to 10", foam core, or picture frames; trim excess, secure with stitches, and choose acid-free, archival materials; avoid direct sun.
Key Considerations: Match hoop size to complexity; frequently check tension to prevent misregistration.
6.2 Durable Display Solutions for Professional Settings
When embroidery represents your brand, tools must keep pace. Sewtalent magnetic hoops offer long-life PPSU construction, strong magnetic hold, fast hooping, wide compatibility, and compelling cost-effectiveness—engineered for garment embroidery (not for cap/hat embroidery). If you need flexible, repeatable setups across teams, magnetic hoops for embroidery streamline workflow while maintaining even tension.
| Feature | Sewtalent Magnetic Hoop | Ordinary Plastic Hoop |
|---|---|---|
| Durability | 40x longer lifespan | Prone to cracking, frequent replacement |
| Magnetic Strength | N50-grade, more magnets, superior hold | Lower strength, less secure |
| Operation Speed | Quick, effortless hooping | Manual, time-consuming |
| Cost-Effectiveness | High ROI, fewer replacements | Lower upfront, higher long-term cost |
7. Long-Term Preservation Techniques
Protect color, fiber strength, and structure so your hoop art stays vibrant for years.
7.1 UV Protection and Light Management Strategies
Advanced Coatings: Cotton fabrics treated with silver nanoparticles (AgNPs) plus zinc oxide (ZnO) or graphene oxide (rGO) can reach a UPF of 70 (vs. 7 untreated). Natural alternatives like halloysite nanotubes (HNTs) infused with plant extracts such as molokhia can improve UV protection for linen textiles by 57%.
Home Light Control: Use UV-filtering films or curtains, keep light levels low (around 20 footcandles for general textiles and about 3 for very delicate pieces), and position displays out of direct sun or rotate them seasonally. For special pieces, consider a UV-resistant spray test or a shadowbox with UV-protective glass.
7.2 Dust-Proofing and Environmental Control
Archival Barriers: Mylar or Tyvek sheeting keeps dust and incidental moisture away; mount on acid-free card or polyethylene foam boards.
Storage and Display: Wrap in muslin with minimal folds for long-term storage; choose locking display cases where needed, maintaining about 70°F (±4°F) and 45% RH (±8%).
Monitoring: Keep temperature and humidity stable, watch for pests, and use silica gel or activated charcoal inside cases to steady humidity.
| Method | Effectiveness | Sustainability | Cost |
|---|---|---|---|
| AgNP-ZnO Coatings | UPF 70 (vs. untreated UPF 7) | Moderate | High |
| Halloysite Nanotube Coatings | 57% UV reduction | High (natural extracts) | Medium |
| Tyvek/Mylar Barriers | Full dust/water protection | High (non-toxic) | Low-Medium |
| Secure Display Cases | Prevents theft/damage | Medium (energy use) | High |
8. Conclusion: Creating Your Display Masterpiece
Combine professional finishing, creative placements, and careful preservation to elevate your hoop art and help it endure. Experiment boldly—mix methods, refine materials, and let your style lead the way.
9. Frequently Asked Questions
9.1 Q: How much fabric should I leave around the embroidery hoop when finishing my embroidery?
A: Leave about ½–¾ inch for most projects; use 1–2 inches for larger hoops or thicker materials to prevent slippage and fraying.
9.2 Q: What’s the easiest way to hang an embroidery hoop on the wall?
A: Use the hoop’s metal clasp as a hanger or thread ribbon/string through it and hang on a removable adhesive hook, nail, or pushpin.
9.3 Q: How can I prevent my embroidery from sagging in the hoop over time?
A: Gather and secure the excess fabric with running or whip stitches. Add felt or cardboard backing for structure and avoid high humidity or direct sun.
9.4 Q: What are tips for rotating embroidery displays seasonally?
A: Store hoops in labeled containers and swap designs by season or theme. Easels and shelf vignettes let you refresh without rehanging.
9.5 Q: Should I use felt or cardboard for backing?
A: Felt offers a soft, polished finish and hides threads; cardboard adds sturdy support and is cost-effective—choose based on the look and structure you want.


